In this tutorial, we’ll show you how to deploy a load balancer on your Multiserver Remote Desktop environment.
A little while ago, we launched the load balancer feature for Jotelulu Servers. This provided greater scalability and improved stability, protecting your server infrastructure from potential interruptions due to overloading.
Here at Jotelulu, we have a firm commitment to continuous improvement. So, the time has come for us to proudly announce that the load balancer feature is now available for our Remote Desktop subscribers. This will allow you to distribute the workload efficiently across all of your Remote Desktop servers.
In this simple tutorial, we’ll explain, step by step, how to set up your load balancer and assign it to your Remote Desktop servers.
How to Deploy a Load Balancer on Your Multiserver Remote Desktop Environment
Before you begin
To successfully complete this tutorial, you will need the following:
- To be registered on the Jotelulu platform and have signed in using your username and password.
- To have an active Remote Desktop subscription. If you haven’t set one up yet, see this tutorial for instructions: How to Register a Remote Desktop on Jotelulu.
- To have more than one server deployed on your Remote Desktop environment. If you haven’t done this yet, see this tutorial for instructions: How to Deploy Additional Servers on Your Remote Desktop (Multiserver) Environment.
Deploying a Load Balancer on Remote Desktop
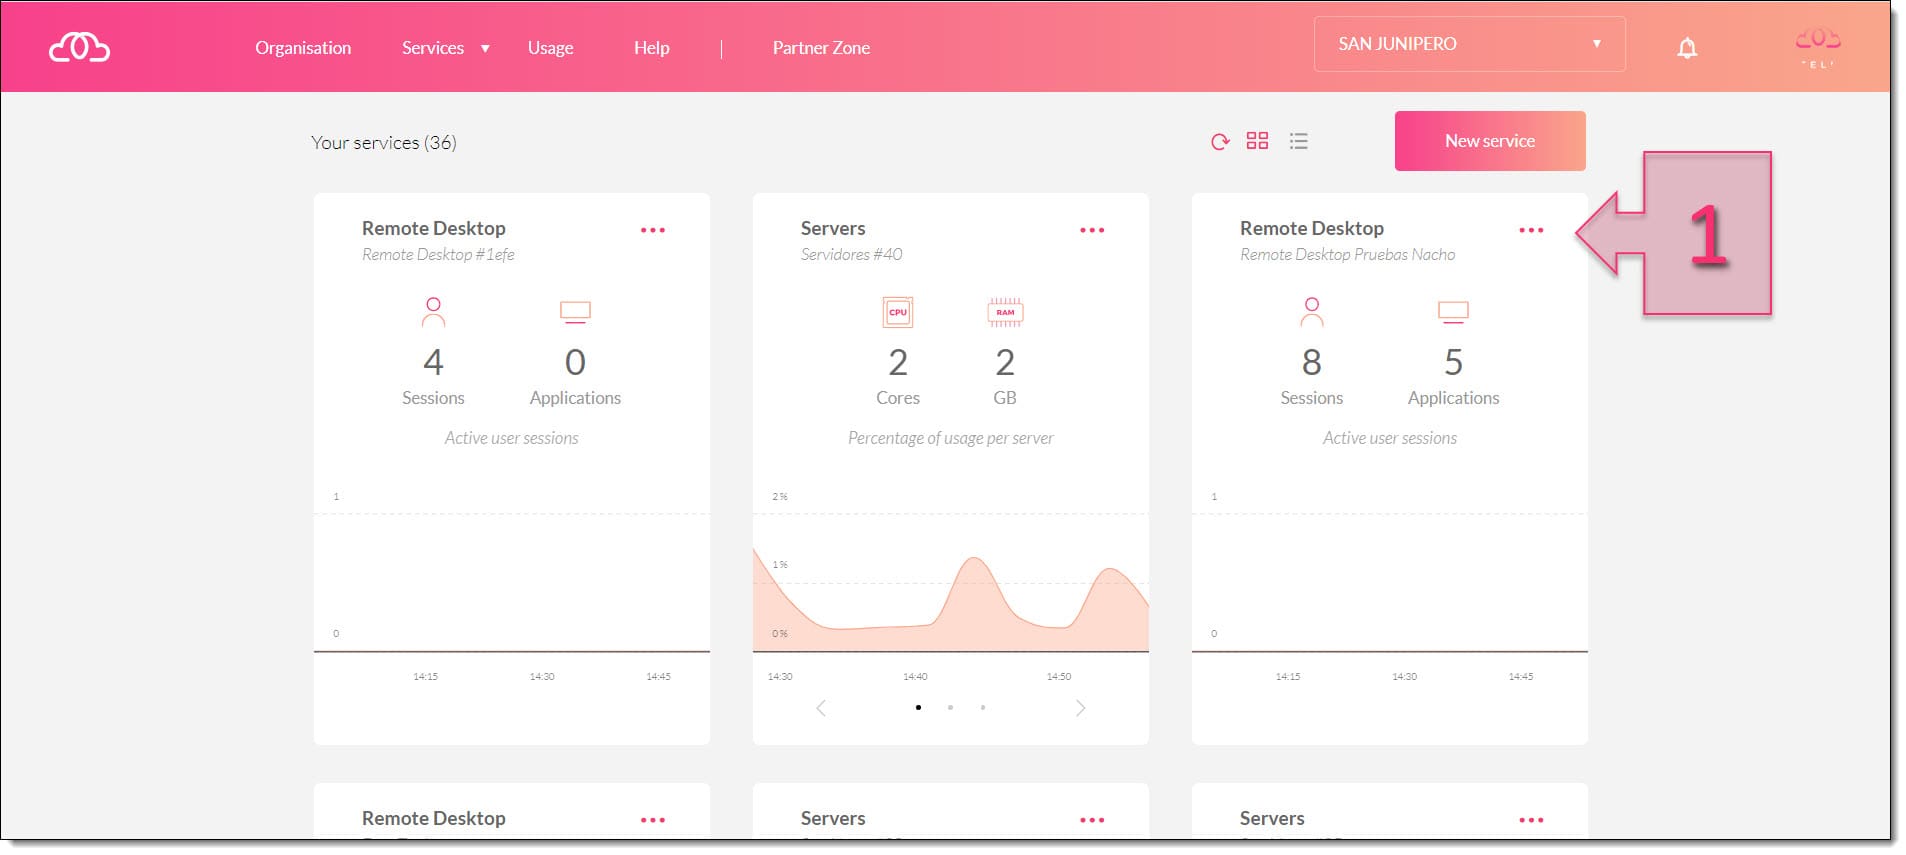
First, sign in to the Jotelulu platform and click on the Remote Desktop card (1).
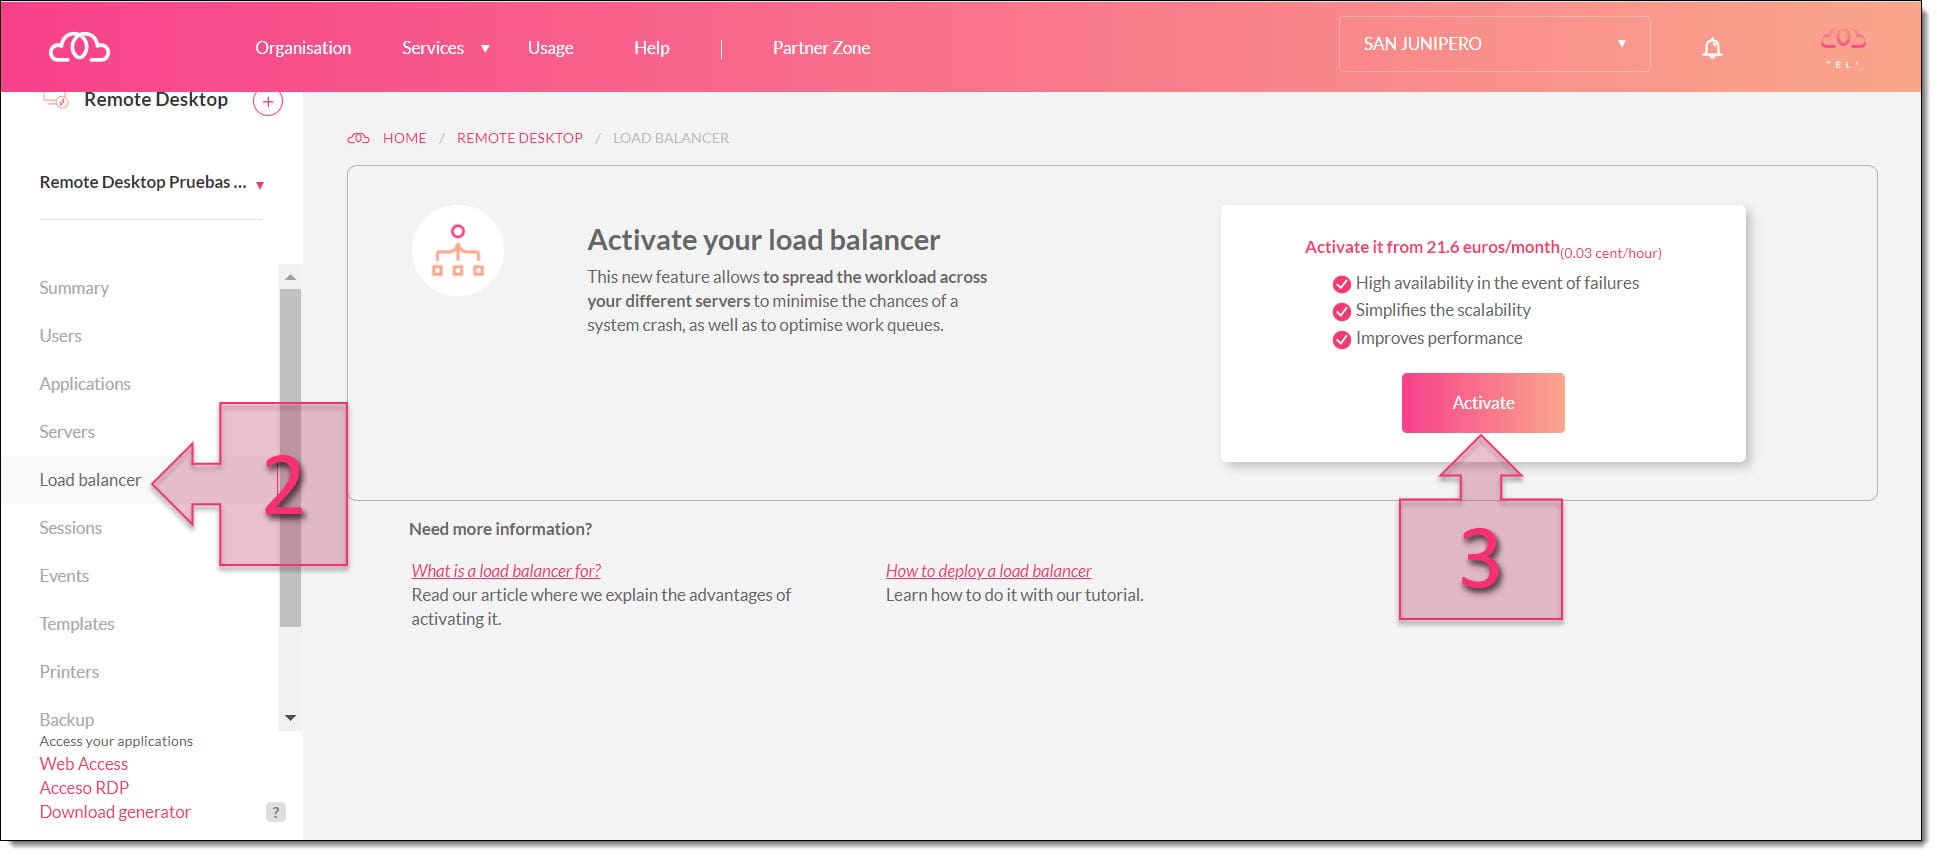
Next, click on Load Balancer (2) in the left-hand menu and click on Activate (3) to begin deploying a new load balancer.
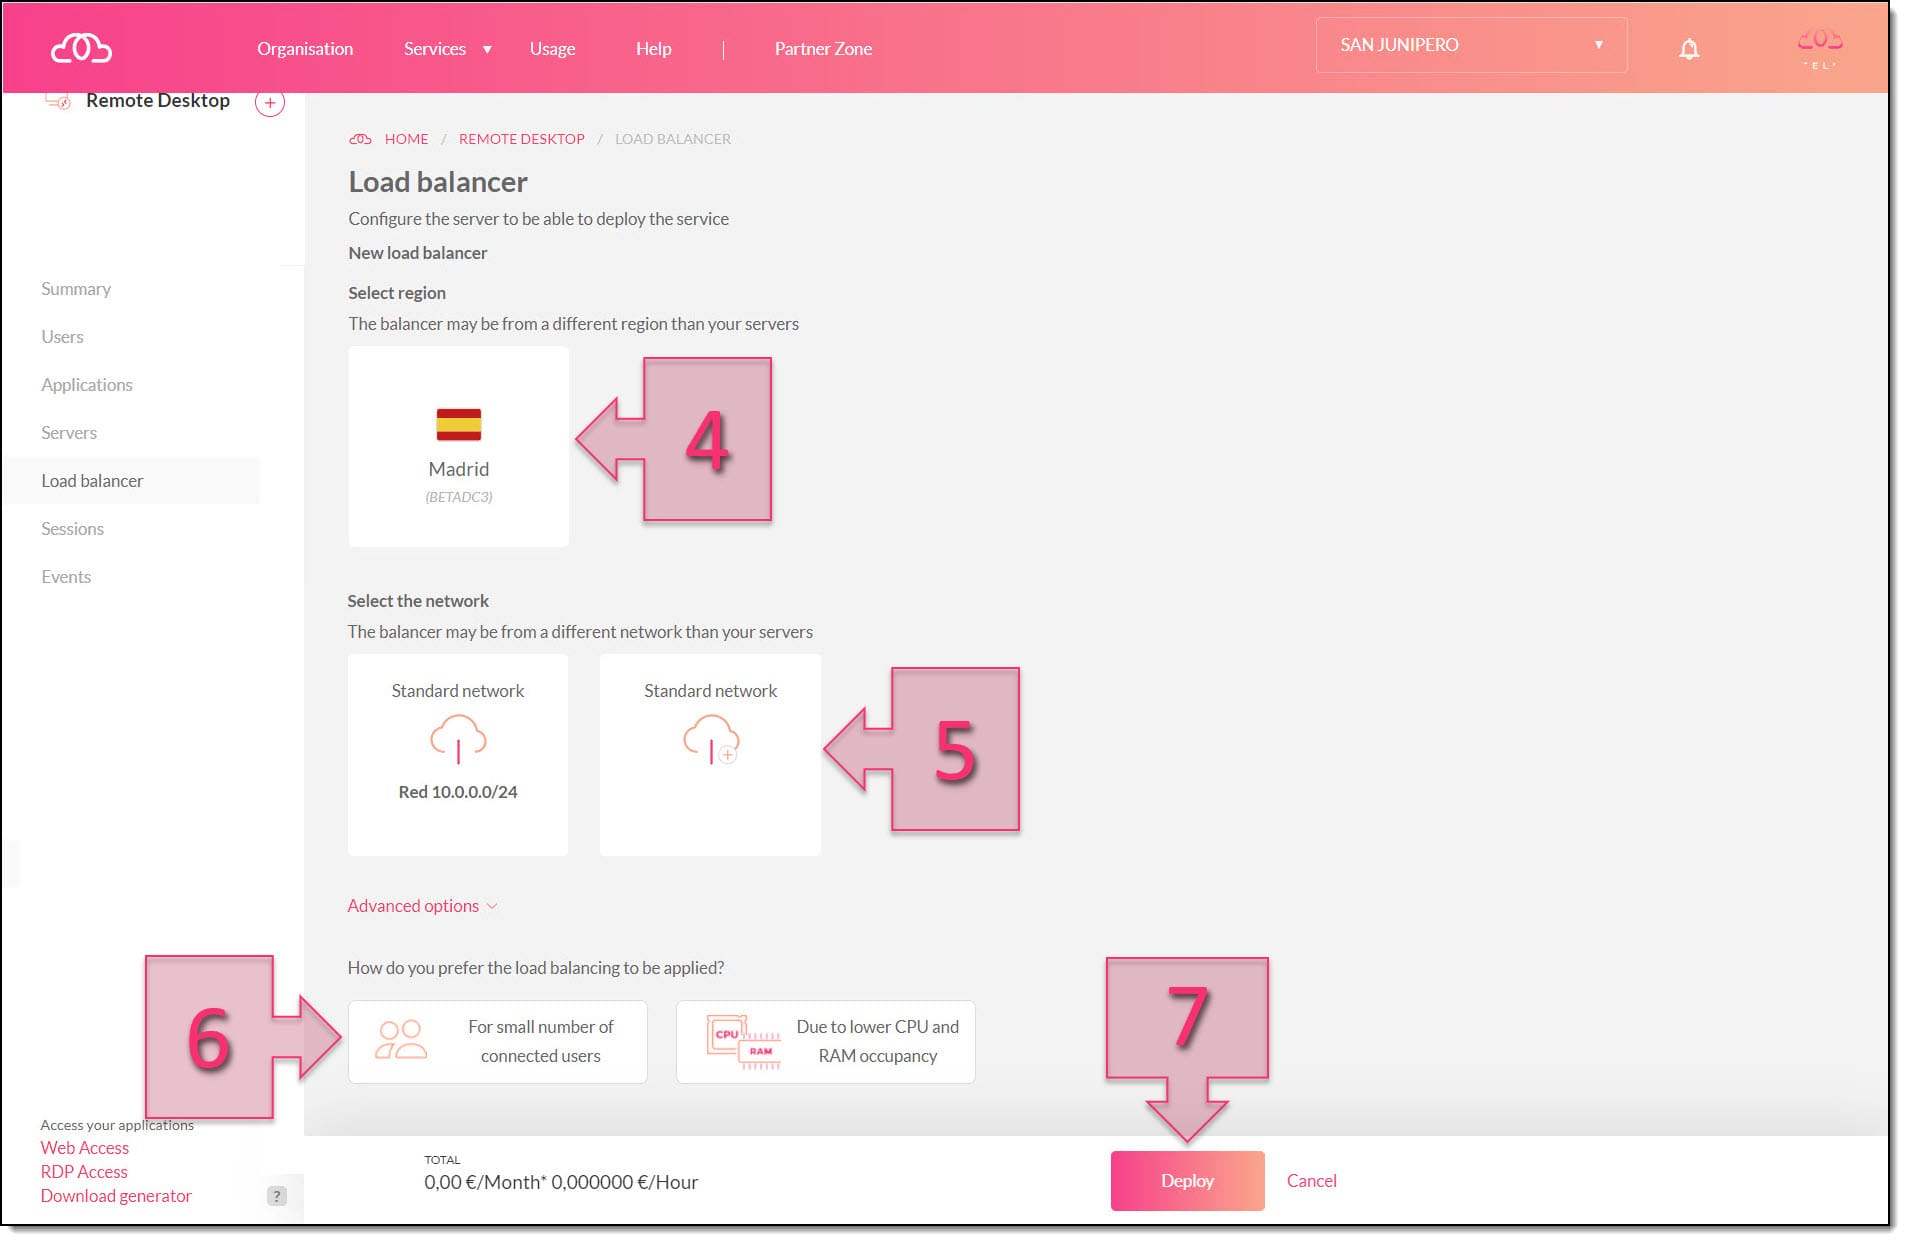
You will now be asked to configure your new load balancer. There are three sections on this page:
- Select Region (4): This is the datacenter that your load balancer will be assigned to. It should be the same as the one that your servers are hosted in.
- Select the network (5): This determines the type of network that your load balancer will operate on.
- Advanced Options (6): Here, you can choose how the load balancer will behave, whether it distributes the load according to the number of users connected or the server load (RAM and CPU)
Once you have made your choices, click on Deploy (7).
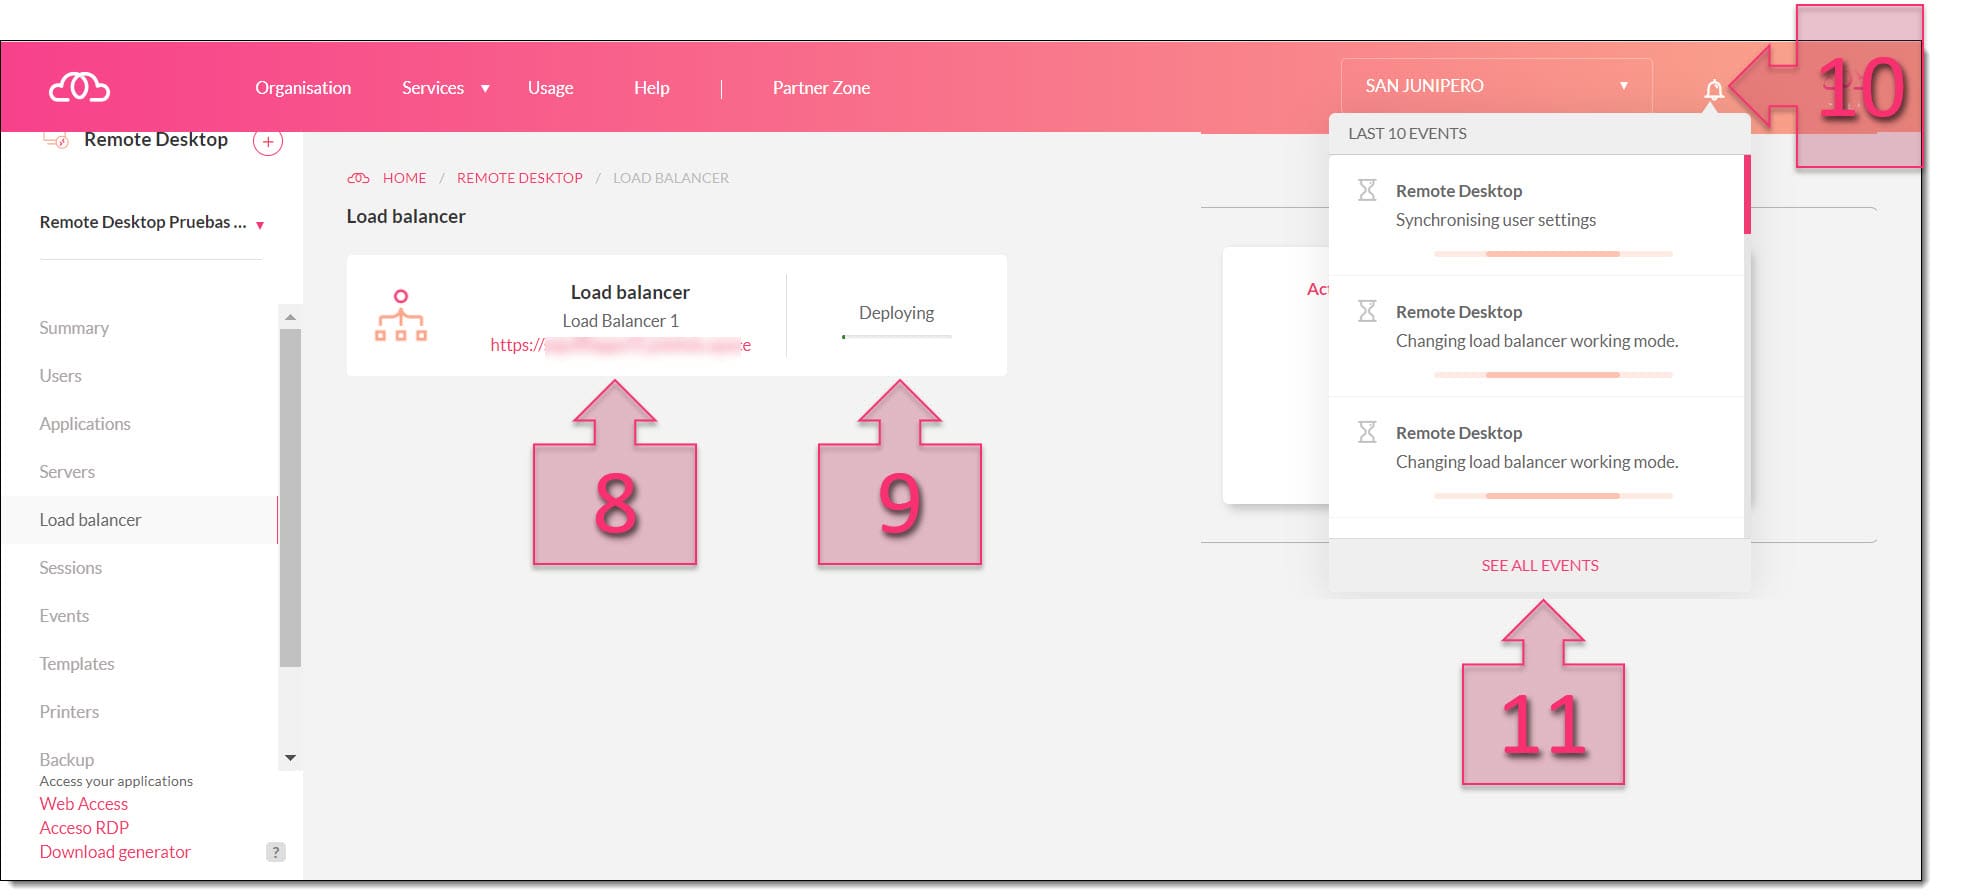
Your new load balancer is now being deployed. On the screen, you will be able to see your new load balancer, its connection chain (8), its deployment status with a progress bar (9) and, if you click on Events (10), you will see the different stages of the deployment process as they are completed (11).
Once the load balancer has been successfully deployed, the screen will change to show three new icons next to your load balancer (12):
- Stop.
- Restart.
- Delete.
NOTE: Please bear in mind that, once deployed, your Remote Desktop load balancer will still be invoiced even if it is stopped.
Assigning the Load Balancer to a Server
At the moment, your load balancer is deployed but not linked to any servers. So, click on Add Server (13) to begin assigning servers.
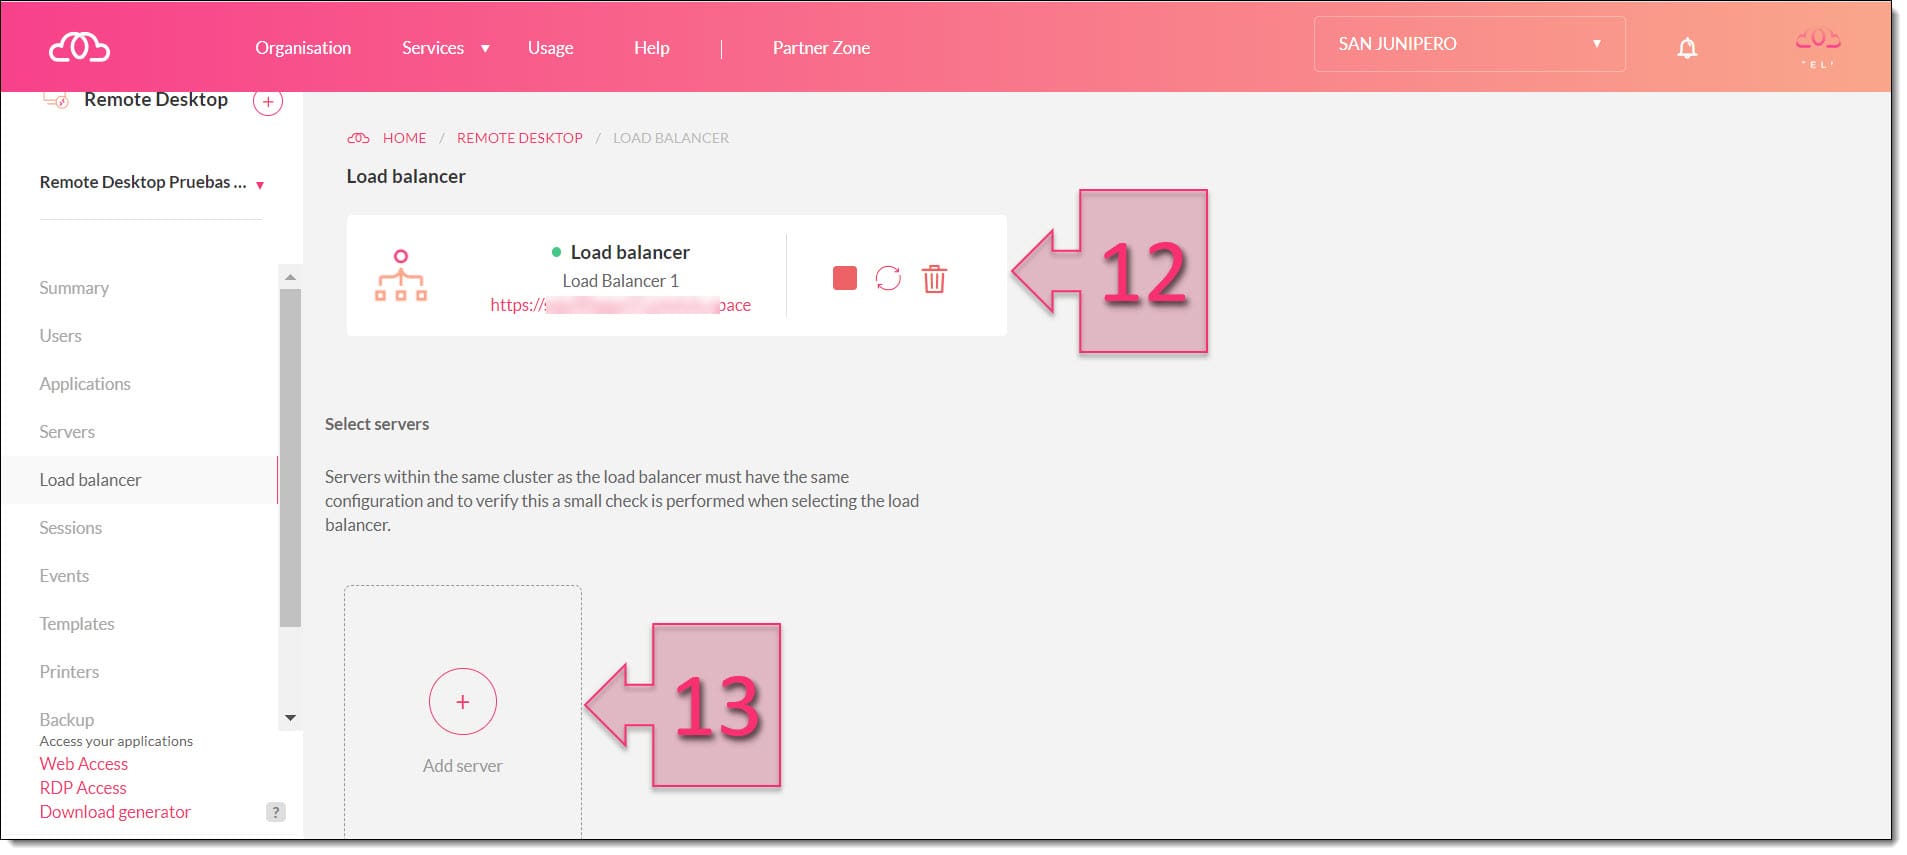
At this point, a pop-up window will appear asking you to select a server to link the load balancer to (14). Once you have selected one, click on Add (15).
NOTE: If you wish to assign more than one server, you will need to repeat this step for each one.
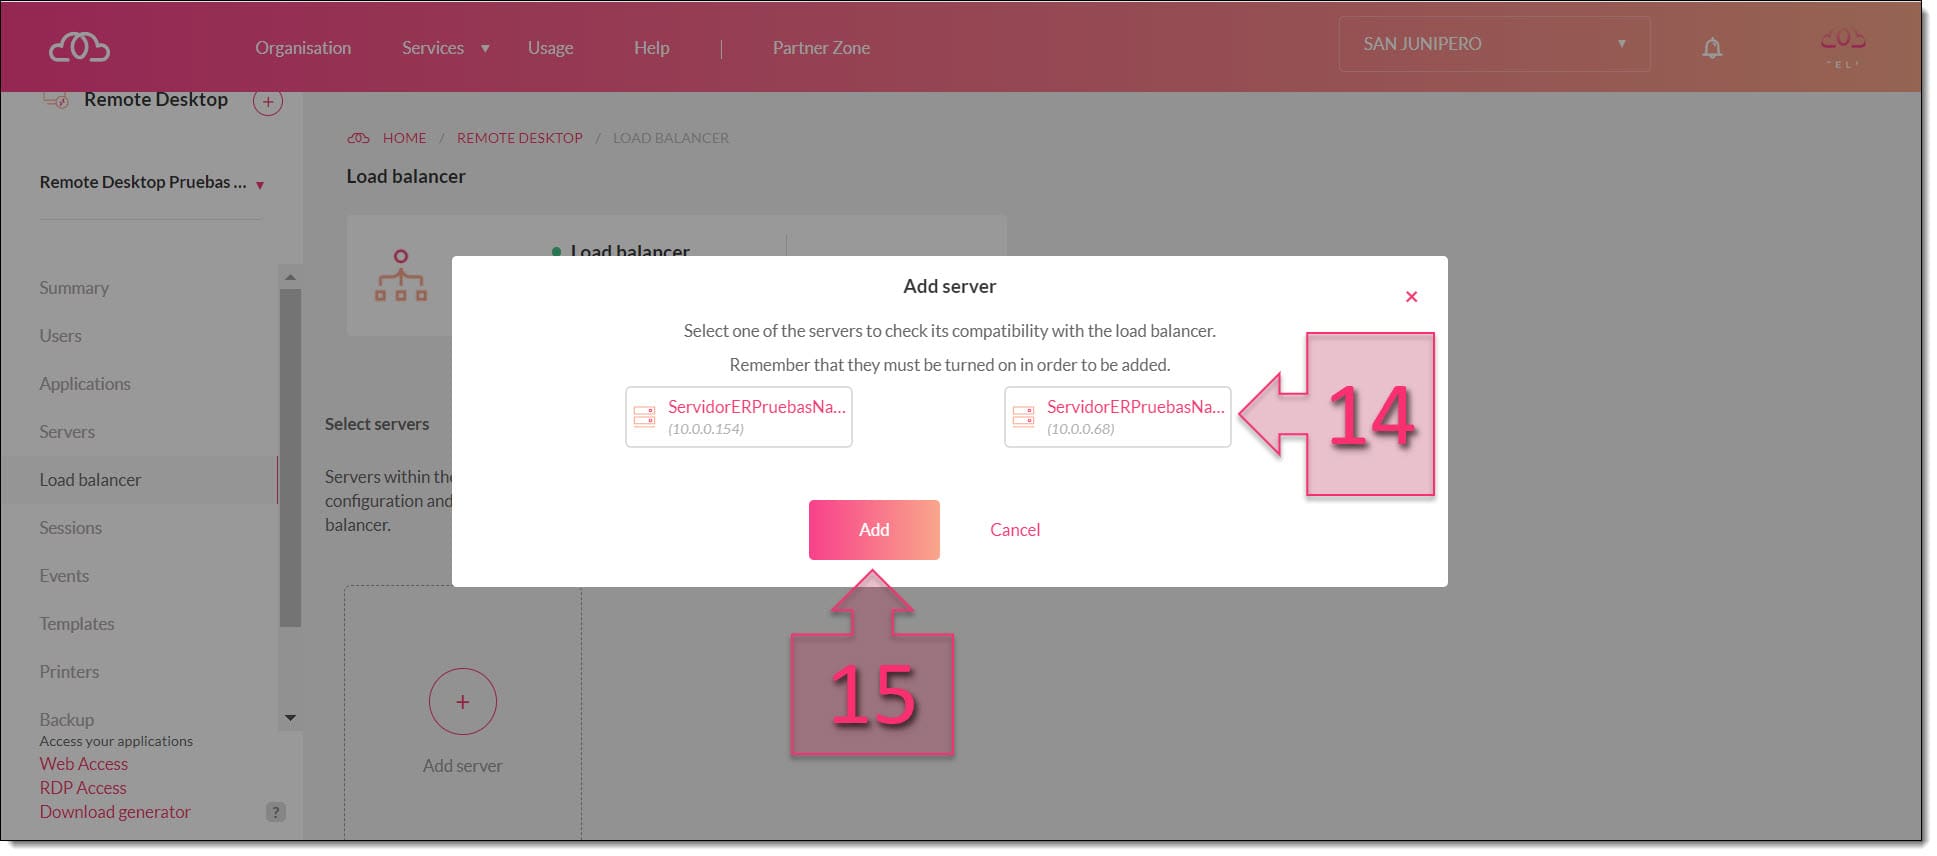
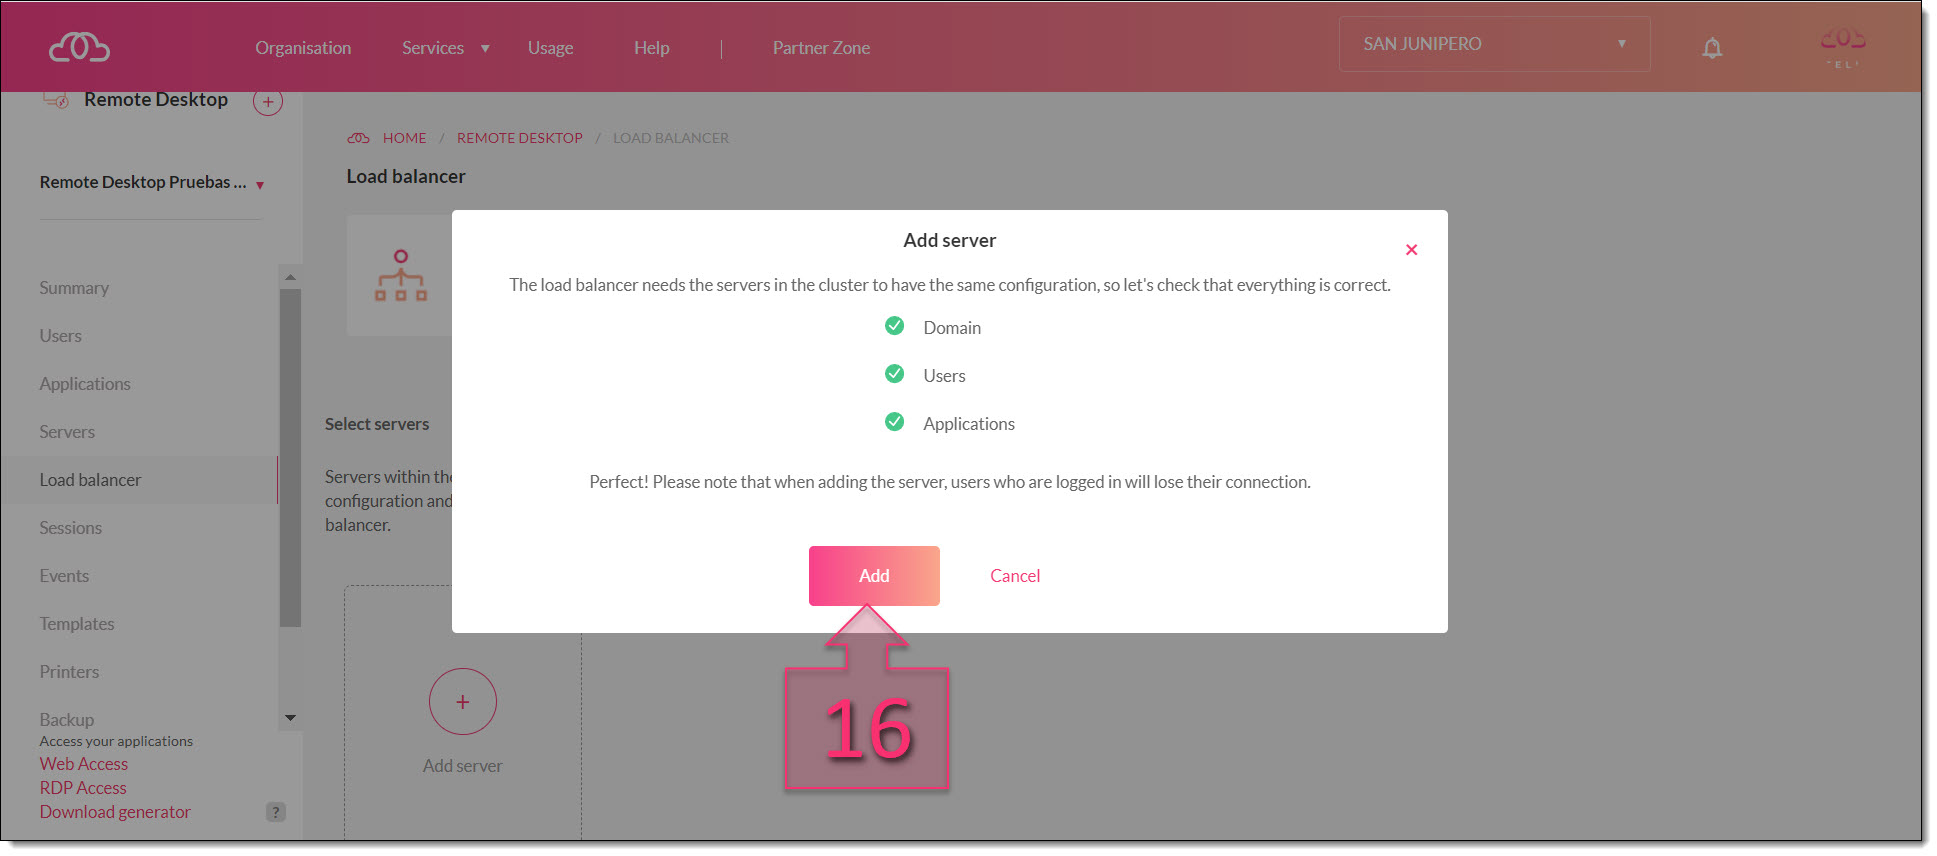
The next pop-up window will show a checklist to validate that the server is ready to be connected to the load balancer. If all the ticks are green, click on Add (16).
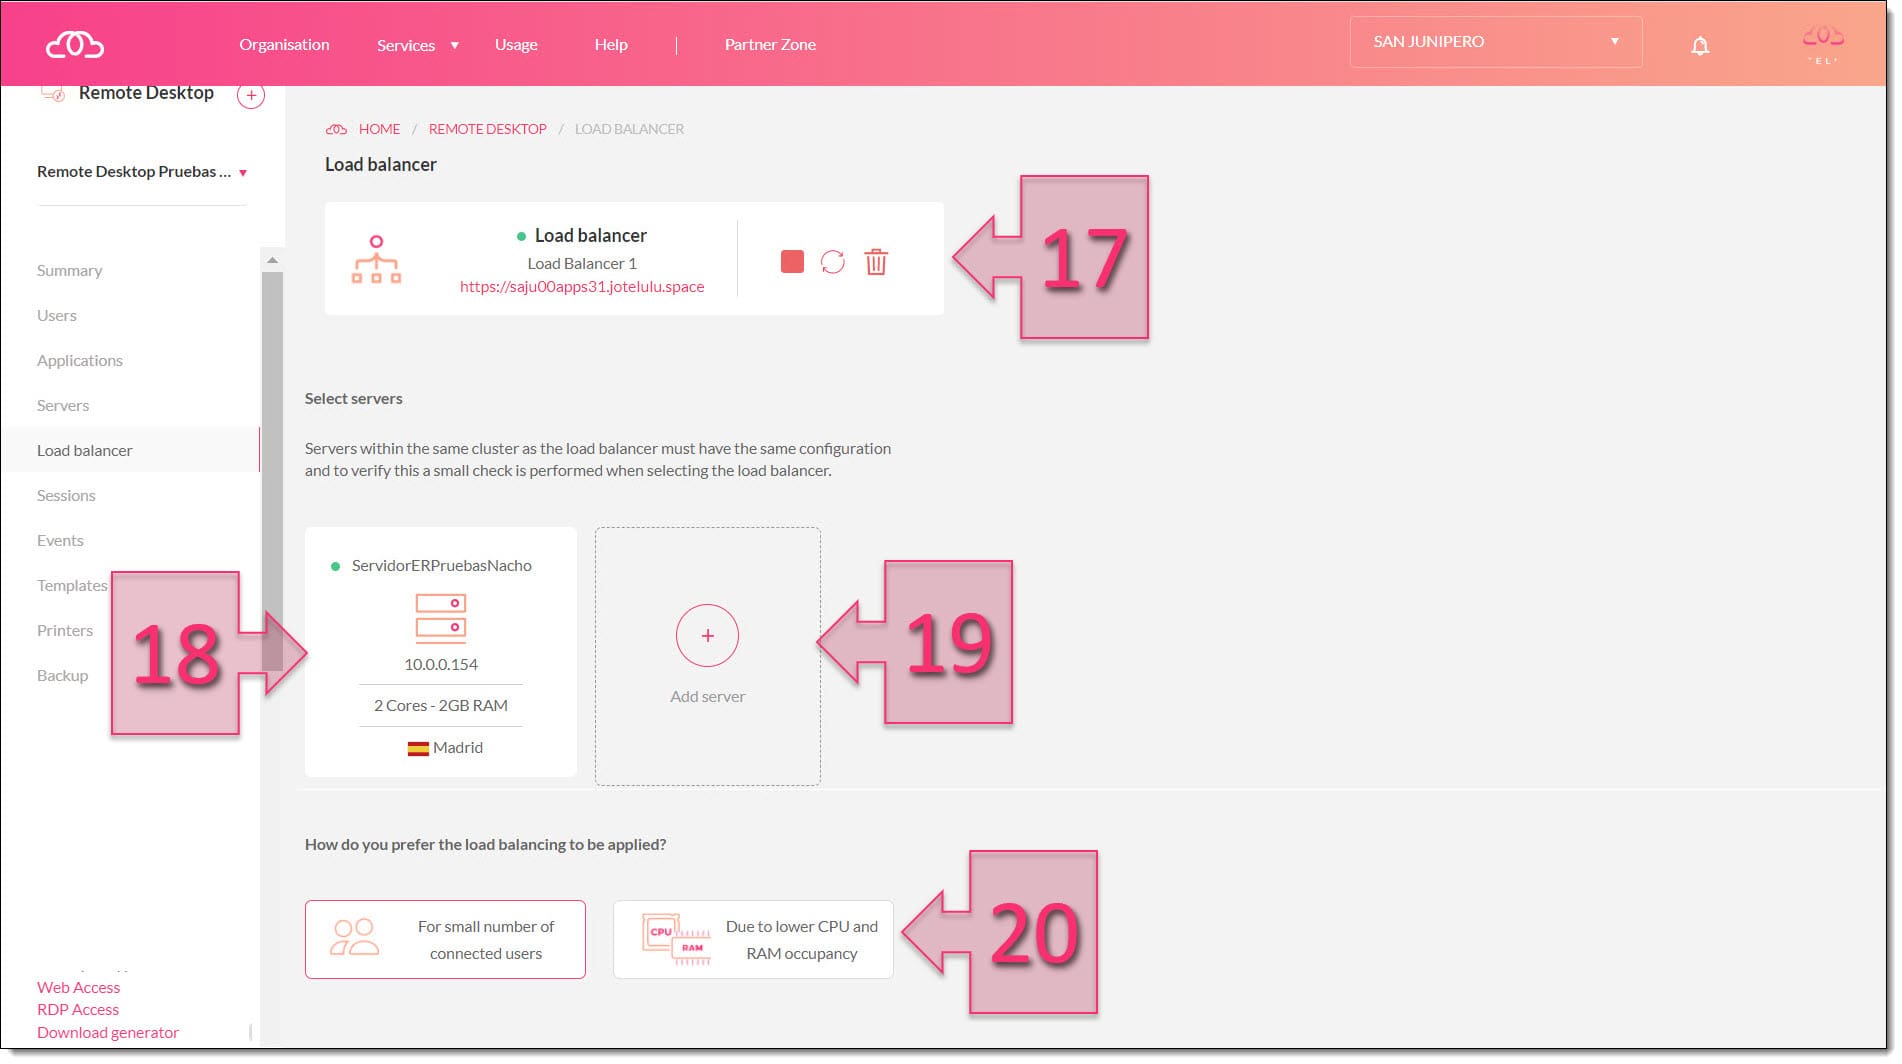
Depending on the load on the platform at that moment in time, it may take a short while to finish creating the connection. Once the process is finished, you will see a new window where you can carry out the following administrative tasks:
- Stop, restart or delete the load balancer (17).
- Check that the server is operational (18).
- Add a new server to the load balancer (19).
- Change how load balancing will be applied (20).
Congratulations! You have now successfully configured your load balancer.
Summary
In this tutorial, we have shown you how to deploy a load balancer on your Multiserver Remote Desktop environment. If you need any help setting up your Remote Desktop environment or deploying servers, check out the following tutorials for full instructions:
- How to Register a Remote Desktop on Jotelulu
- How to Deploy Additional Servers on your Remote Desktop (Multiserver) Environment
As you can see, it’s a very simple process, and the platform will guide you through the process to make sure that there are no mistakes.
We hope that you find this tutorial useful. However, if you do have any problems, don’t hesitate to get in touch with us so that we can help you.
Thanks for choosing Jotelulu!


