In this tutorial, you will learn how to configure a GPO for mapping shared drives and automatically provide users access when they log on.
Providing users with access to shared folders can be really useful. It allows you to keep control over your IT infrastructure while allowing people to share the resources they need.
Shared folders or drives are often used for departments or geographic locations, and these folders can be mapped using a Group Policy or GPO.
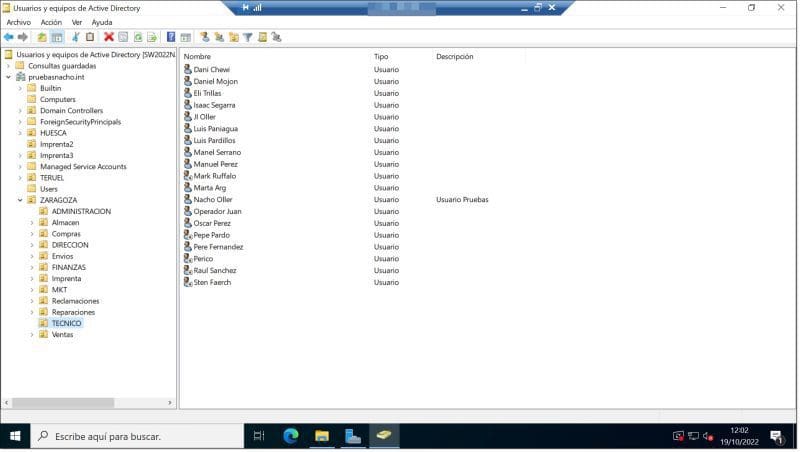
Example of an Organisational Unit (OU) within the AD DS Server structure
In this tutorial, we’re going to take the example of a test environment, Pruebasnacho.in, on our Active Directory, and apply a GPO to the Technical Department OU located in Zaragoza (i.e., “ou=tecnico,ou=zaragoza,dc=pruebasnacho,dc=com”).
How to Configure a GPO for Mapping Shared Drives
Before you begin:
To successfully complete this tutorial and configure a GPO for mapping shared drives, you will need:
- To be registered on the Jotelulu platform and have logged in.
- To have a Windows Server with AD DS Server installed.
- To have an account with administrator permissions.
Create the GPO
First, launch the Group Policy Manager on AD DS Server. To do this, in Server Manager, click on the Tools menu and click on “Group Policy Management” (1).
NOTE: You can also launch this console using the command “GPMC.msc”.
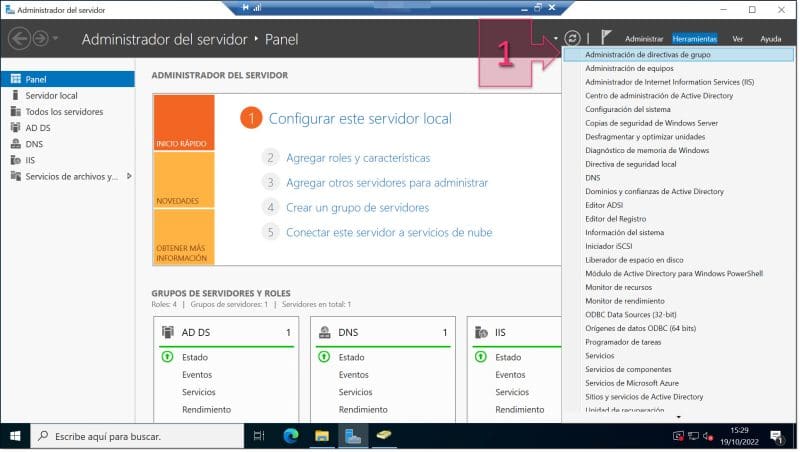
Launch the Group Policy Manager
In the Group Policy Manager window, expand the tree structure until you reach the OU (2) that you want to link the GPO to. Once you have done this, right-click on the OU and select the option “Create a GPO in this domain, and Link it here…” (3).
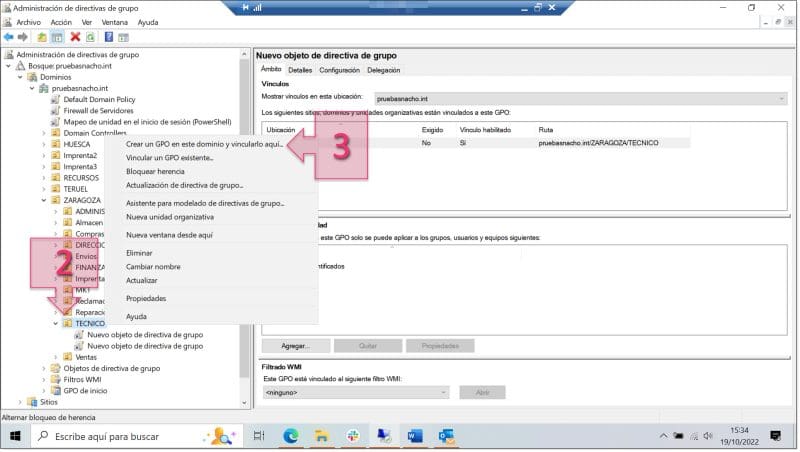
Expand the tree structure until you find the OU and create a new GPO
You will now see a window asking you to give the new GPO a name (4). Here, you should choose something descriptive so that you can easily identify it in the future. For this tutorial, we’ll call it “Technical Department Drive Mapping”.
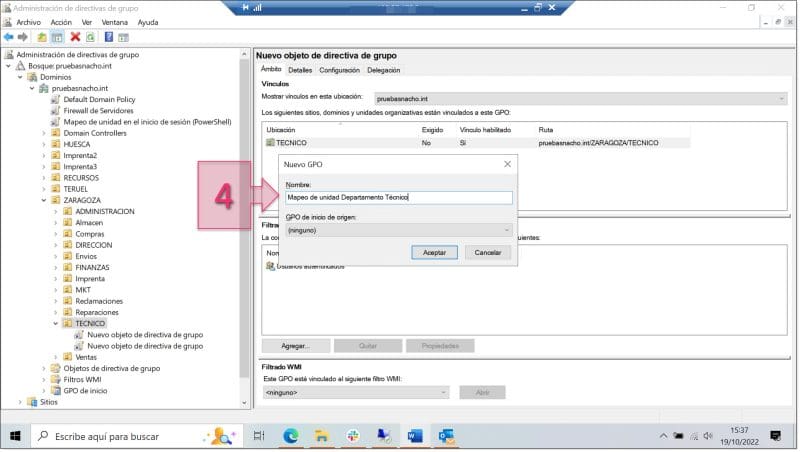
Give the new GPO a name
Next, right-click on the GPO (5) and select “Edit…” (6).
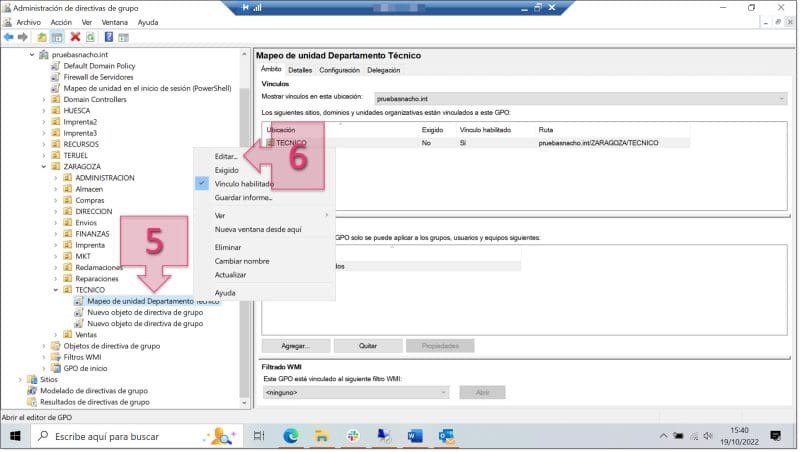
Edit the GPO that you just created
This will open the Group Policy Editor. Here, you will need to go to “User Configuration > Preferences > Windows Settings > Drive Maps” (7). Then, click in the right-hand part of the window and click on “New > Mapped Drive” (8).
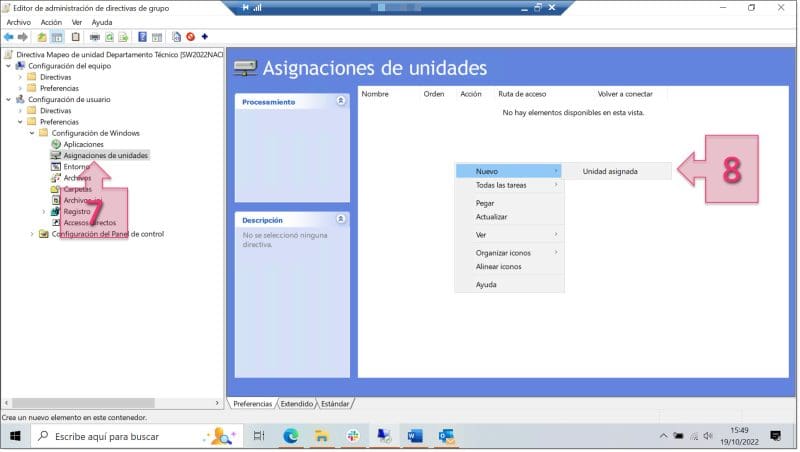
Create a new mapped drive
At this point, a new window will appear. Next to the “Action” field, select “Create” from the drop-down menu (9). Then, you will need to enter the location (10). For this tutorial, the resource we want to map is located at: “file://SW2022NACHO01/Shared/Technical”. So, we need to enter “\\SW2022NACHO01\Shared\Technical” in this field. Lastly, select a drive letter (11) (for this tutorial, we’ll choose “T” since it is for the “Technical” department), click on “Apply” and “OK” (12).
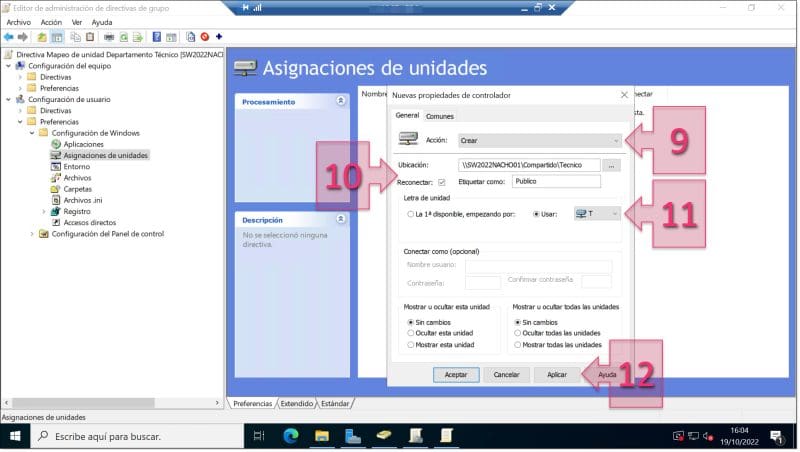
Configure the shared drive
You have now mapped your shared drive (13).
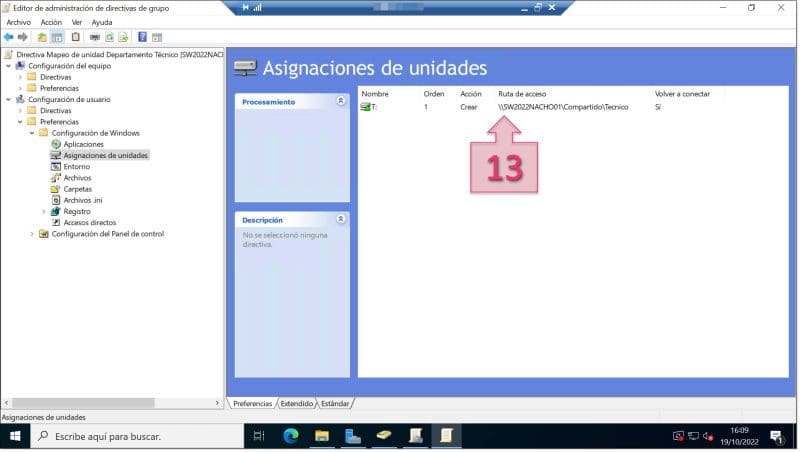
The drive has been created
You have now created a new policy to map the shared drive, and all that remains is to check that it is mapped correctly. To do this, simply log on with an account that belongs to the OU in question and check that you have access to the drive.
NOTE: There can sometimes be a slight delay between mapping the drive and it appearing on user devices. If it doesn’t appear the first time you log on, try restarting or run the “gpupdate/force” command, which forces the system to re-read the Group Policies.
Conclusions
In this tutorial, we have looked at a simple procedure for configuring a GPO to map shared drives for users belonging to a specific OU or even all domain users.
If you would like to find out more about this topic, we recommend that you check out the following tutorials, where you will find additional information and some practical examples of what you can achieve with Group Policies:
- What Are GPOs and What Are They Used for
- PowerShell Commands for Managing GPOs
- How to Configure a GPO for Printer Mapping
- How to Deploy a PowerShell Script Using a GPO
- How to Configure Personal Drives Using a GPO
- How to Configure Your Firewalls Using a GPO
- How to Hide a Drive on Your Server Using the Local Policy Editor
Thanks for reading!


