In this tutorial, you’ll learn how to set up 2FA (double-factor authentication) for Remote Desktop users so you can keep your platform secure.
Jotelulu has always offered a range of security measures to protect your business infrastructure, including password protection, IP address filtering, firewalls, antivirus software and backups to ensure service and business continuity.
Previously, double-factor authentication (2FA) was only available for the Servers service and access to the platform, but now, it is also available for our Remote Desktop service.
This feature essentially adds an extra layer of security whereby the user needs a registered device in order to receive a temporary access code whenever they log in. This access code changes regularly, so even if an attacker manages to get a glimpse of it, a few minutes later, it will no longer be valid.
To use this feature, the systems administrator will have to activate 2FA on their user profile and also install one of the following apps on the user’s mobile device:
- Google Authenticator
- Microsoft Authenticator
NOTE: If a user has access to more than one Remote Desktop environment, they will be able to access all of them using just one 2FA device.
How to Set Up 2FA for Remote Desktop Users
Before you begin
To successfully complete this tutorial, you will need the following:
- To have registered on the Jotelulu platform.
- To have signed in to the platform using your username and password.
- To have an active Remote Desktop subscription. If you don’t have one yet, see this tutorial for instructions: How to Register a Remote Desktop on Jotelulu.
- To have a smartphone and have downloaded either Google Authenticator or Microsoft Authenticator.
Part 1 – Enabling 2FA for Remote Desktop Users
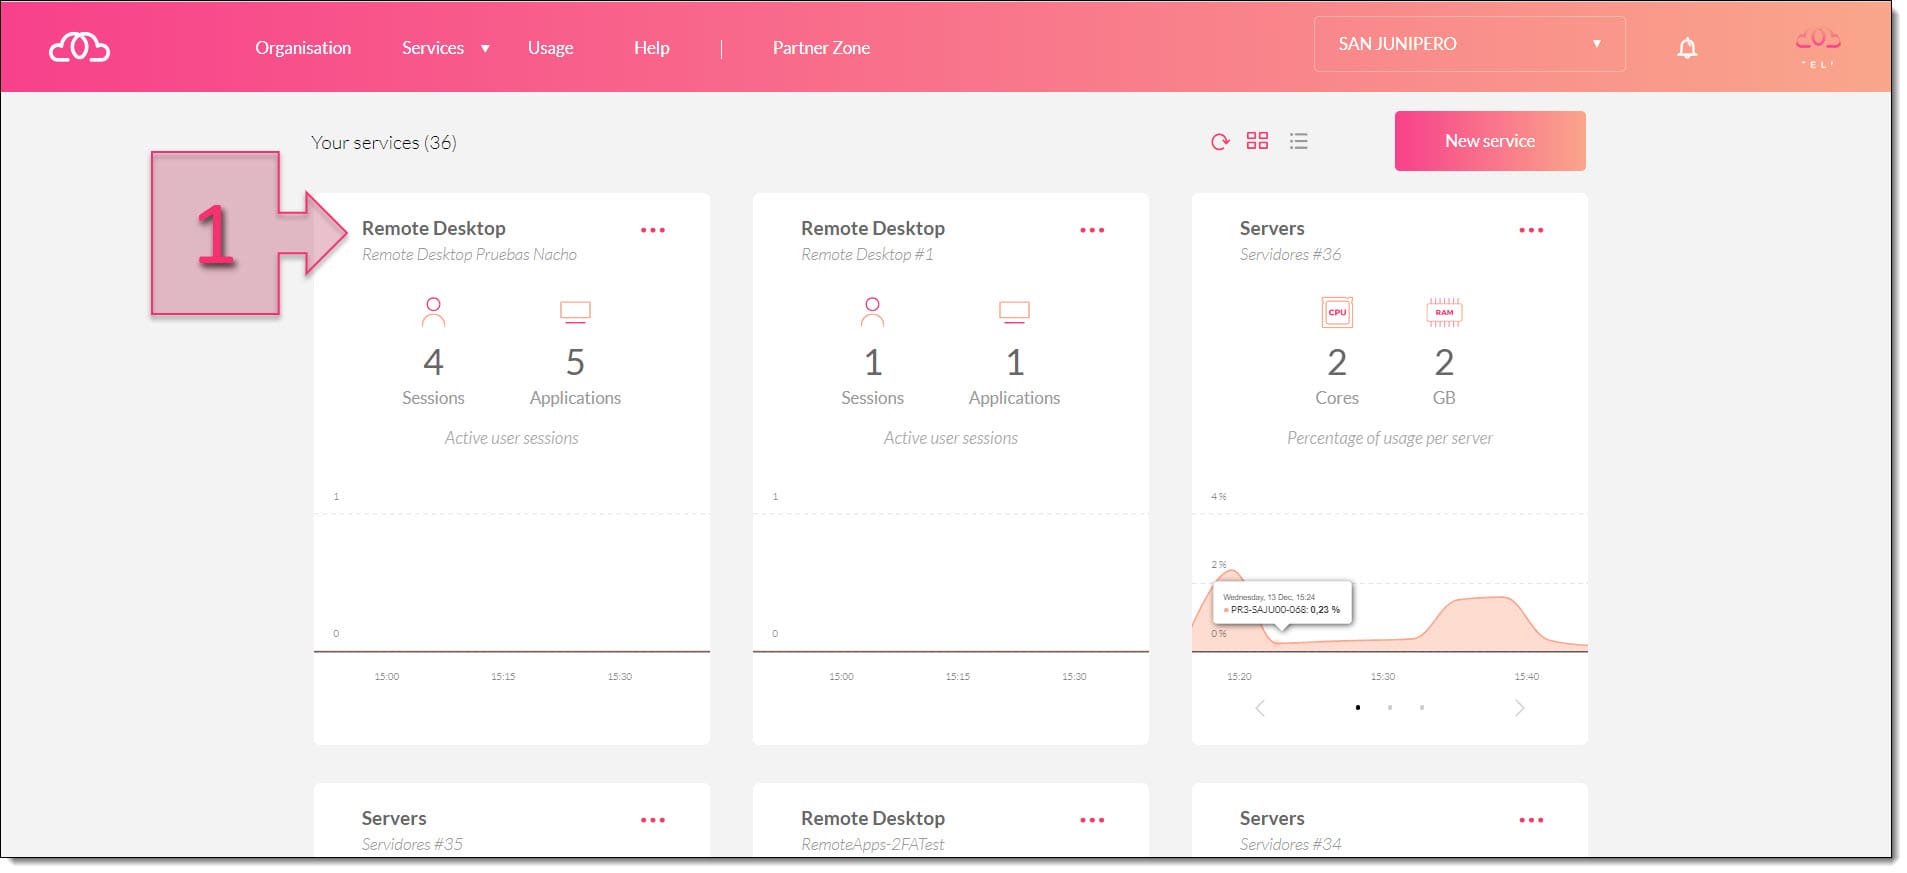
First, sign in to the Jotelulu platform and click on the card for your Remote Desktop subscription (1).
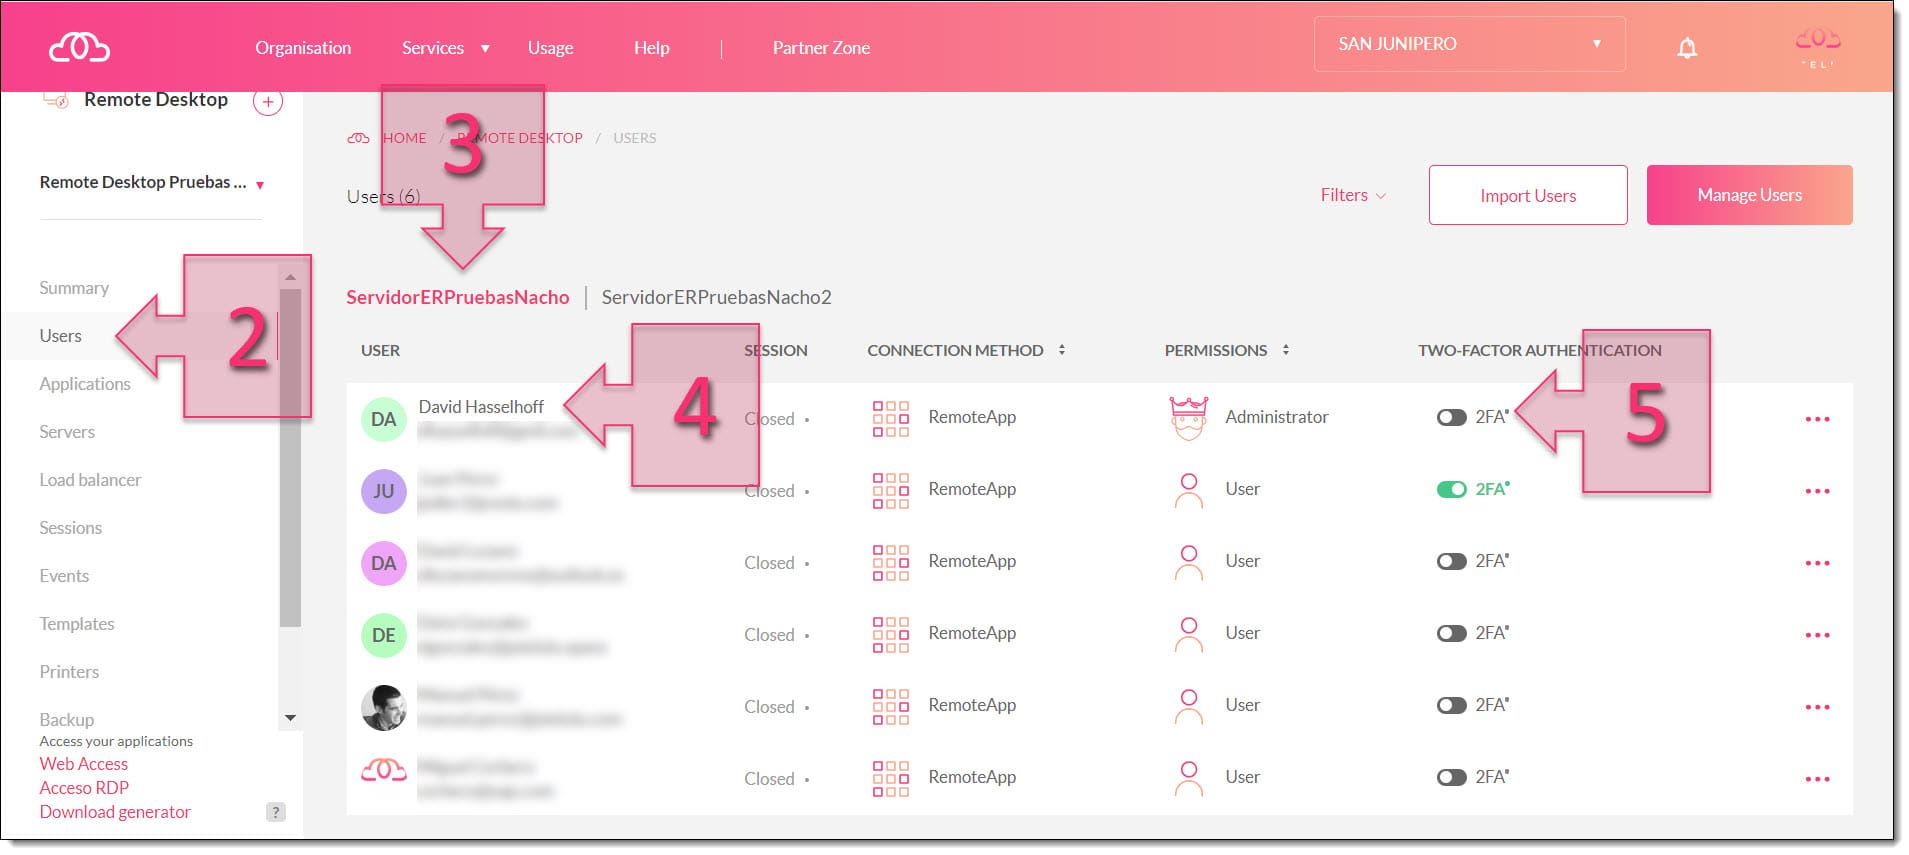
Next, click on Users (2) and select the server that you wish to work on (3). Search for the user for which you wish to set up 2FA (4) and click on the 2FA toggle switch (5).
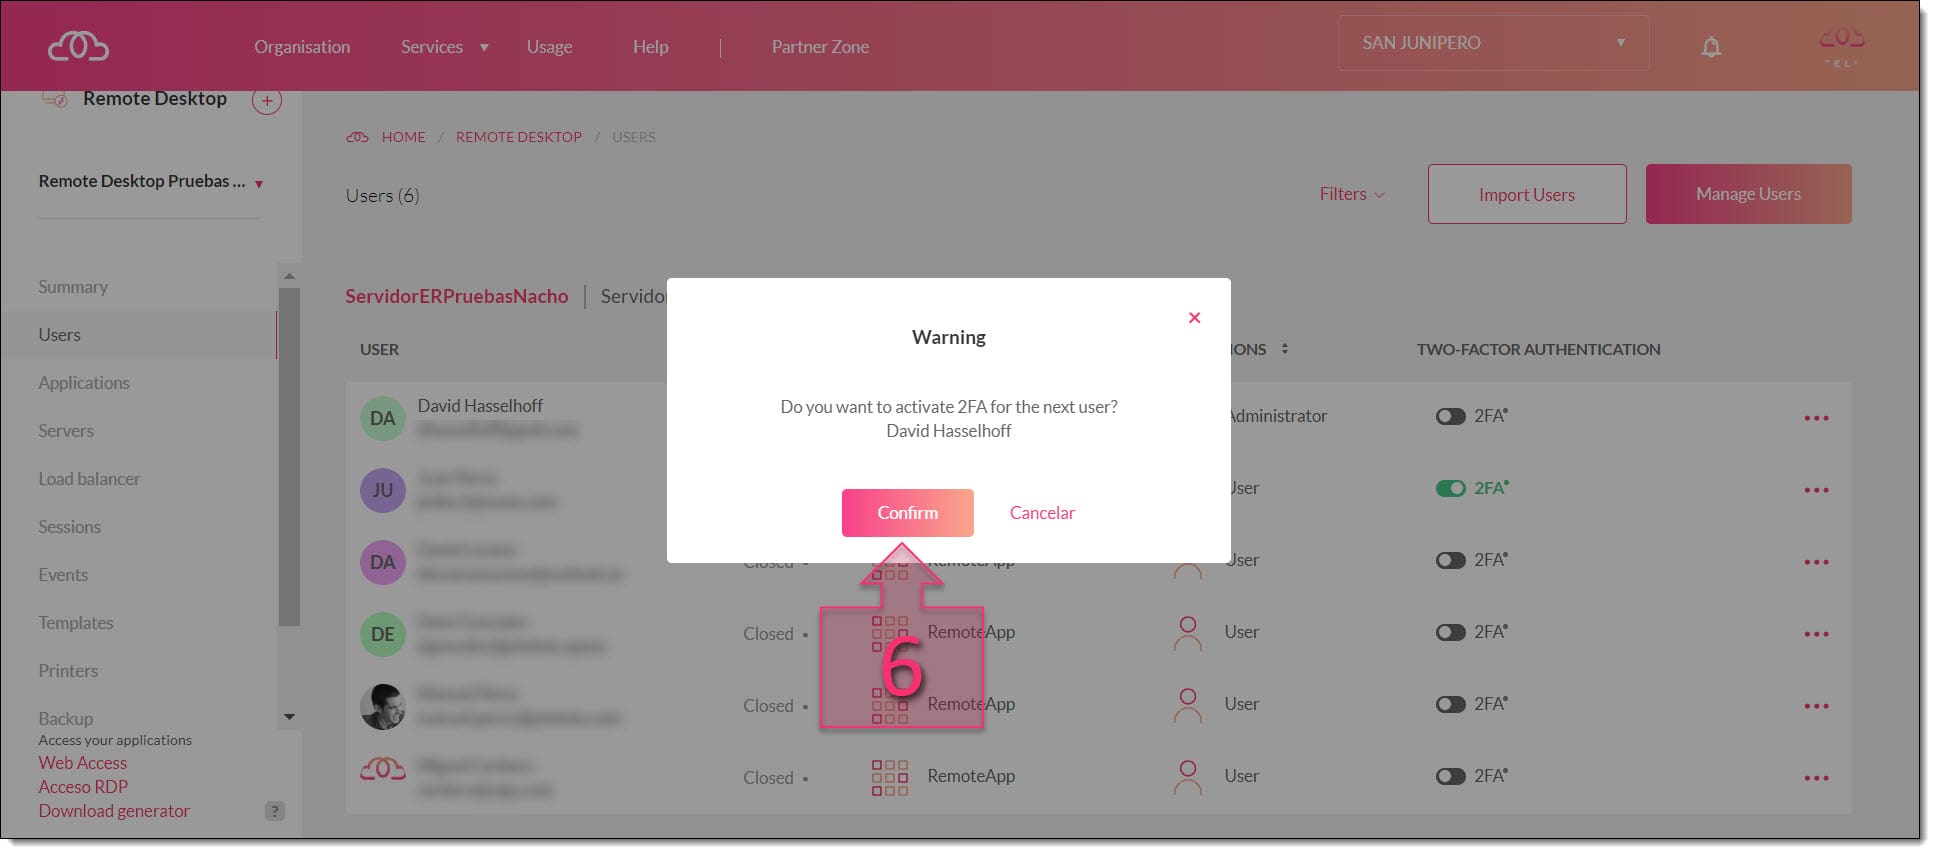
At this point, a window will appear asking you to confirm that you wish to activate 2FA for this user. Click on Confirm (6).
After a few seconds, you will see that 2FA is now enabled for that user (7) and the toggle switch will shown in green. You will also see a notification at the bottom of the screen confirming your change (8).
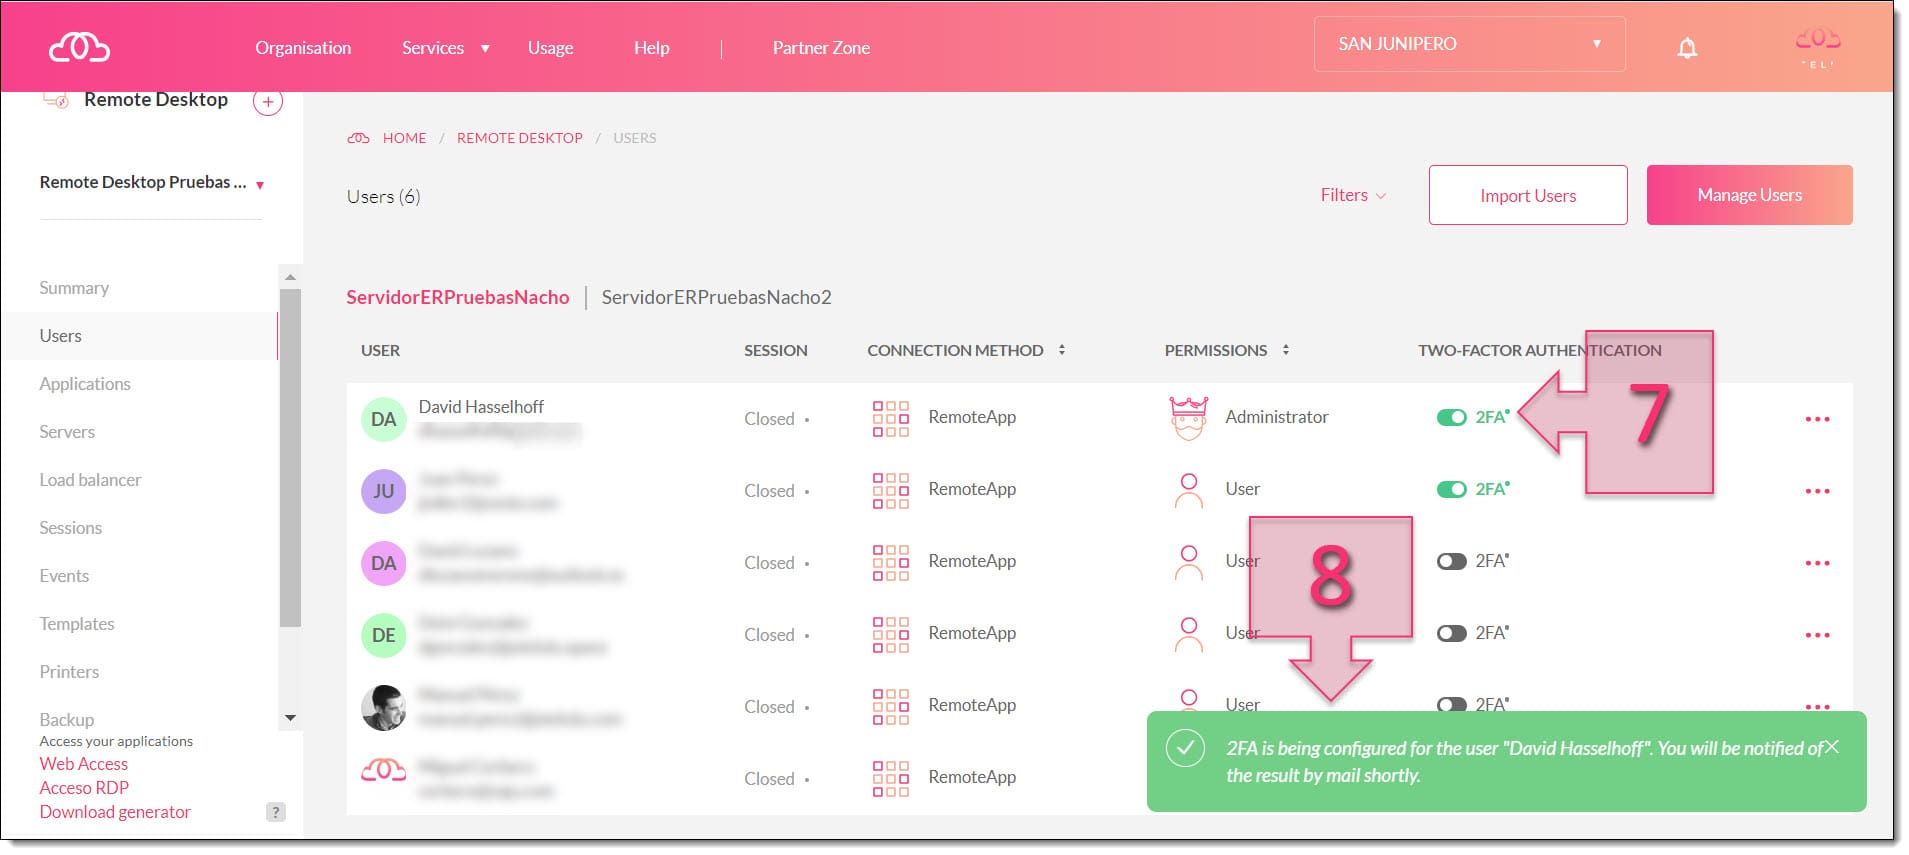
You have now successfully enabled 2FA for your Remote Desktop user.
Part 2 – Configuring 2FA for Remote Desktop User-side
The next time the user accesses Remote Desktop, they will need to have their smartphone handy with their authenticator app open, whether it’s Microsoft or Google.
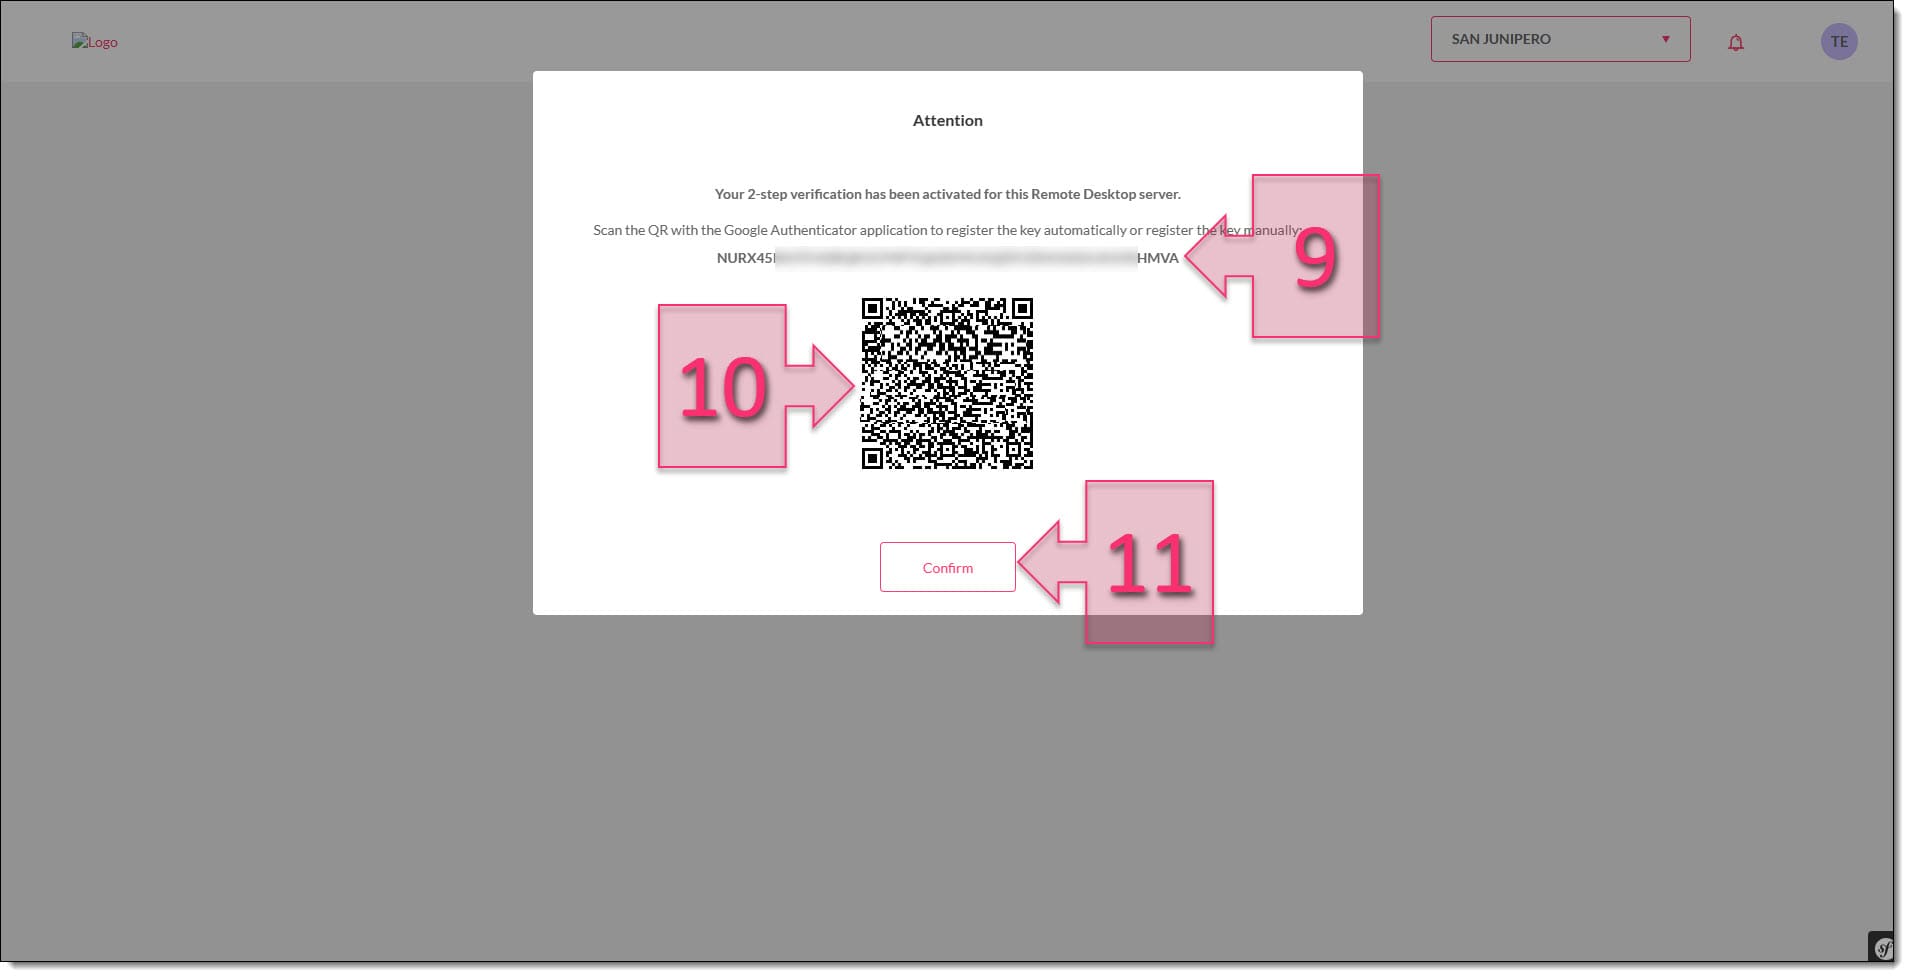
When they try to log in to the Remote Desktop, they will see the screen shown in the image below. Here, the user has two methods to register their authenticator app:
- Alphanumeric key: (9) This involves manually entering the key in the authenticator app.
- QR code: (10) This involves scanning the QR code using the authenticator app.
Once the user has registered using one of these two methods, they should click on Confirm (11) and they will receive an access code in the authenticator app in order to access the platform.
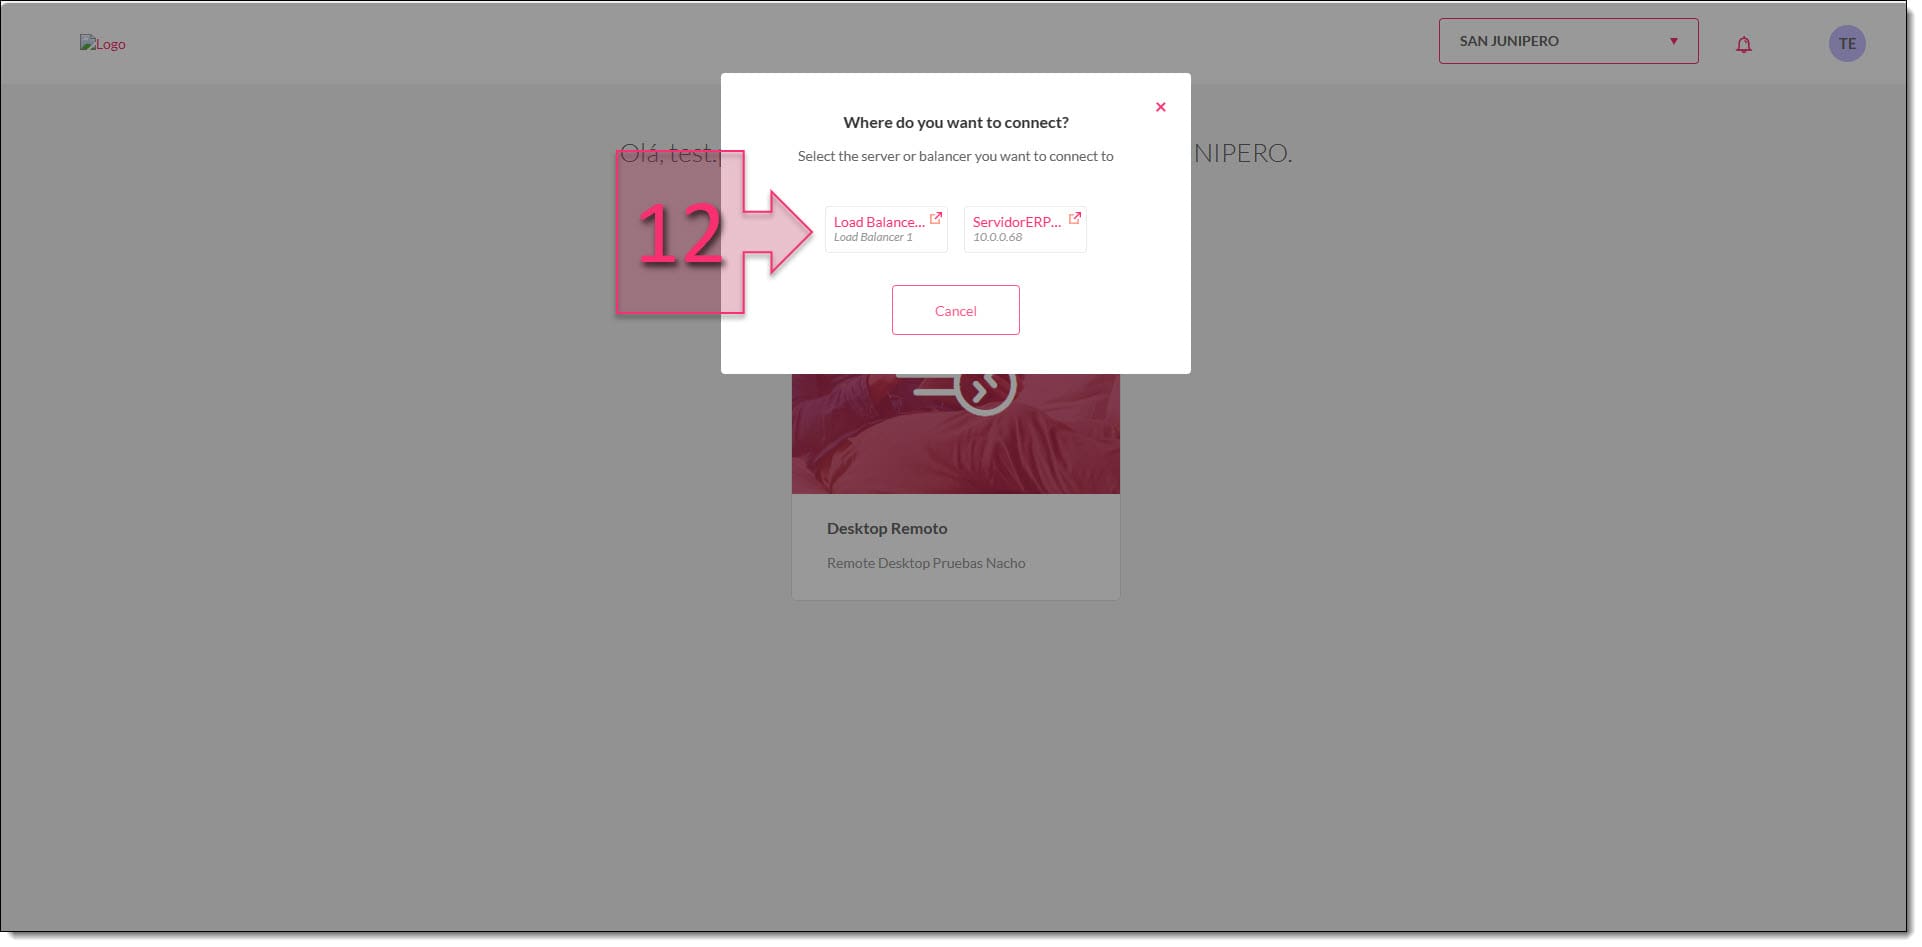
There is one small extra detail to mention here. If the user is registered to use servers connected and a load balancer, they will have the option to choose where they want to connect (12). This won’t be the case if the user is only registered to use one server or just the load balancer.
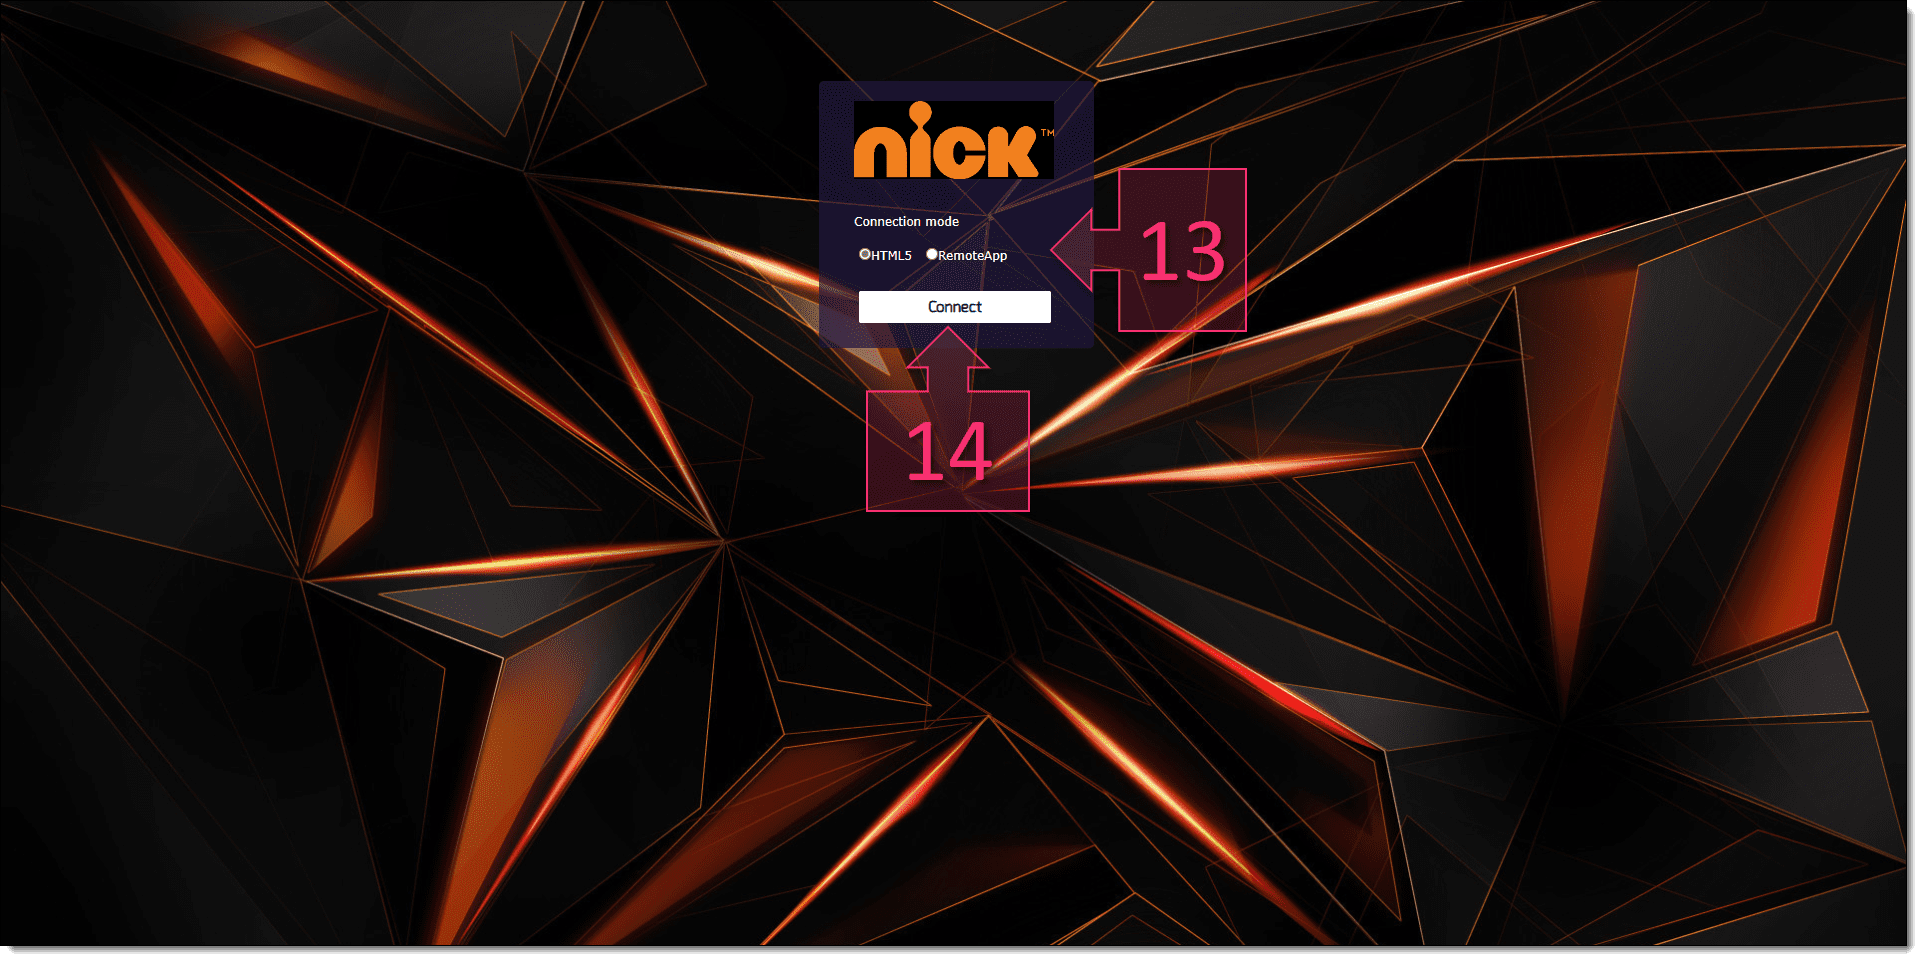
At this point, the user will see a new sign-in screen allowing them to select their connection method (13). If they are using a browser, they should select HTML5 and if they wish to connect through RemoteAPP, they will need to have administrator privileges and download a plugin.
Once the user has selected a connection method, they just need to click on Connect (14).
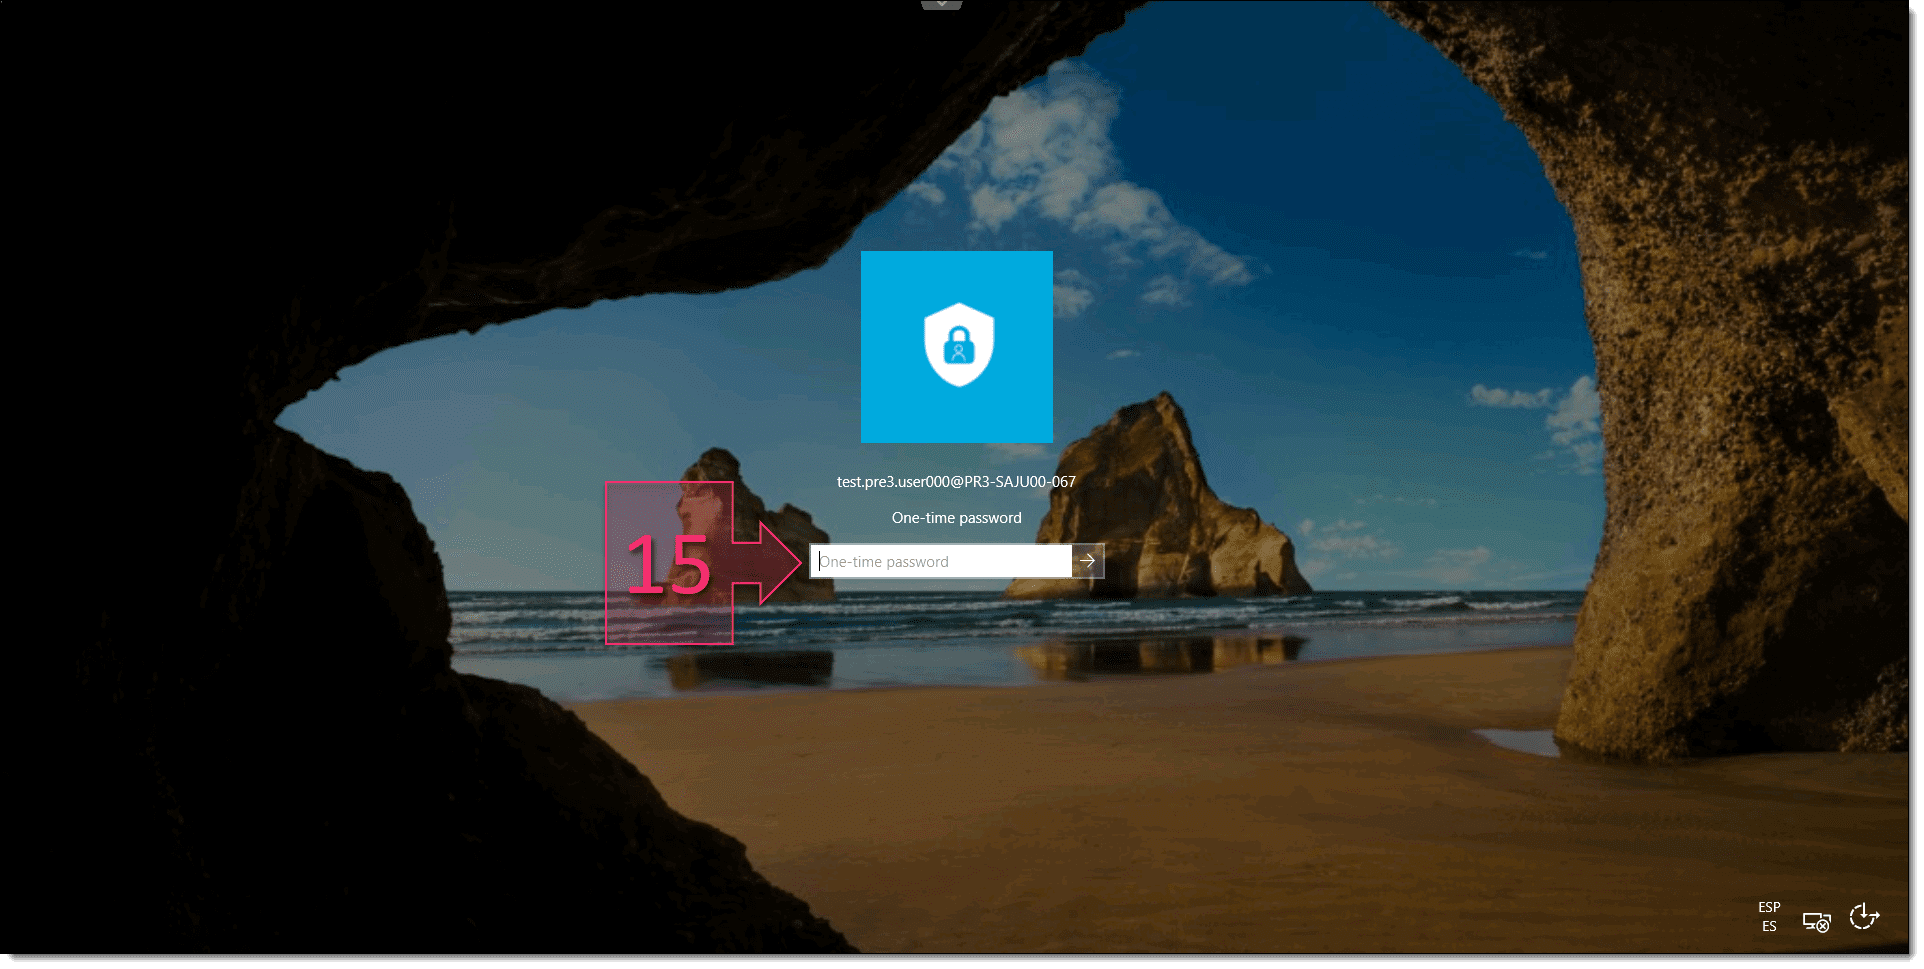
Finally, the user will be presented with the Remote Desktop validation screen, where they simply need to enter their authentication code (15), as provided in the app.
NOTE: Once double-factor authentication has been enabled, the user’s profile in the Organisation section of the platform will change. There will now appear two fields allowing you to reconfigure the Authenticator App by generating a new key or generate new single-use keys.
Summary
In this tutorial, you have seen how you can easily set up 2FA for your Remote Desktop users and we have also provided instructions for accessing the service as a user. This is just one more layer to keep your working environment as secure and reliable as possible.
We hope that you find this tutorial useful. However, if you have any problems or need more information about the feature, don’t hesitate to contact us and we’ll be happy to help.
Thanks for choosing Jotelulu!


