In this quick tutorial, we’ll show you how you can use PowerShell to quickly set a static IP address for your server or computer.
We’ve looked at PowerShell on many previous occasions on this blog, and as you’ll realise by now, it can be very convenient when managing operating systems, applications, services and even hardware.
One of the things you can do with PowerShell is query network settings and make changes to them, and that’s exactly what we’re going to do today.
NOTE: Please take great care when making changes remotely. When making changes to the network configuration, you will need to re-connect to the server once the changes have been applied. If you make a mistake, you might lose all access to the machine completely, unless you’re able to physically access the machine or use an iLO connection.
How to Set a Static IP Address Using PowerShell
Before you get started…
To successfully complete this tutorial, you will need the following:
- To be registered with an organisation on the Jotelulu platform and to have logged in.
- A Servers subscription on the platform.
Setting a Static IP Address
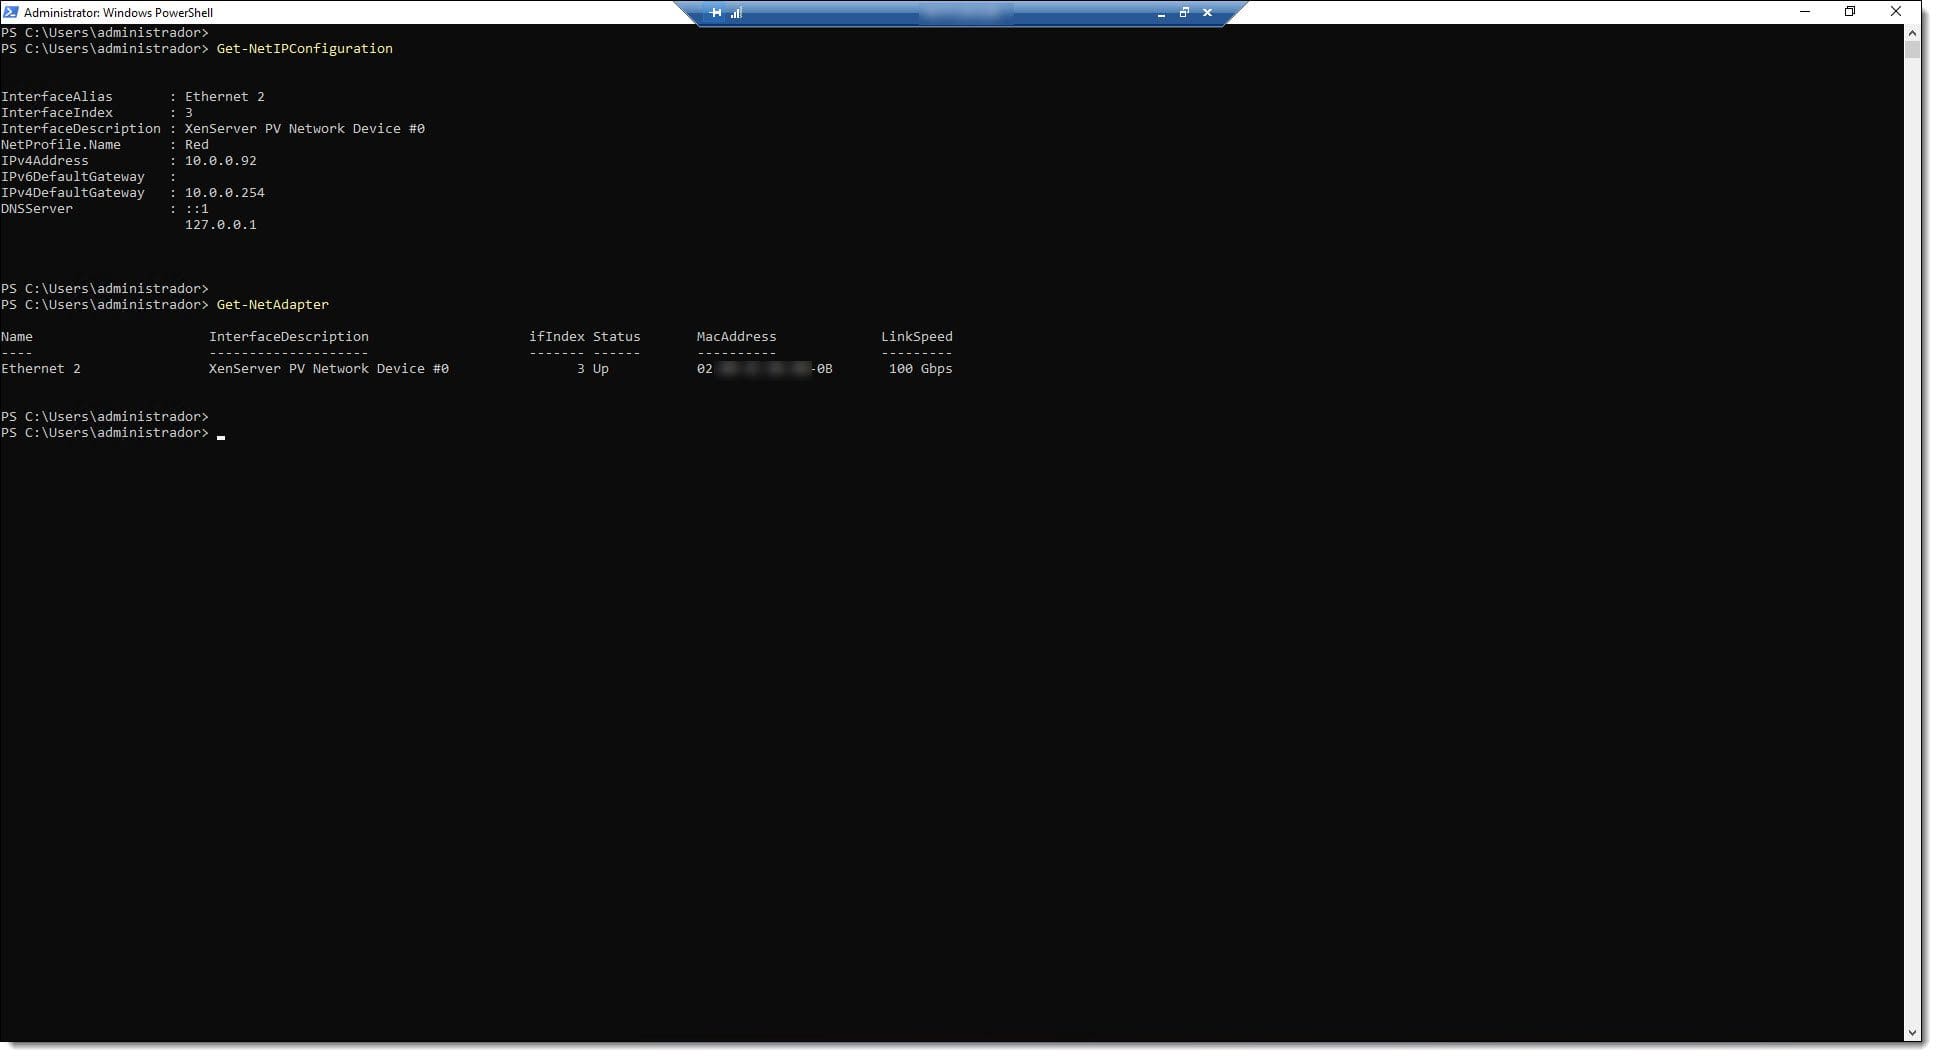
First, you need to retrieve information about the current state of the network interface. To do this, run the “Get-NetIPConfiguration” command which will show the current network configuration.
# Get-NetIPConfiguration
Next, run the “Get-NetAdapter” command to retrieve the following information:
- Description of the interface.
- Link Speed.
- MAC address or physical address.
# Get-NetAdapter

Once you’ve done this, you’re ready to set a static IP address.
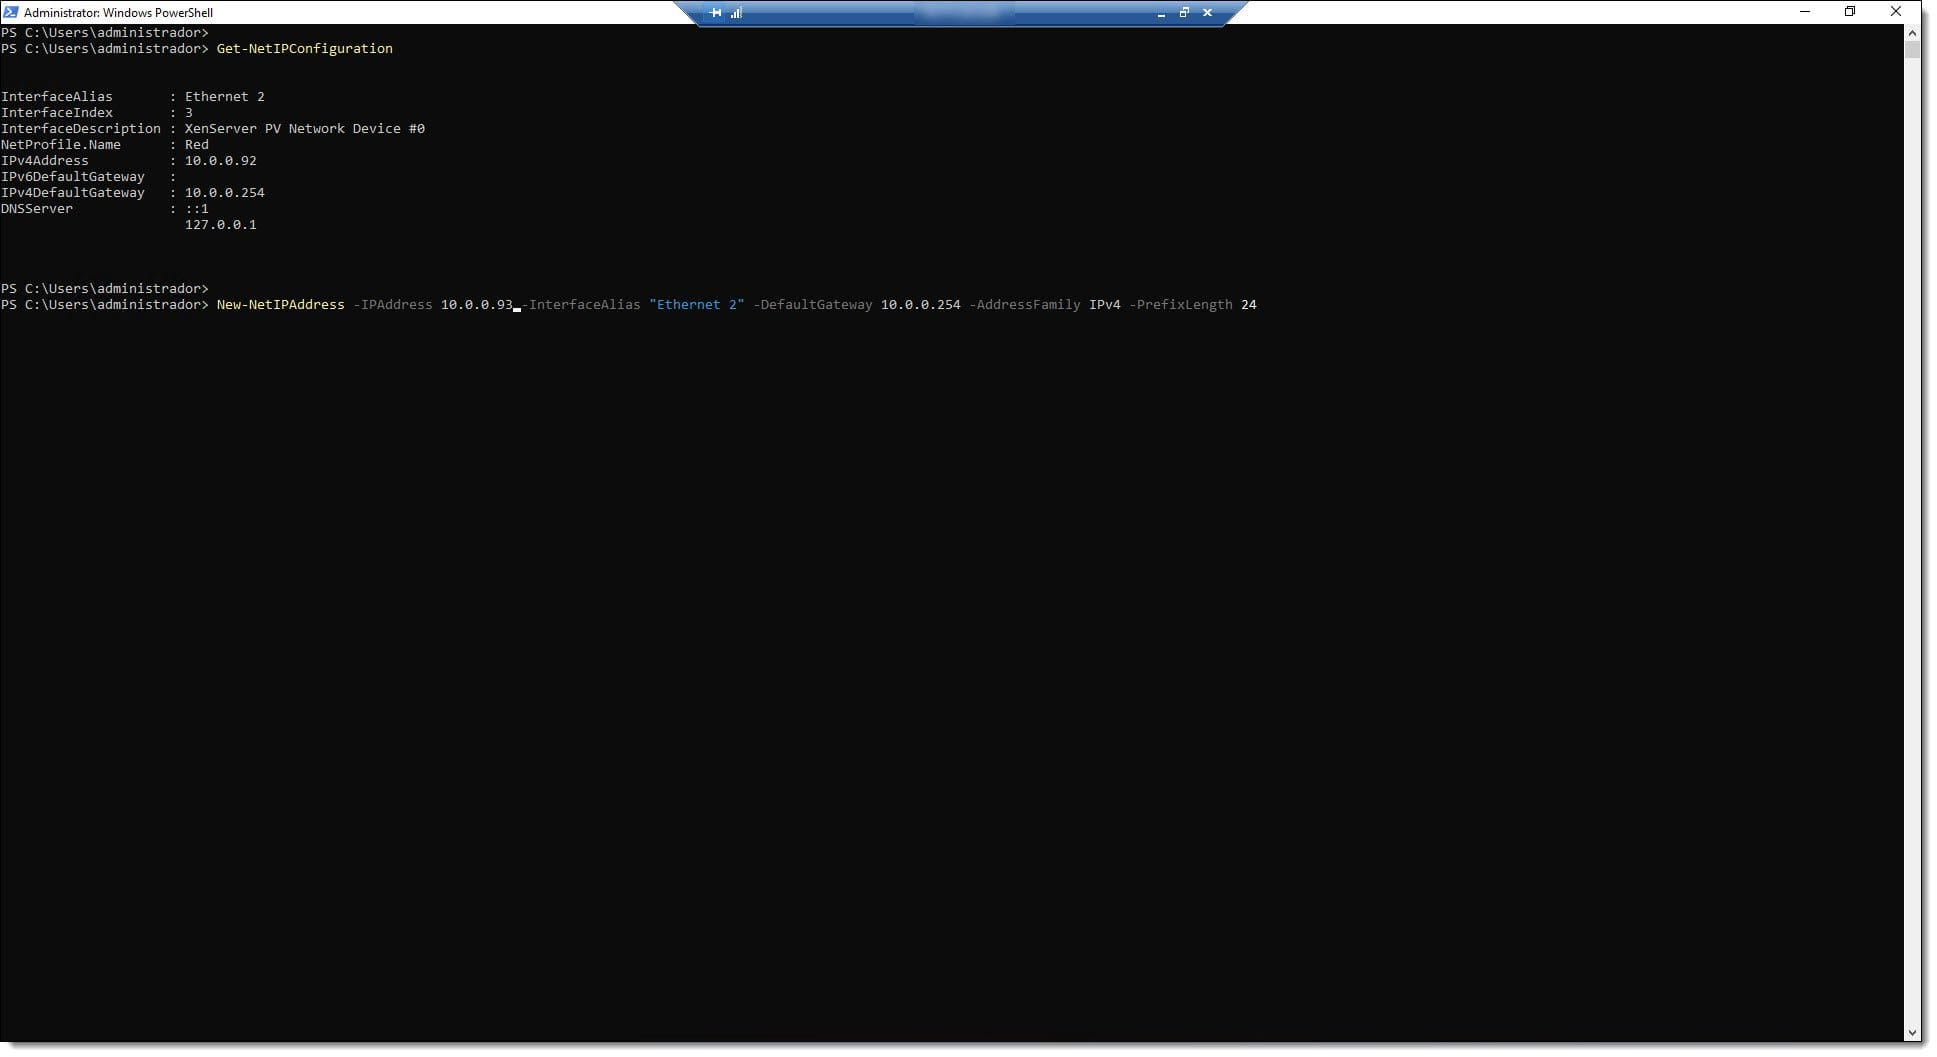
To do this, run the “New-NetIPAddress” command with the following parameters:
# New-NetIPAddress -IPAddress <IP_Address> -InterfaceAlias “<Interface_Name>” -DefaultGateway <Gateway_Address> -AddressFamily <IP_Type> -PrefixLength <Prefix_Length>
Where…
- <IP_Address> is the address you want to give the server using the format “X.X.X.X”.
- <Interface_Name> is what you want to name the interface.
- <Gateway_Address> is the gateway IP address using the format “X.X.X.X”.
- <IP_Type> specifies whether you’re using IPv4 or IPv6. For this tutorial, we’ll use IPv4.
- <Prefix_Length> should contain the number of bits for subnet mask, such as 24 for 255.255.255.0.
Here’s an example of what this command might look like:
# New-NetIPAddress -IPAddress 10.0.0.92 -InterfaceAlias “Ethernet” -DefaultGateway 10.0.0.254 -AddressFamily IPv4 -PrefixLength 24

Congratulations! You’ve set a static IP address for your server.
Summary
In this very quick tutorial, you’ve learnt how to set a static IP for your server using PowerShell. As you can see, PowerShell can make some tasks much quicker to help you manage your time more efficiently. If you’d like to learn more about PowerShell or Windows, you can find many more articles and tutorials on our blog.
We hope that you have found this tutorial useful, but if you have any problems, don’t hesitate to contact us so we can help you.
Thanks for choosing Jotelulu!


