In this tutorial, we’ll explain how to configure a GPO for printer mapping so that users automatically have access to the printers they need when they log on.
This procedure is especially useful if you have a number of departmental printers and you want different users to be able to use them without having to set up each printer one by one on each computer.
Instead, the process adds the printer to an OU (Organisational Unit) and links it to a GPO (Group Policy Object).
How to Configure a GPO for Printer Mapping
Before you begin
To successfully complete this tutorial and configure a GPO for mapping shared printers, you will need:
- To be registered on the Jotelulu platform and have logged in.
- To have a Windows Server with AD DS Server installed.
- To have an account with administrator privileges.
- To have the Print and Document Services Role installed on the server.
Creating the GPO
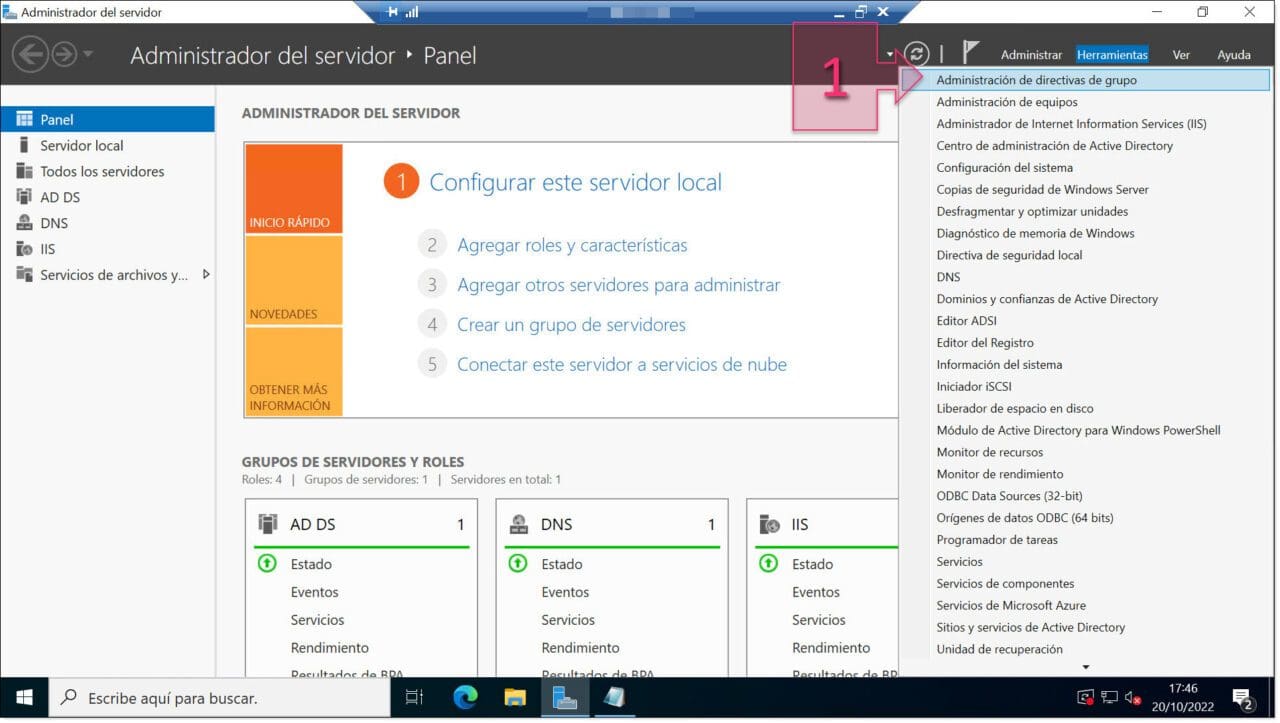
First, launch the Group Policy Manager on AD DS Server. To do this, in Server Manager, click on the Tools menu and click on “Group Policy Management” (1).
NOTE: You can also launch the Group Policy Manager by using the command “GPMC.msc”.
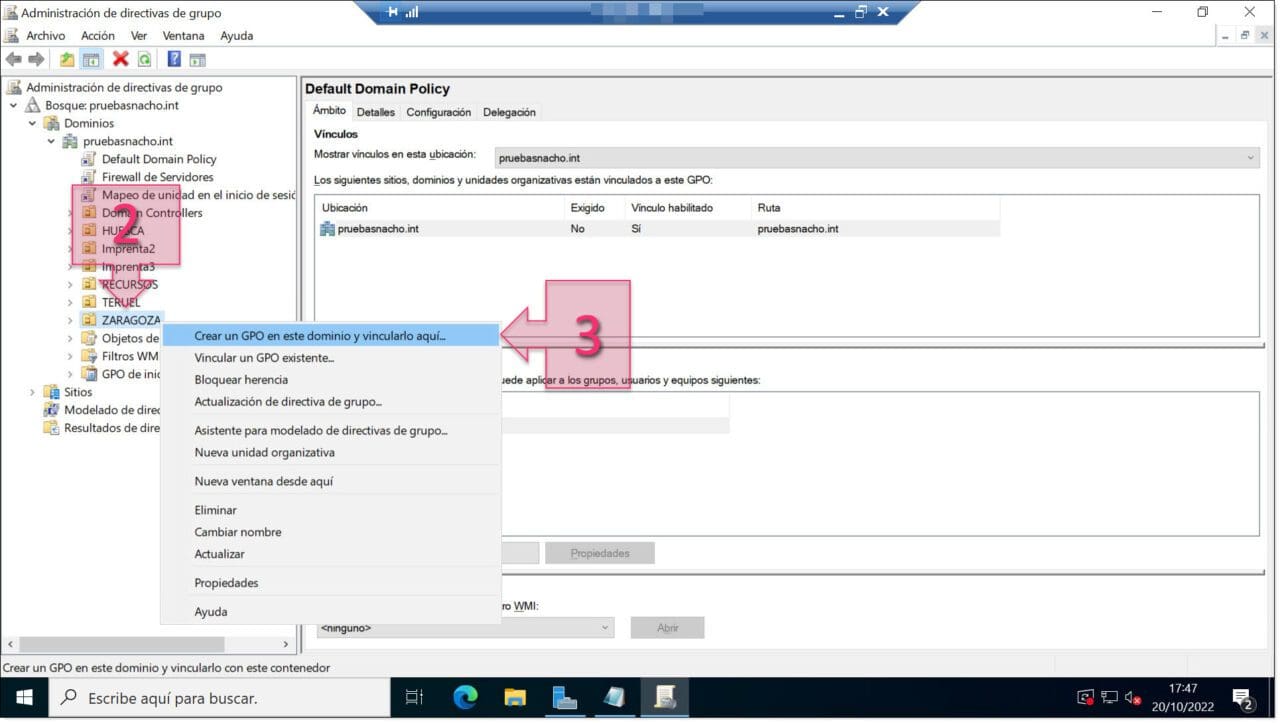
Next, in the Group Policy Manager window, expand the tree structure until you reach the OU (2) on which you want to deploy the printer. For the purposes of this tutorial, we want to deploy the printer for the delegation located in Zaragoza.
Once you have found the OU, right-click on the OU and select the option “Create a GPO in this domain, and Link it here…” (3).
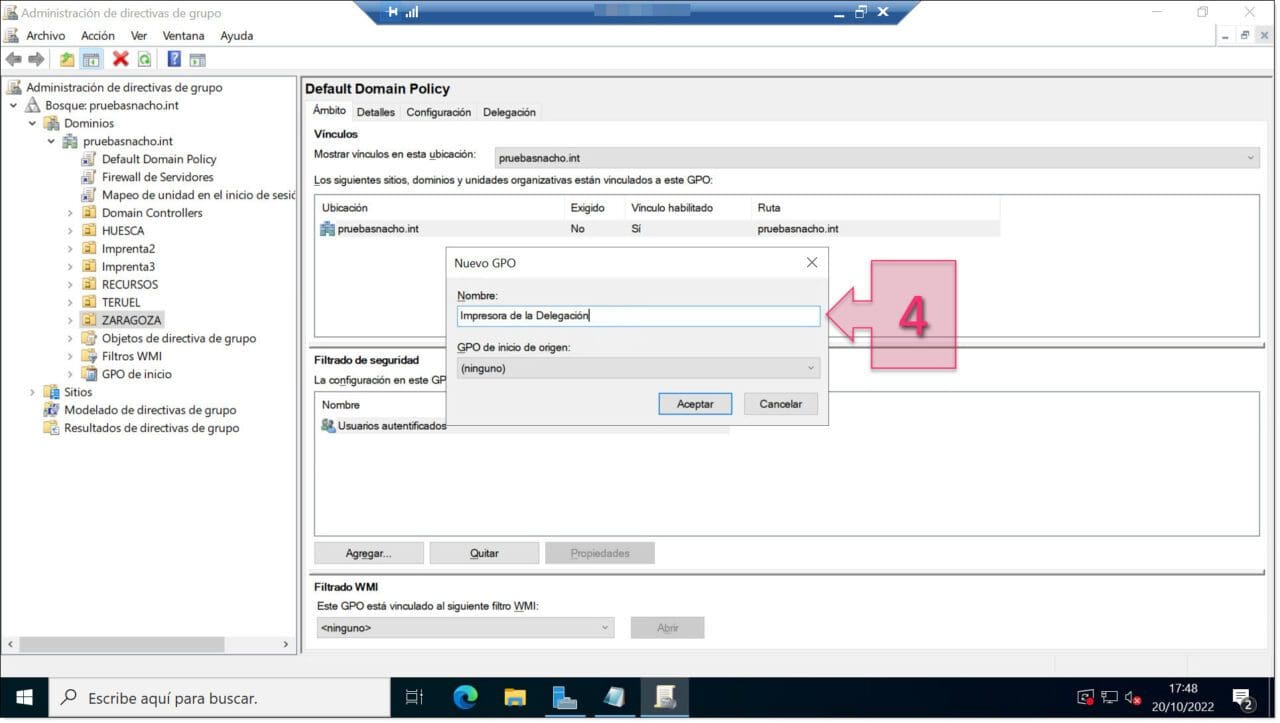
Then, you will see a window asking you to give the new GPO a name (4). Here, you should choose something descriptive so that you can easily identify it in the future. For this tutorial, we’ll call it “Delegation Printer”.
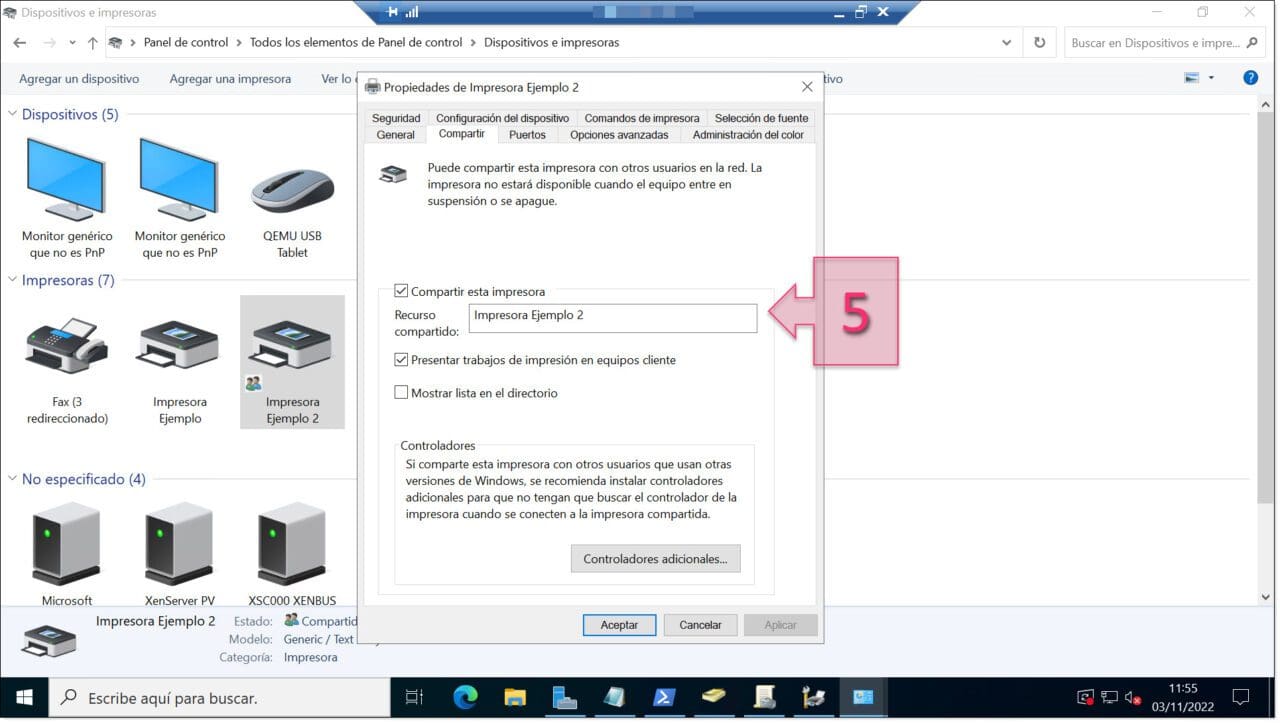
At this point, you will need to have a shared printer (5) to complete the rest of the process.
Next, in the Server Manager window, click on “Tools” and “Print Management” (6).
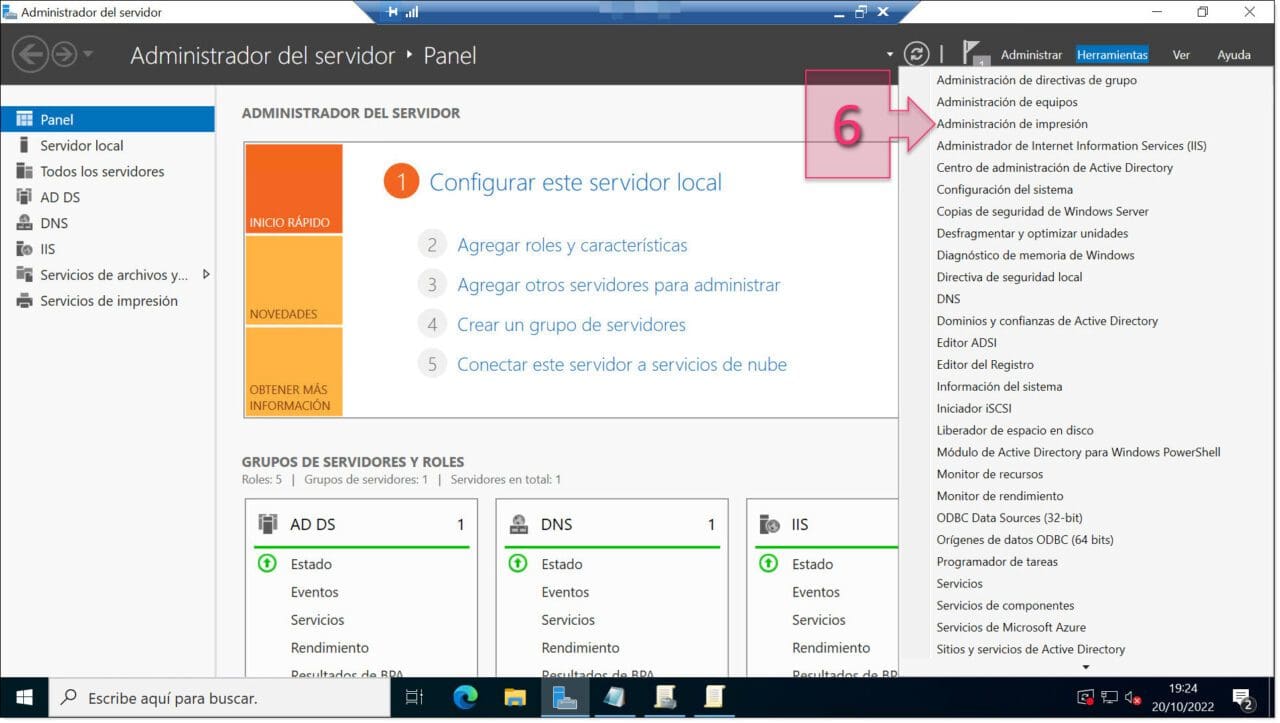
In the Printer Manager, expand the tree structure by clicking on “Print Servers > (Name of Server) > Printers (7) and then search for the printer you wish to use (8). Then, right-click on the printer and select “Deploy with group policy…” (9).
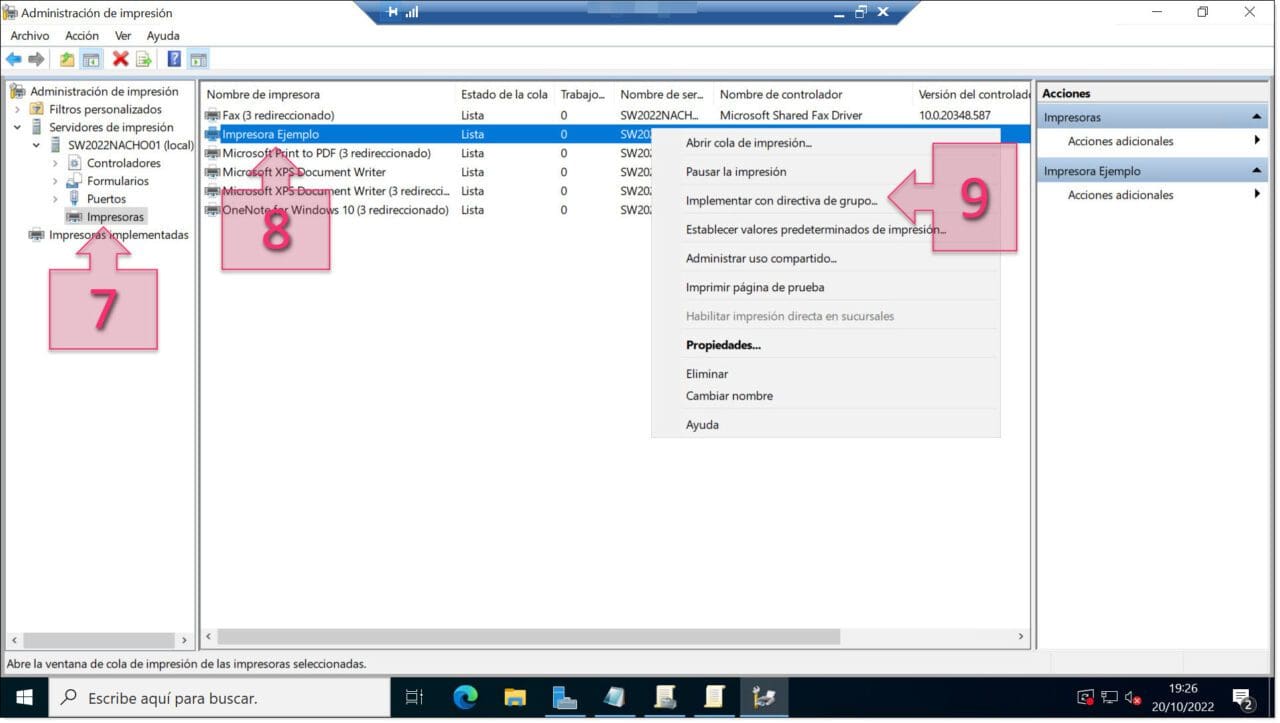
Next, you will see the “Deploy with Group Policy” window. Click on the “Browse” button (10).
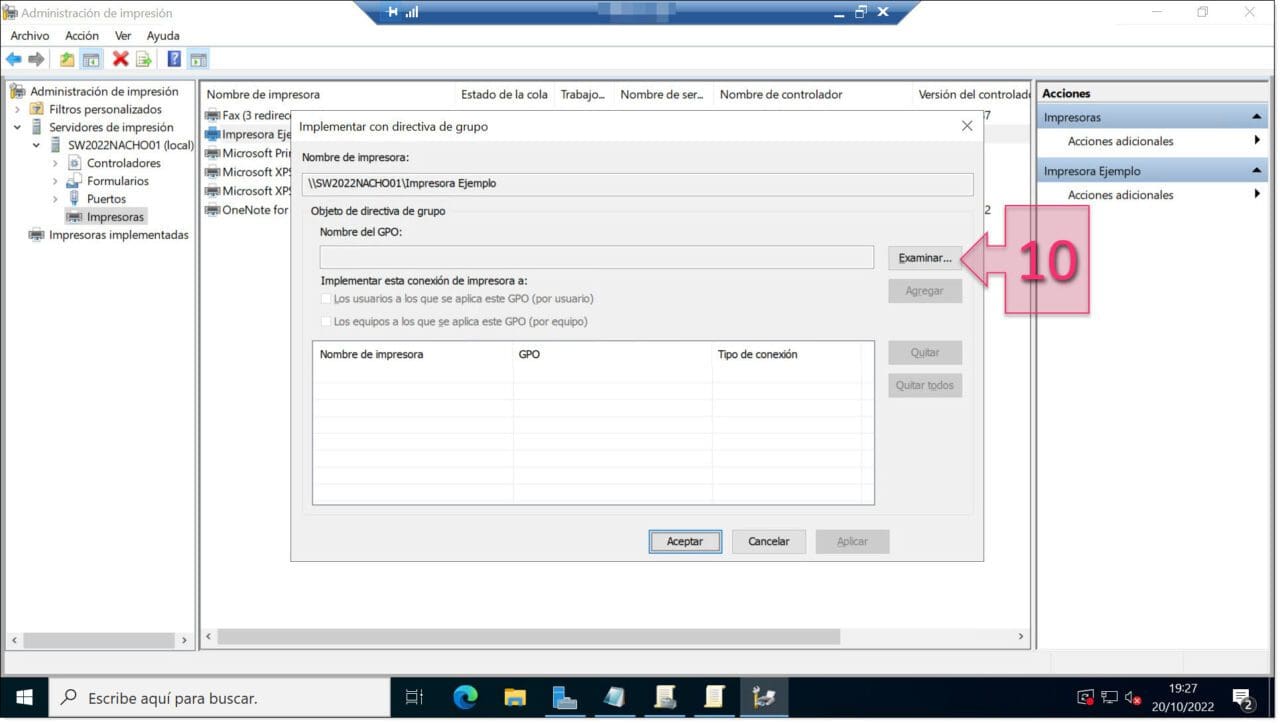
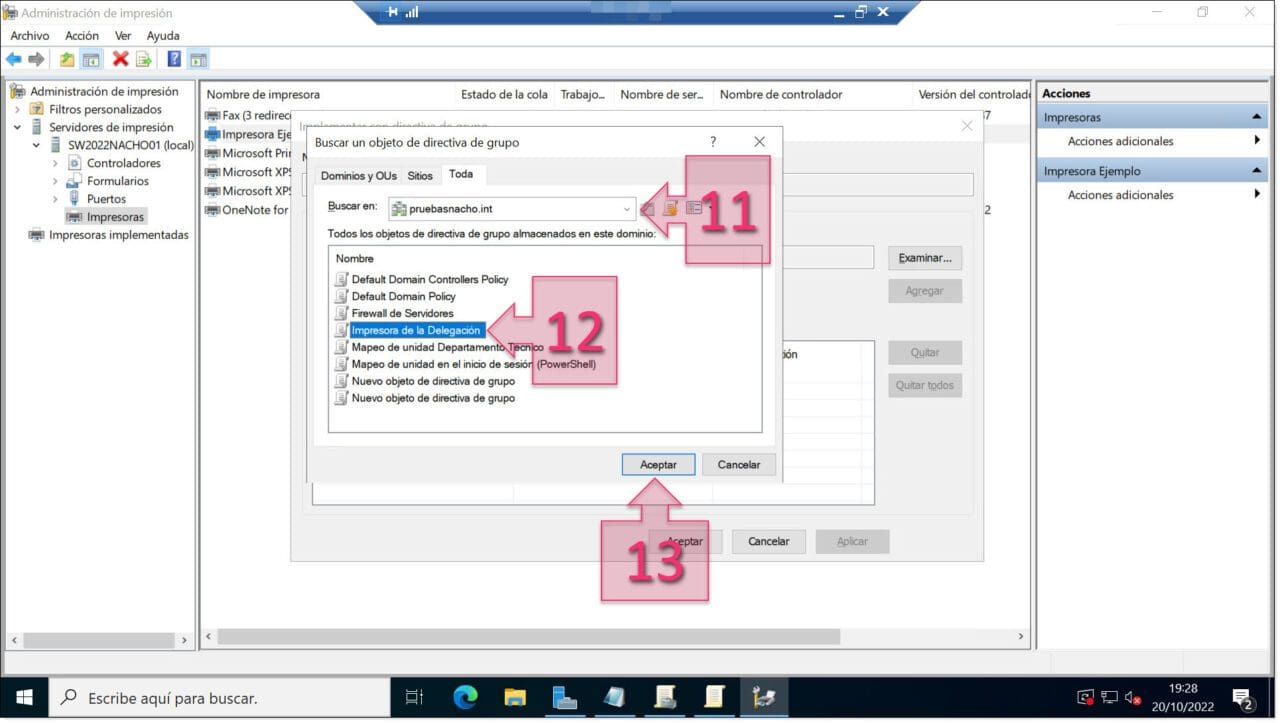
Then, you’ll see the window “Search for a Group Policy Object”. If you have more than one server environment, you’ll need to check that you have selected the right one (11).
Find the GPO you just created (12), which in this tutorial will be “Delegation Printer”. Click on it and then click “OK” (13).
Next, in the “Deploy with Group Policy” window, double-check that you have selected the right GPO (14). Then, under “Deploy this printer connection to the following:”, select “The users that this GPO applies to (per user)” (15) and click on “Add” (16). Then, click on “OK” (17).
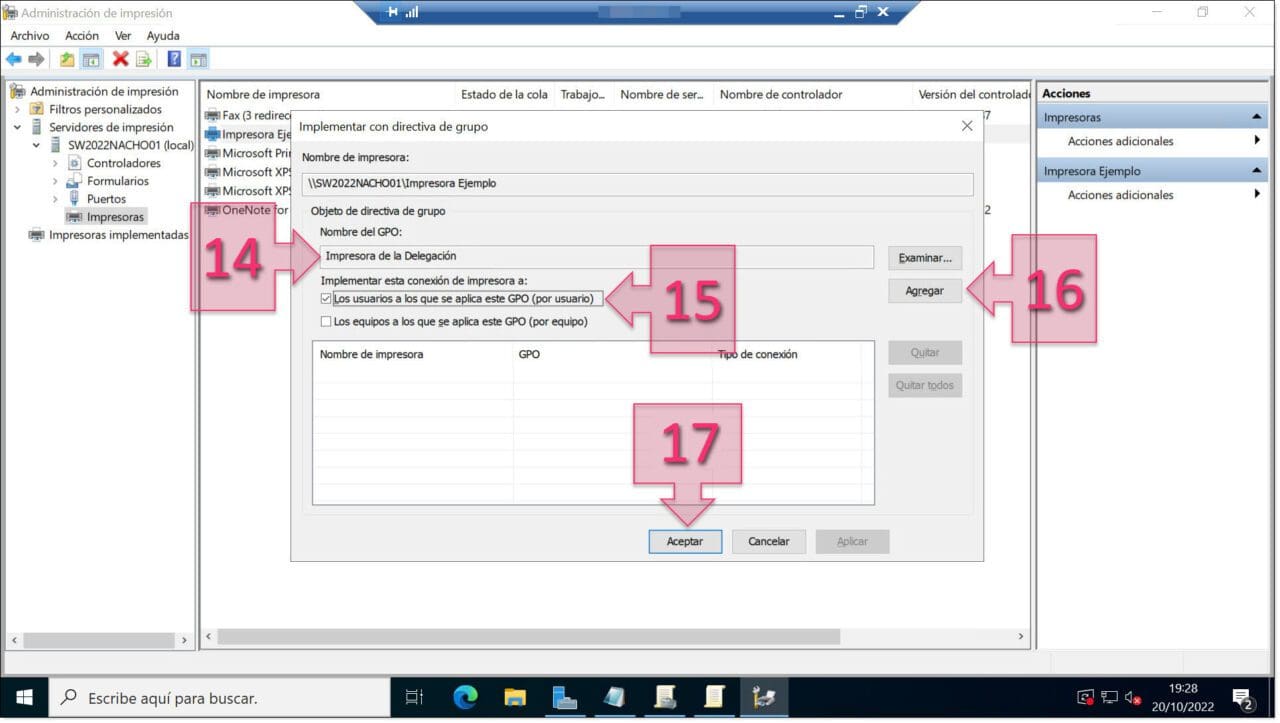
At this point, the GPO will be deployed to map the printer and you will see the message “Printer deployment or removal operation succeeded”. Below this message, you will see the details of the printer that you just deployed:
- Printer name: Network location of the printer.
- GPO: Name of the GPO linked to the printer.
- Connection type: Whether it is mapped per user or per computer.
Now, if you go to “Deployed Printers” (18), the printer will appear as available (19).
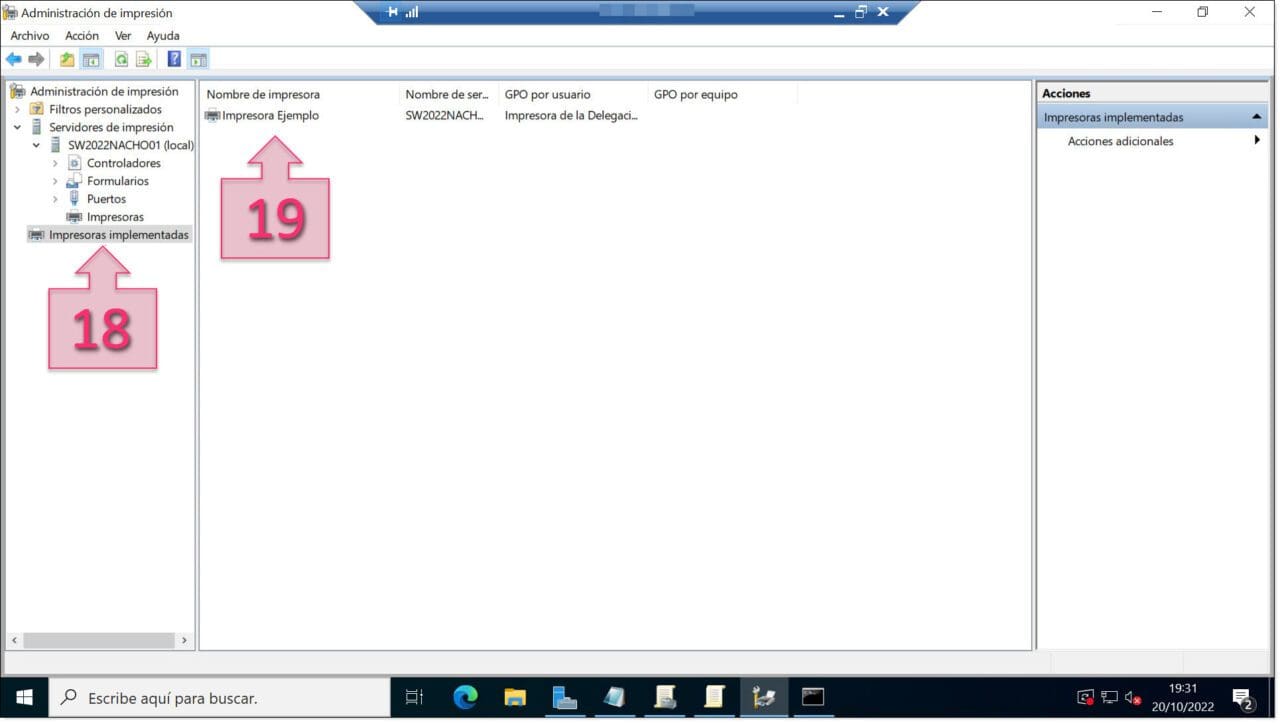
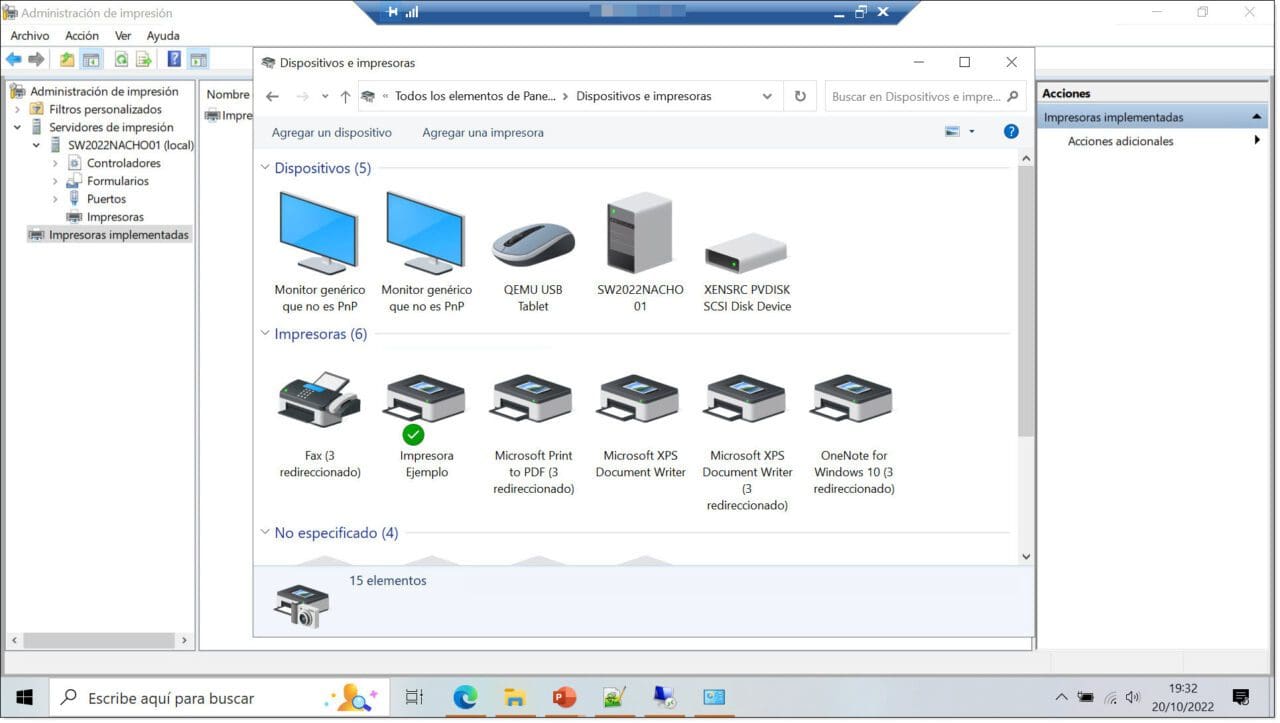
You have now successfully created your GPO to map your shared printer. All that remains is to check that it has been mapped correctly. To do this, simply log on using an account that belongs to the OU and check that the printer is visible.
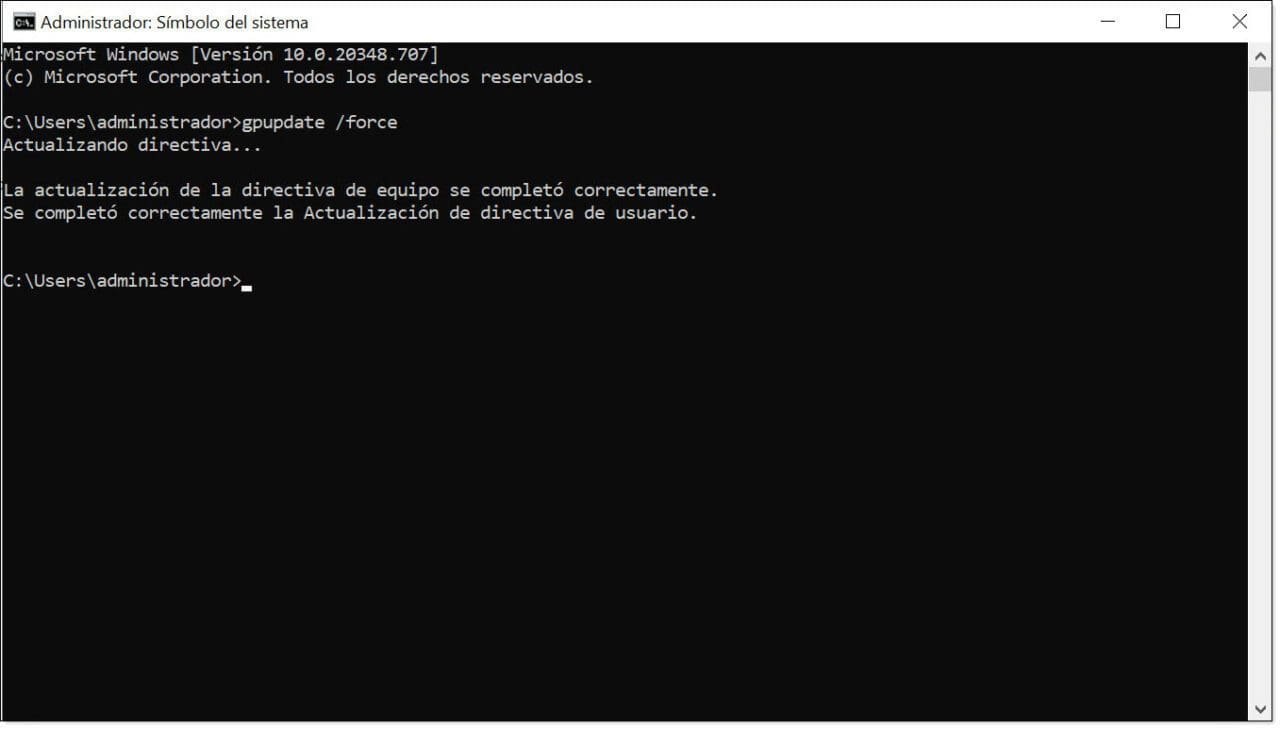
NOTE: There can sometimes be a slight delay between mapping the printer and it appearing on user devices. If it doesn’t appear the first time you log on, try restarting or run the “gpupdate/force” command, which forces the system to re-read the Group Policies.
Conclusion
In this tutorial, we have looked at a simple procedure for configuring a GPO for printer mapping for users belonging to a specific OU or even all domain users.
If you would like to find out more about this topic, we recommend that you check out the following tutorials, where you will find additional information and some practical examples of what you can achieve with Group Policies:
- What Are GPOs and What Are They Used for
- PowerShell Commands for Managing GPOs
- How to Configure a GPO for Mapping Shared Drives
- How to Deploy a PowerShell Script Using a GPO
- How to Configure Your Firewalls Using a GPO
- How to Hide a Drive on Your Server Using the Local Policy Editor
Thanks for reading!


