In this tutorial, we’ll look at how to add a server to an Active Directory domain using PowerShell.
As we’ve already mentioned in previous articles on this blog, PowerShell can really save a lot of time when adding and configuring servers, client devices, services and applications. It can also be used to make scripts so that you can automate repetitive tasks.
As a result, we’re going to show you how to add a machine to a domain using PowerShell. We’ll also look at how to change its name on the domain too. So, you’re getting two for the price of one!
How to Add a Server to a Domain Using PowerShell
Before you get started…
To successfully complete this tutorial, you will need the following:
- To be registered with an organisation on the Jotelulu platform and to have logged in.
- A Servers subscription on the platform.
- A defined naming policy.
Part 1 – Changing the Name of the Server
When you install a Windows server or computer, it will initially be given a random name that will probably be very difficult to remember and won’t have anything to do with its main function within the business.
That’s why it’s a good idea to make sure that all your servers and computers have appropriate, descriptive names. Your business might have an internal naming policy or it might be up to sysadmin to decide, but regardless of your situation, you should make sure that the names of your devices are consistent across your IT infrastructure.
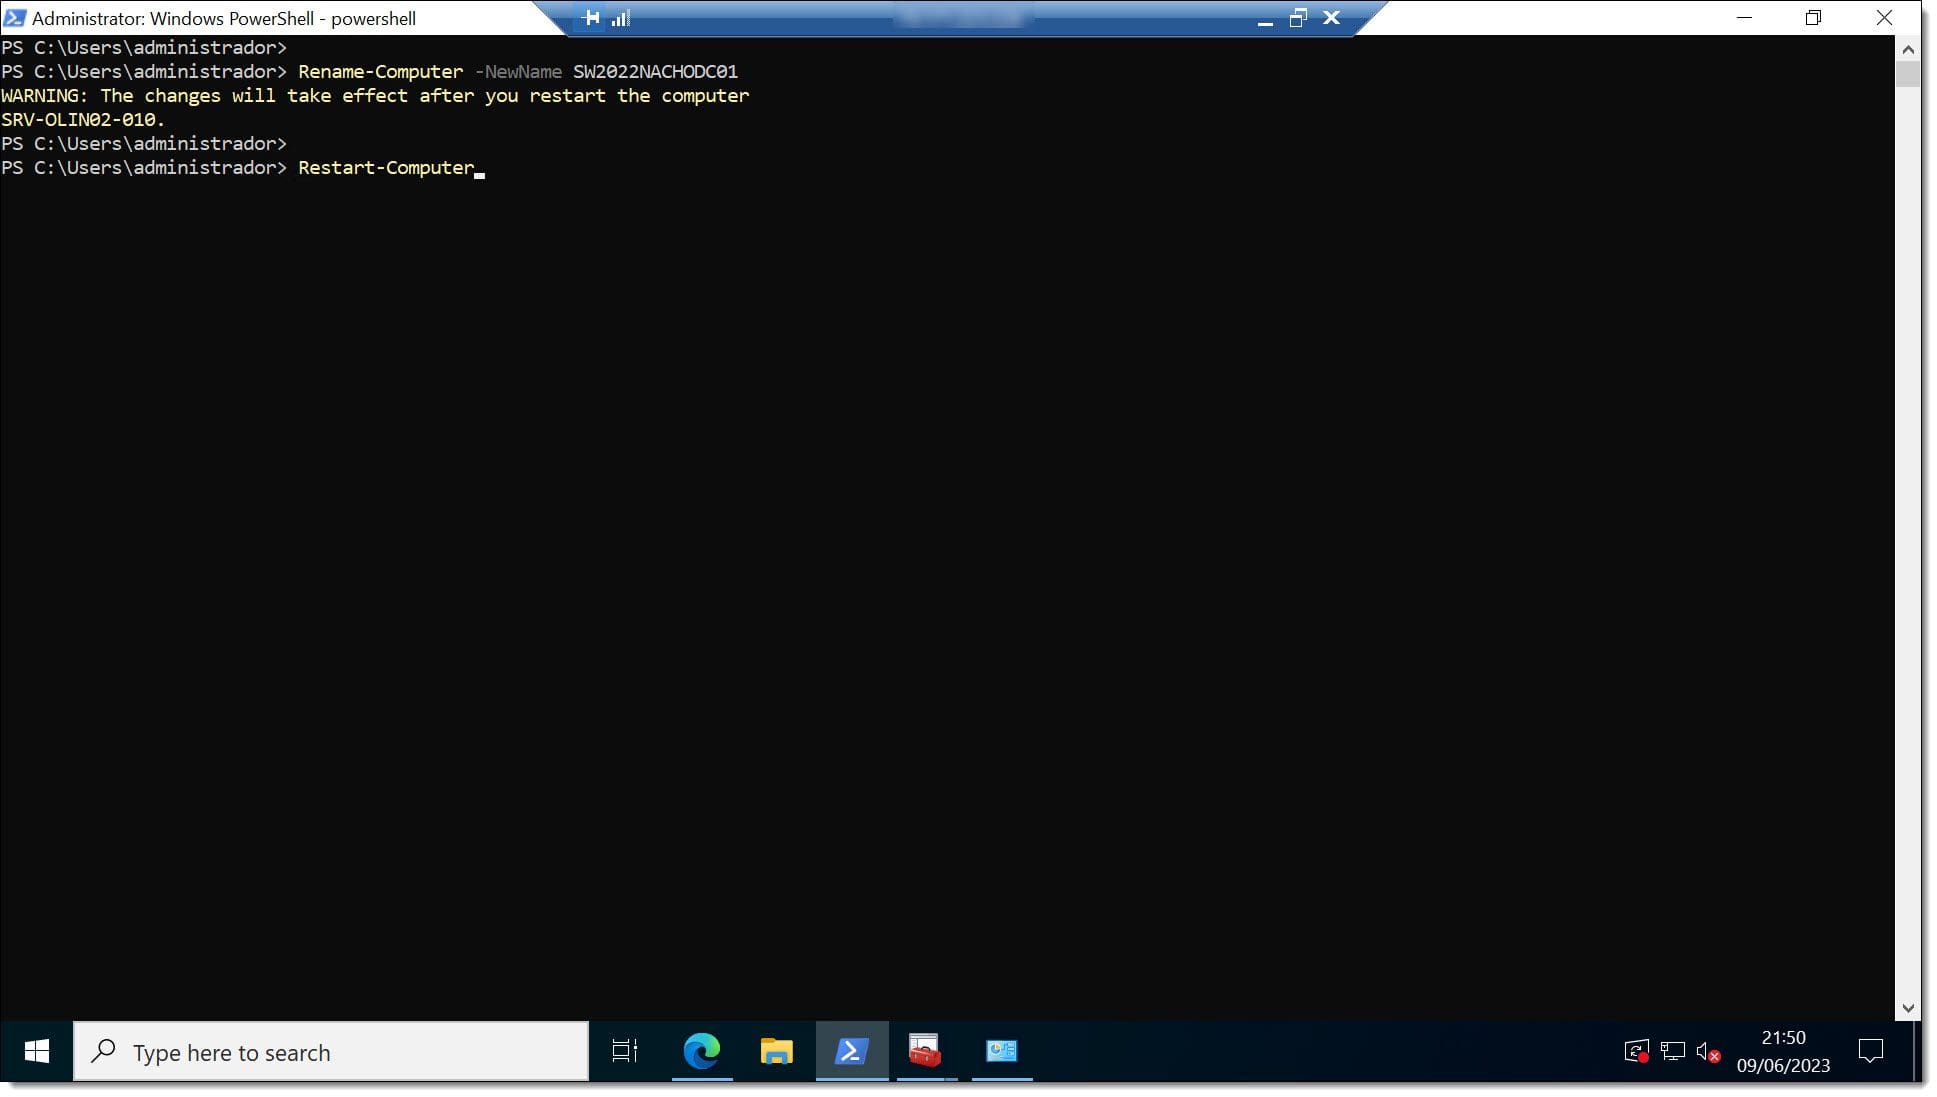
Once you know what you’re going to call your new device, you can set it using the following command:
# Rename-Computer -NewName <Server_Name>
Where…
- <Server_Name> is the name you intend to give to the server.
For example, this might look something like this:
# Rename-Computer -NewName SW22DHCPSERVER01
Then, you’ll need to restart the server for the change to take effect, which you can do using the following command:
# Restart-Computer

Part 2 – Adding the Server to an AD DS Domain Using PowerShell
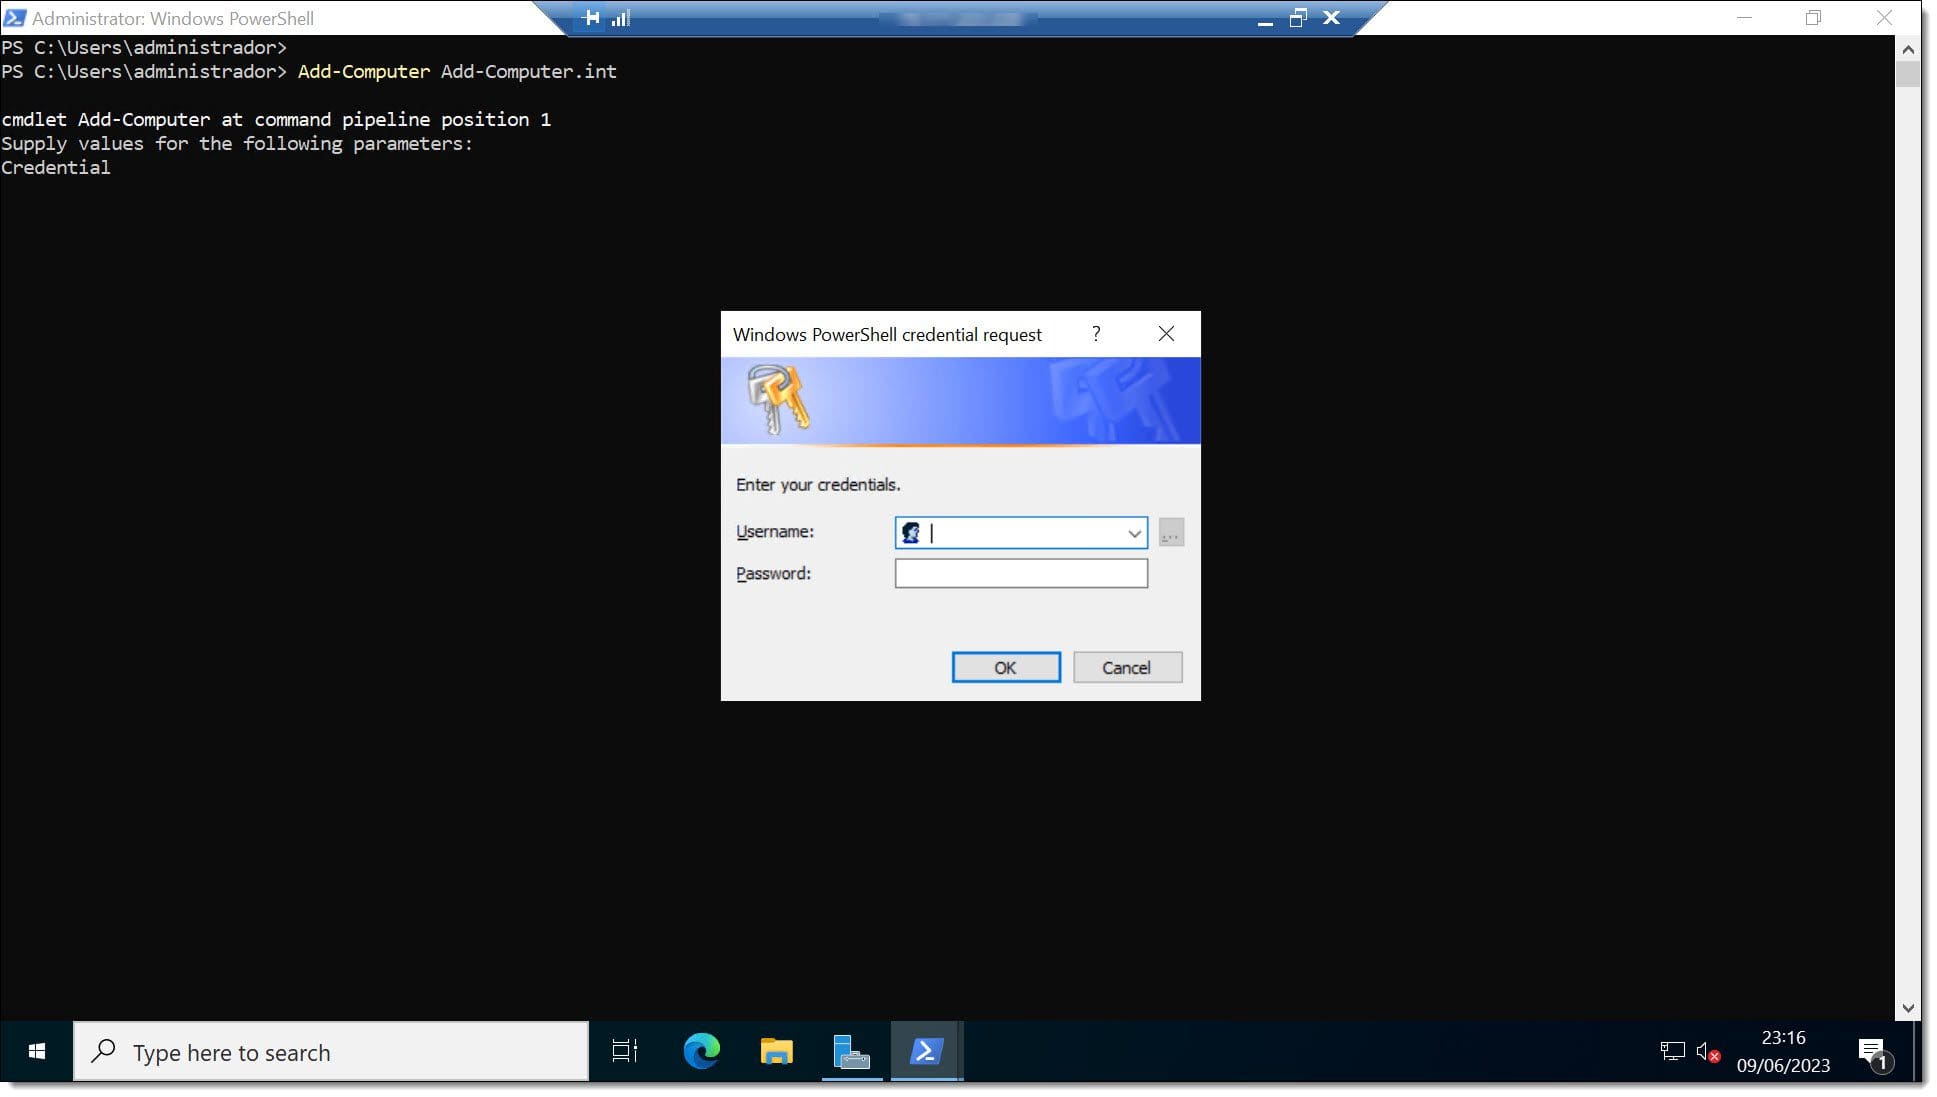
Now that you’ve named your server, it’s time to add it to your Active Directory domain. To do this, use the following command:
# Add-Computer <Domain>
Where…
- <Domain> is the domain that you want to add the server to.
For example:
# Add-Computer jotelulu.com
Once you’ve done this, you’ll need to restart the server again.
# Restart-Computer

Congratulations! Your server has now been joined to your Active Directory domain!
Summary
As you can see, it’s really easy to add any kind of machine to an AD DS domain using PowerShell, and you can also use PowerShell to run scripts for repetitive tasks. If you’d like to learn more about what you can do with AD DS, check out our blog for more articles and tutorials.
We hope that you’ve found this tutorial useful, but if you have any problems, don’t hesitate to contact us so we can help you.
Thanks for choosing Jotelulu!


