In this tutorial, you will learn how to register for an Object Storage to help manage large volumes of storage. All you need to do is set a quota and set up your users.
These days, businesses need increasingly more storage space to maintain and protect their security copies, application data, etc. The hardware to do this can cost serious amounts of money. To respond to this problem, Jotelulu has developed Object Storage, a cloud storage solution that allows businesses to store large volumes of data in an organised, secure and accessible way.
How to register for an Object Storage on Jotelulu?
Before you begin:
To successfully complete this tutorial, you will need:
- To be registered on the Jotelulu platform and have signed in using your username and password.
- To have an organisation on the platform with at least one registered user so that they can be linked to the Object Storage (this requirement can be considered optional since users can be created when deploying the service).
Step 1. Create and name the Object Storage
From the main dashboard, click either on Services on the top menu (1), the New Service button (2) or the Add Service card (3) and select Object Storage.

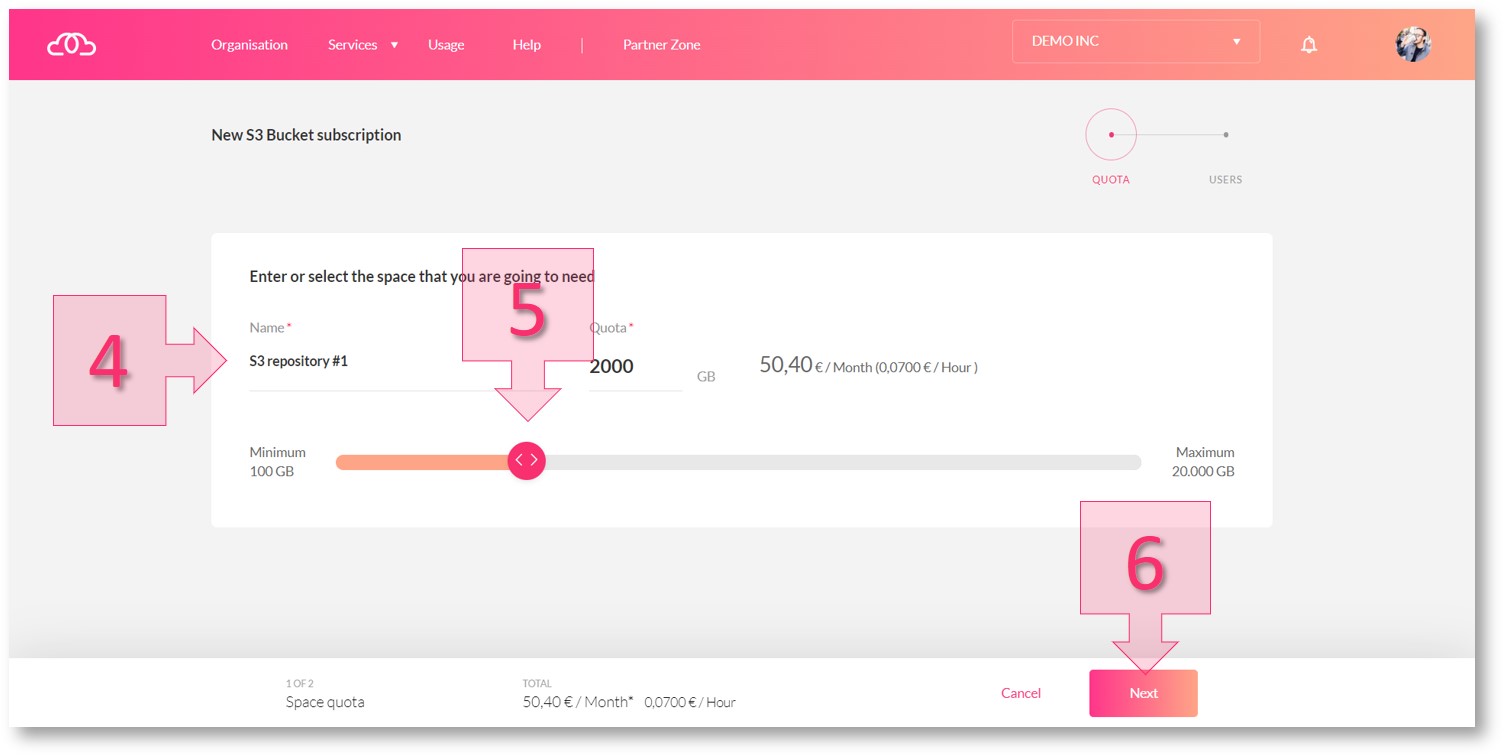
First, you will be required to enter a name for the subscription (4)* so that it will be easier to identify later. You will also need to set the storage quota for your bucket (5). Once you have done this, click on Next (6).
*Note: Due to system limitations, the name of the subscription must only contain letters and numbers and not contain any special symbols, capital letters or spaces.
Step 2. Choose the owner of the Object Storage
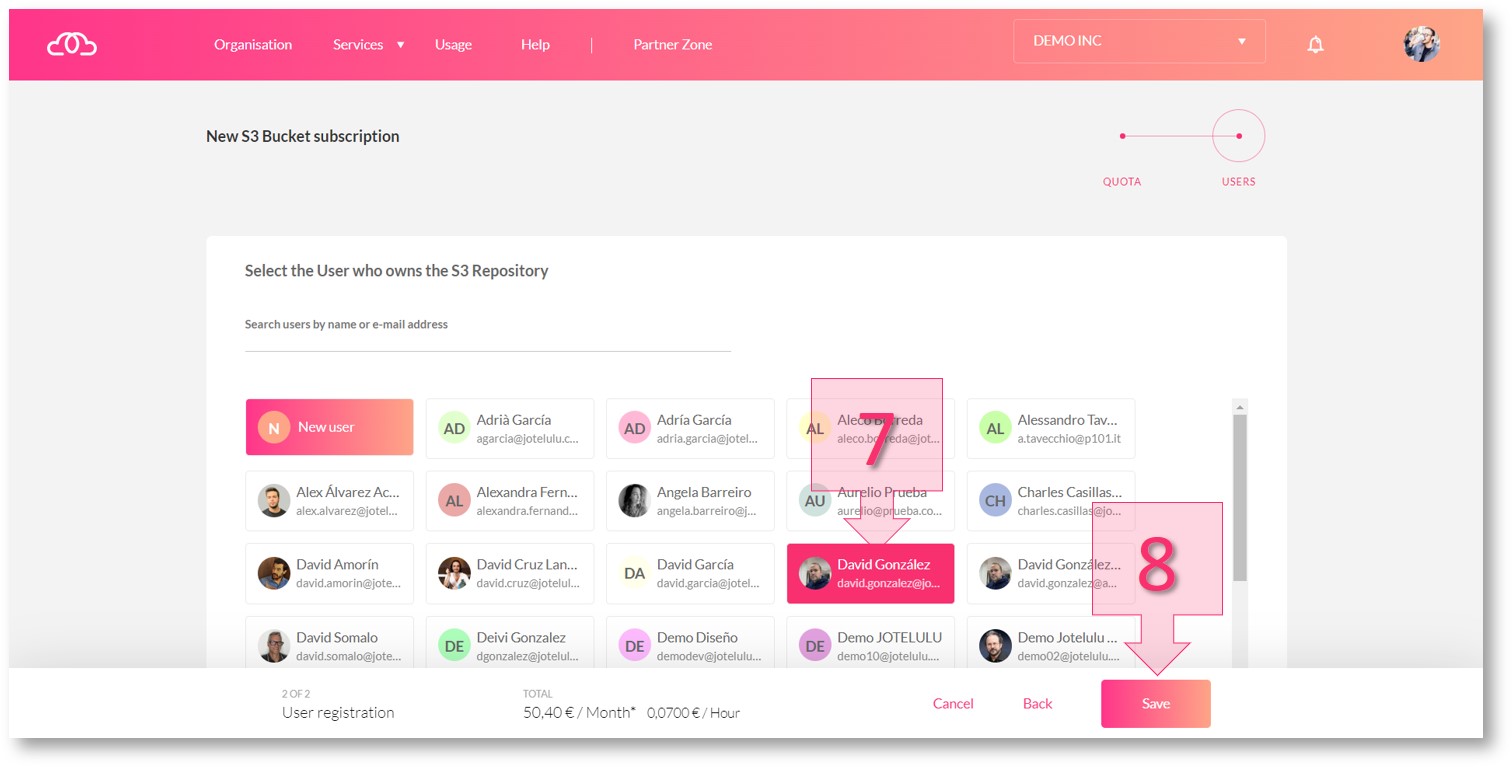
Next, you will need to choose a user to be the owner of the bucket. Being an owner means having complete control over the bucket, and it is only possible to have one owner per bucket. Choose an owner from the list of users shown (7).
Note: You will have to give specific permissions to any other user that needs to access the bucket. These will need to be added once the service has been deployed.
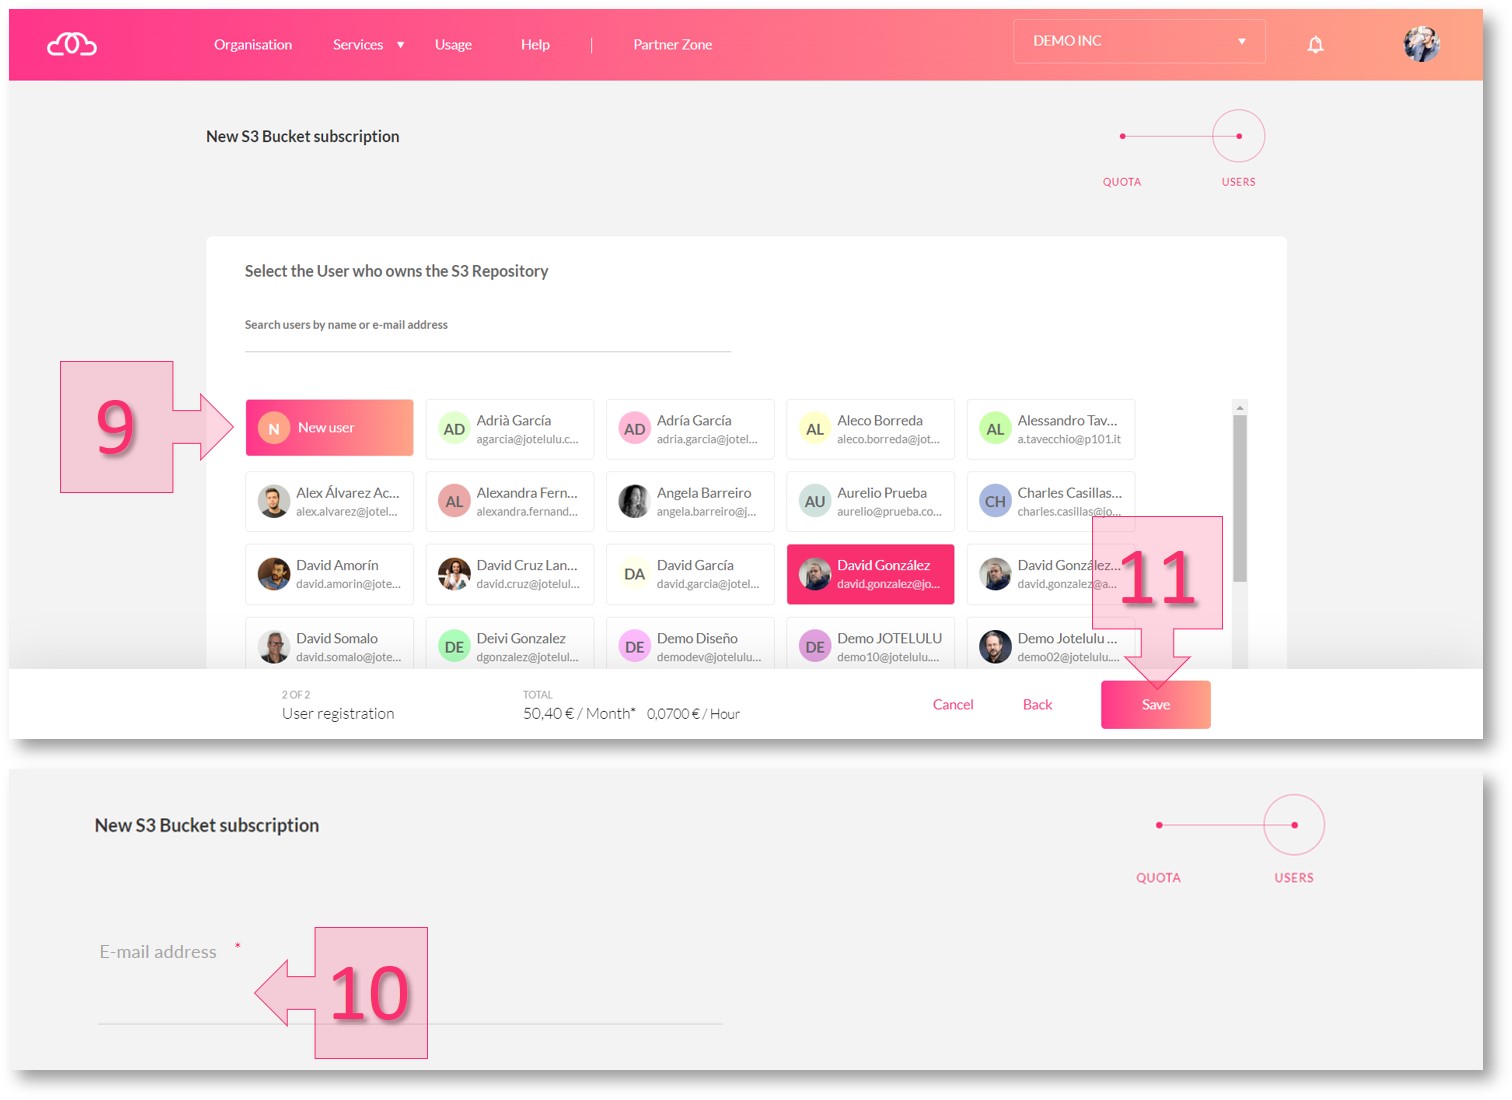
If the user that you want to be chosen as the owner has not yet been created, simply click on the New User button (9). Then enter their e-mail address (10) and other details (if the user is new on the platform).
Once you have chosen a user, click on Save (11).
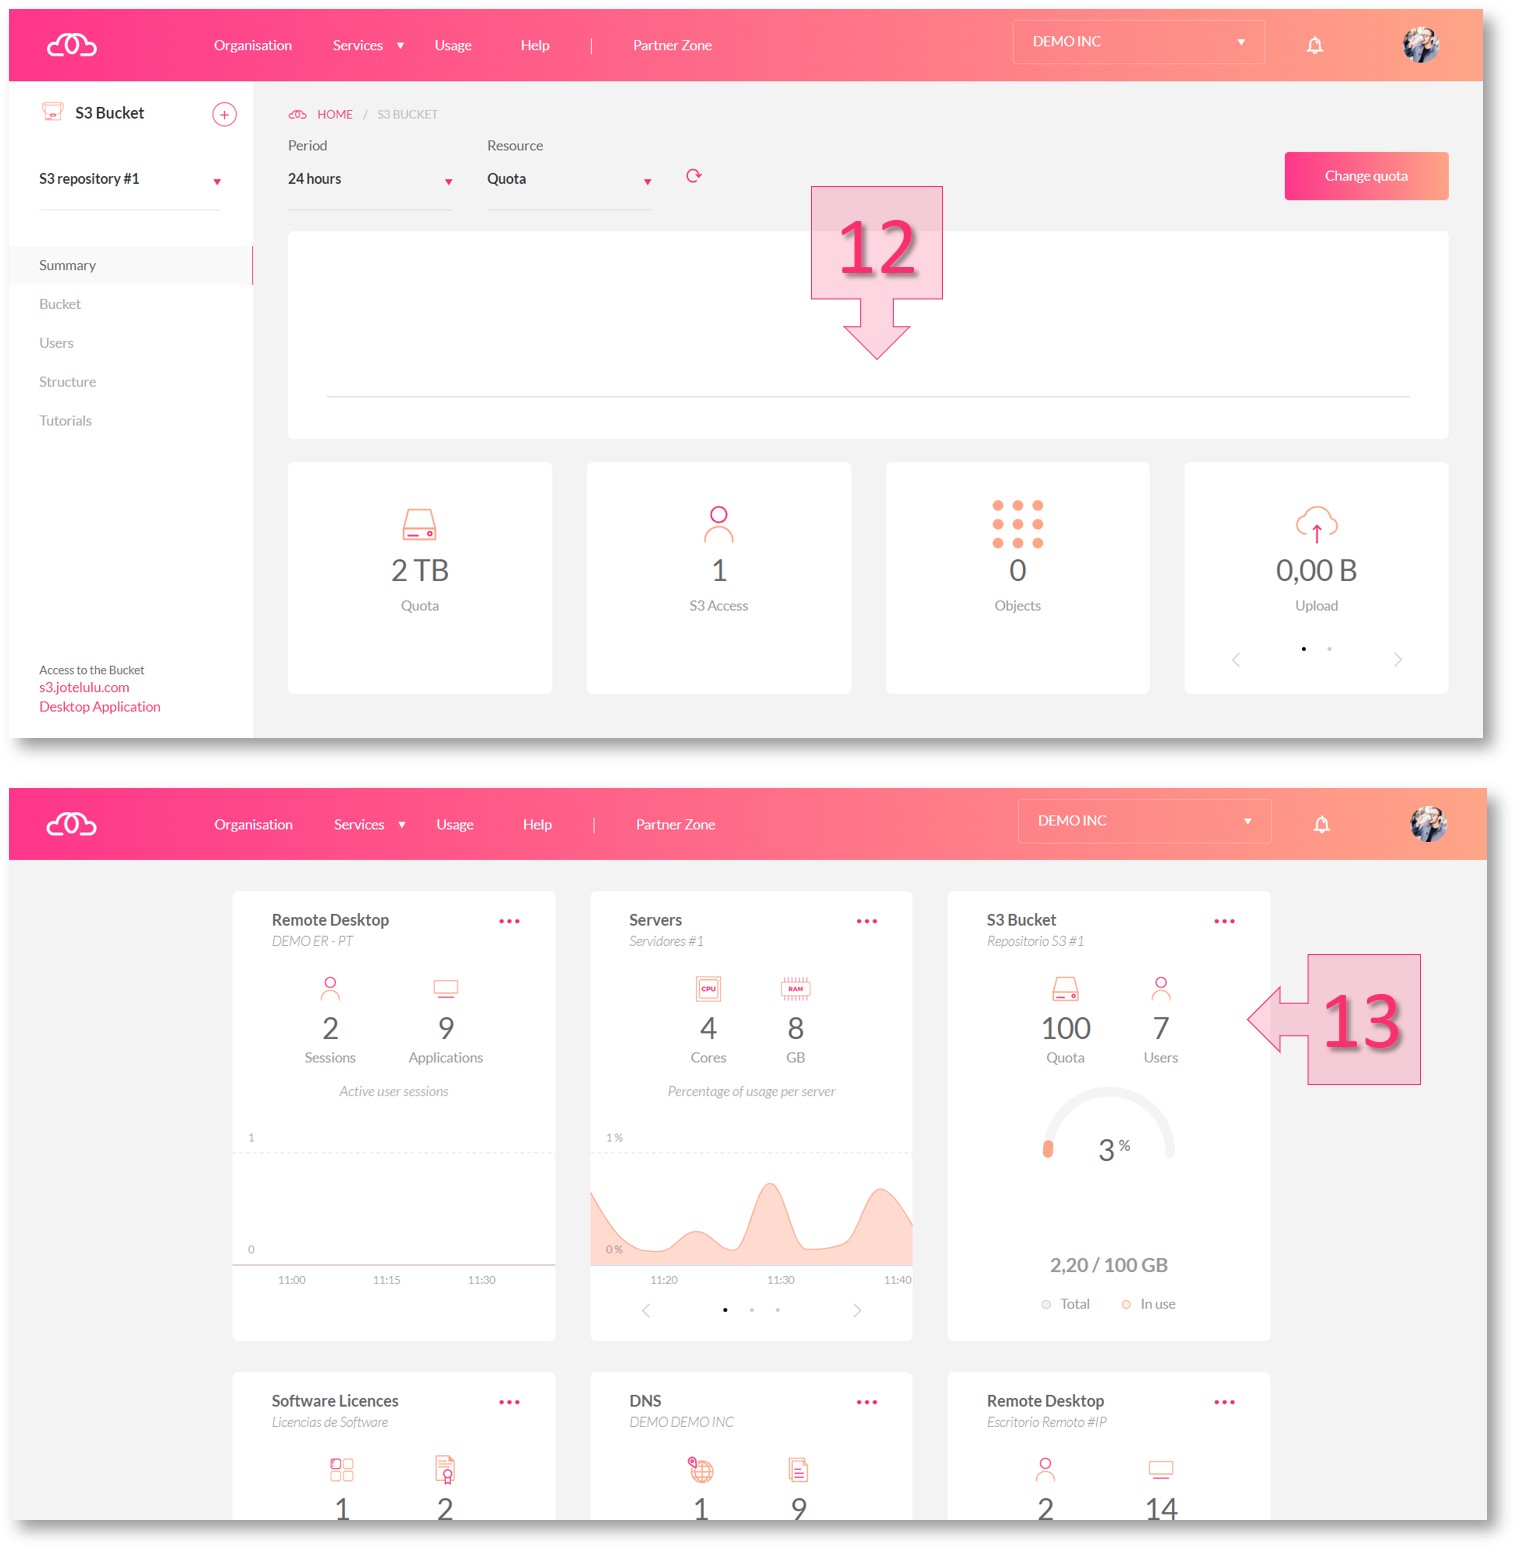
Your Object Storage will now have been created (12) and can be managed from the main dashboard (13).
Summary and next steps:
The process to register for an Object Storage is fully guided and can be completed in just a few steps.
Now that you have completed this tutorial, you may want to find out more about this service and its features. If so, the following tutorials may be of interest to you: