In this tutorial, you will learn how to map a Jotelulu Object Storage bucket to a QNAP in order to make a local copy of your data.
There may be times when you need to move data from your local environment to the Jotelulu cloud, such as to an Object Storage bucket, or vice versa. This could be for many reasons, such as being able to use a remote drive from different locations or simply to create a security copy of your data.
In this tutorial, we will explain how to map an Object Storage bucket to your QNAP cabinet.
How to map a Jotelulu Object Storage bucket to your QNAP cabinet
Before you get started
To successfully complete this tutorial and map your Object Storage, you will need:
- To be registered on the Jotelulu platform and have logged in.
- To have permissions to deploy Object Storage.
- To have an operational QNAP cabinet with internet access and have administrator access.
NOTE: For this tutorial, we have used a QNAP TS-x73A. If you have a different model, there may be small differences in the procedure.
Mapping your Object Storage to a QNAP
The first thing that you will need to do is open the application HybridMount in order to connect the Jotelulu Object Storage. You may need to install the application on the cabinet first. To do this, open the QNAP App Center, search for “HybridMount” and install it. This is a fairly simple process and there exists plenty of related documentation. Even so, you can always get in touch with our support team if you have any issues.
Once you have installed the application, you will see it on the cabinet desktop. Click on it to launch the program (1) and begin the process.
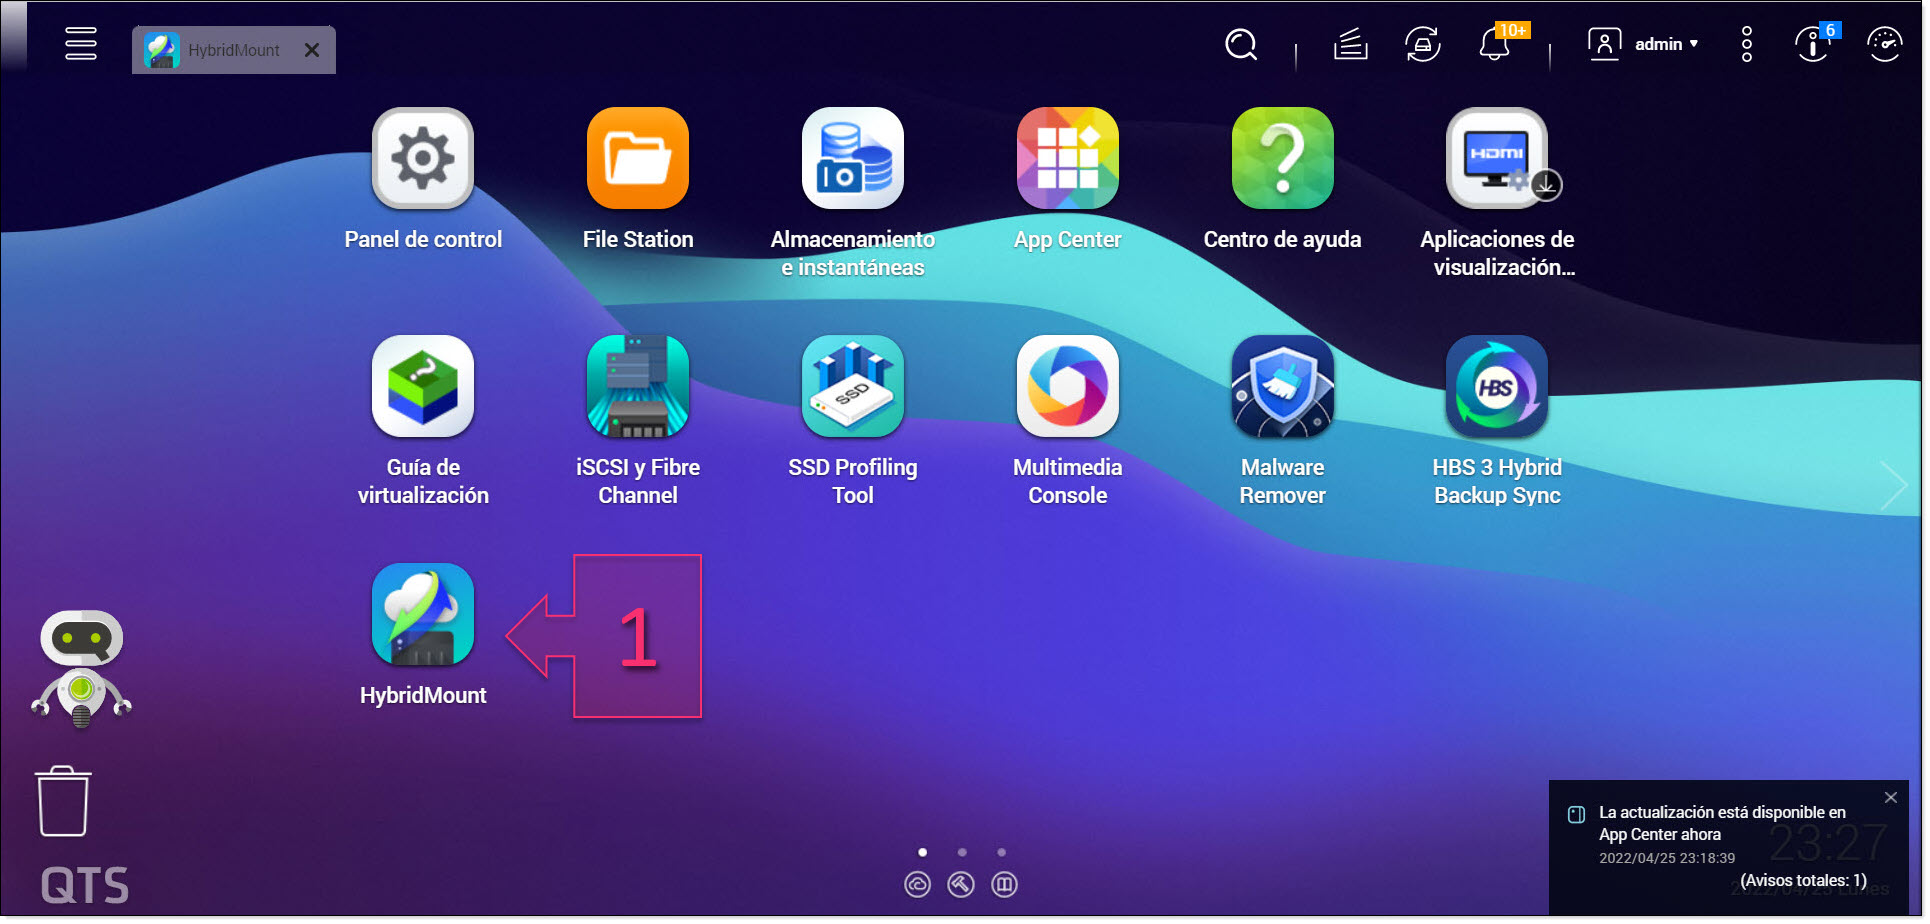
Run HybridMount
Next, click on the “Mount Management” section and click on “Create Remote Mount” at the bottom of the screen (2).
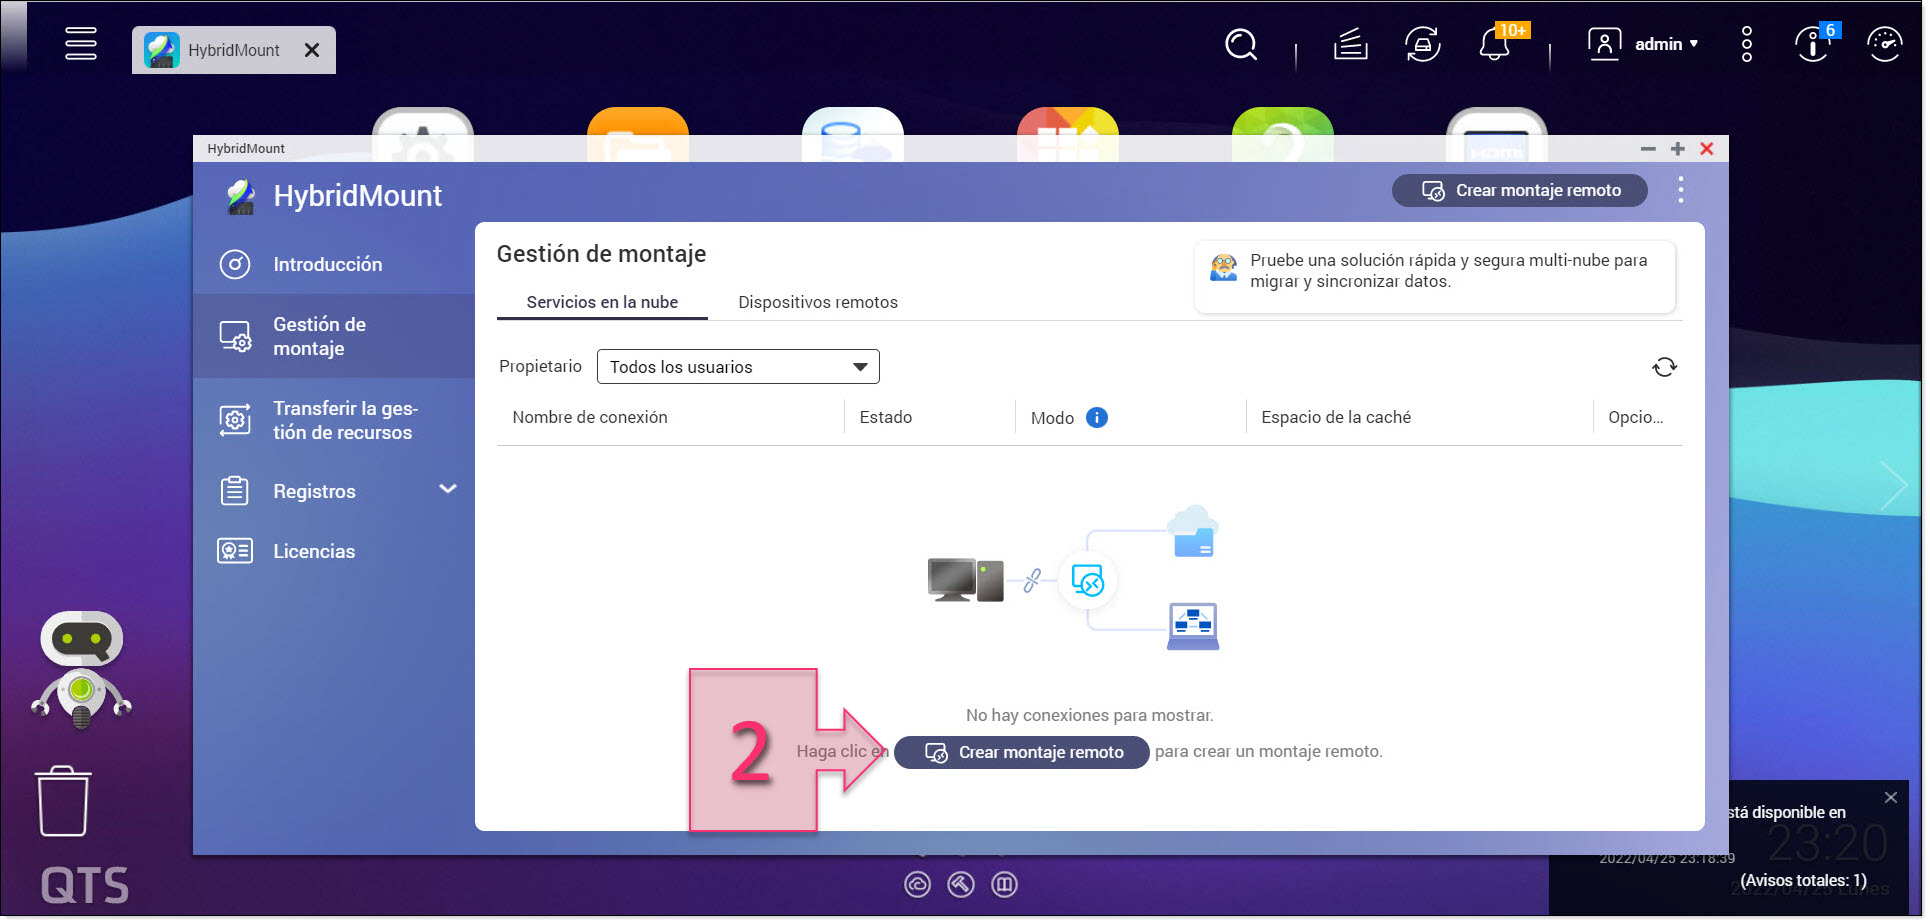
Create a mount point
This will launch the Remote Mount Creation Wizard. Next, click on “Create Network Drive Mount” (3).
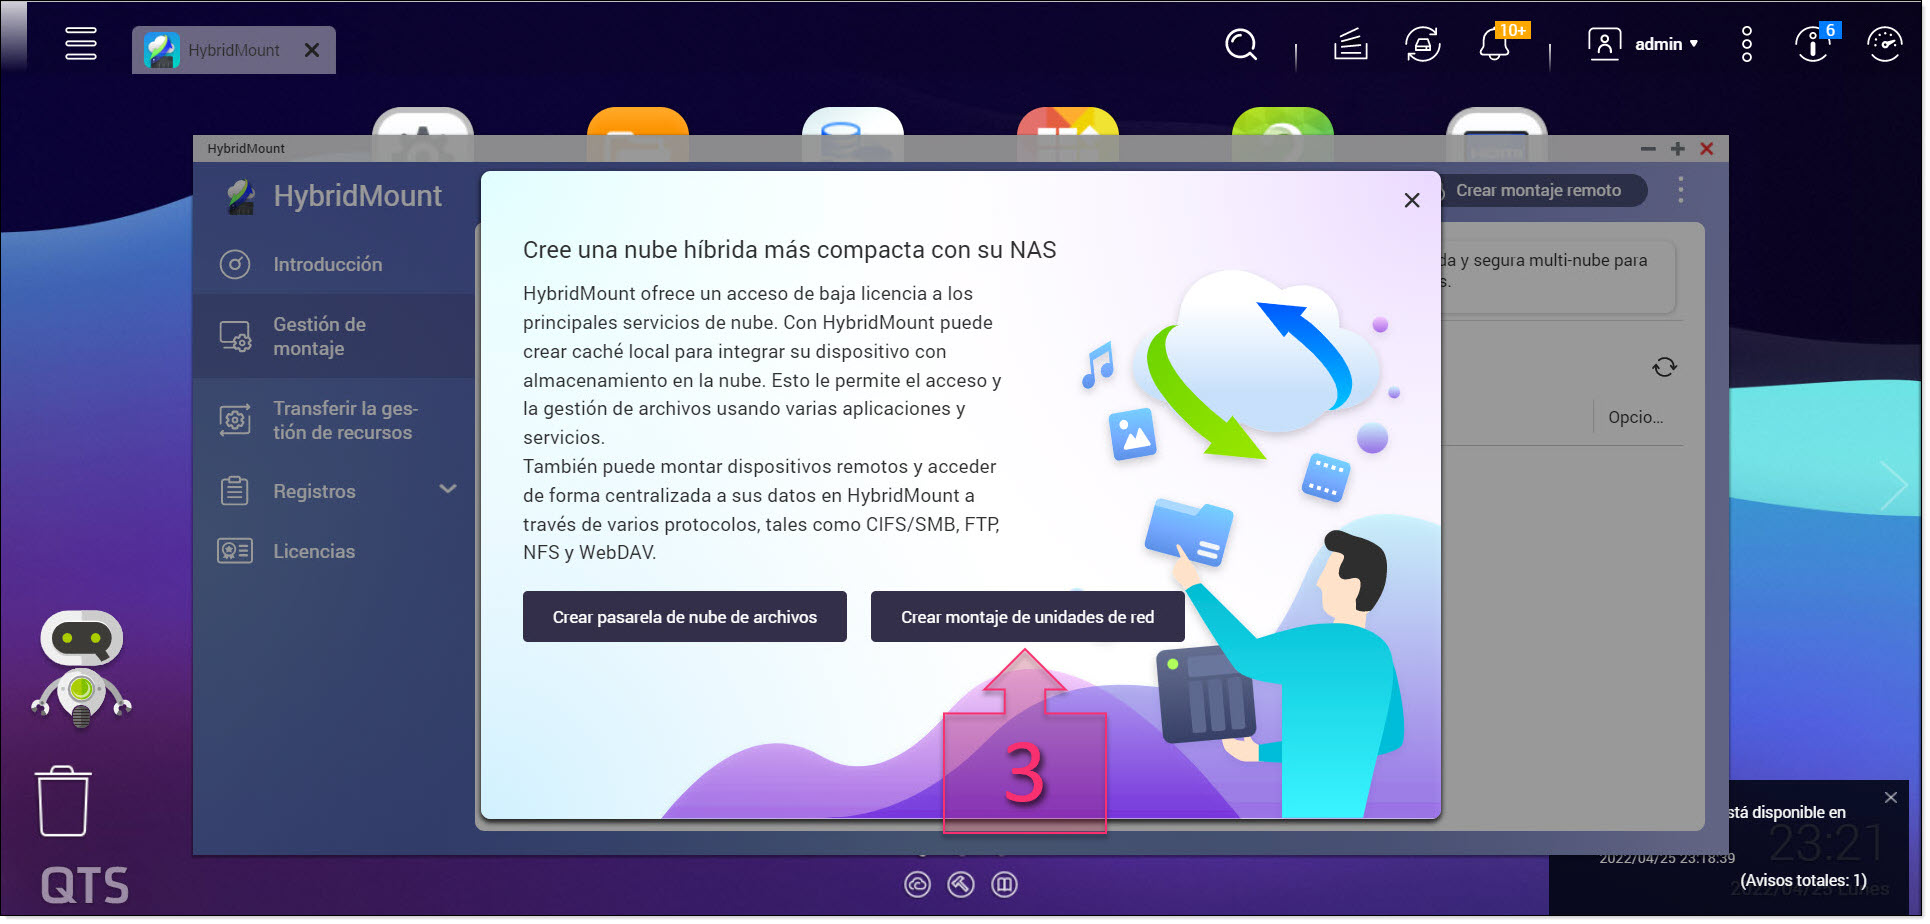
Creating a mount point
On the next screen, click on “Cloud service” (4) and select “S3 Compatible” from the drop-down list (5).
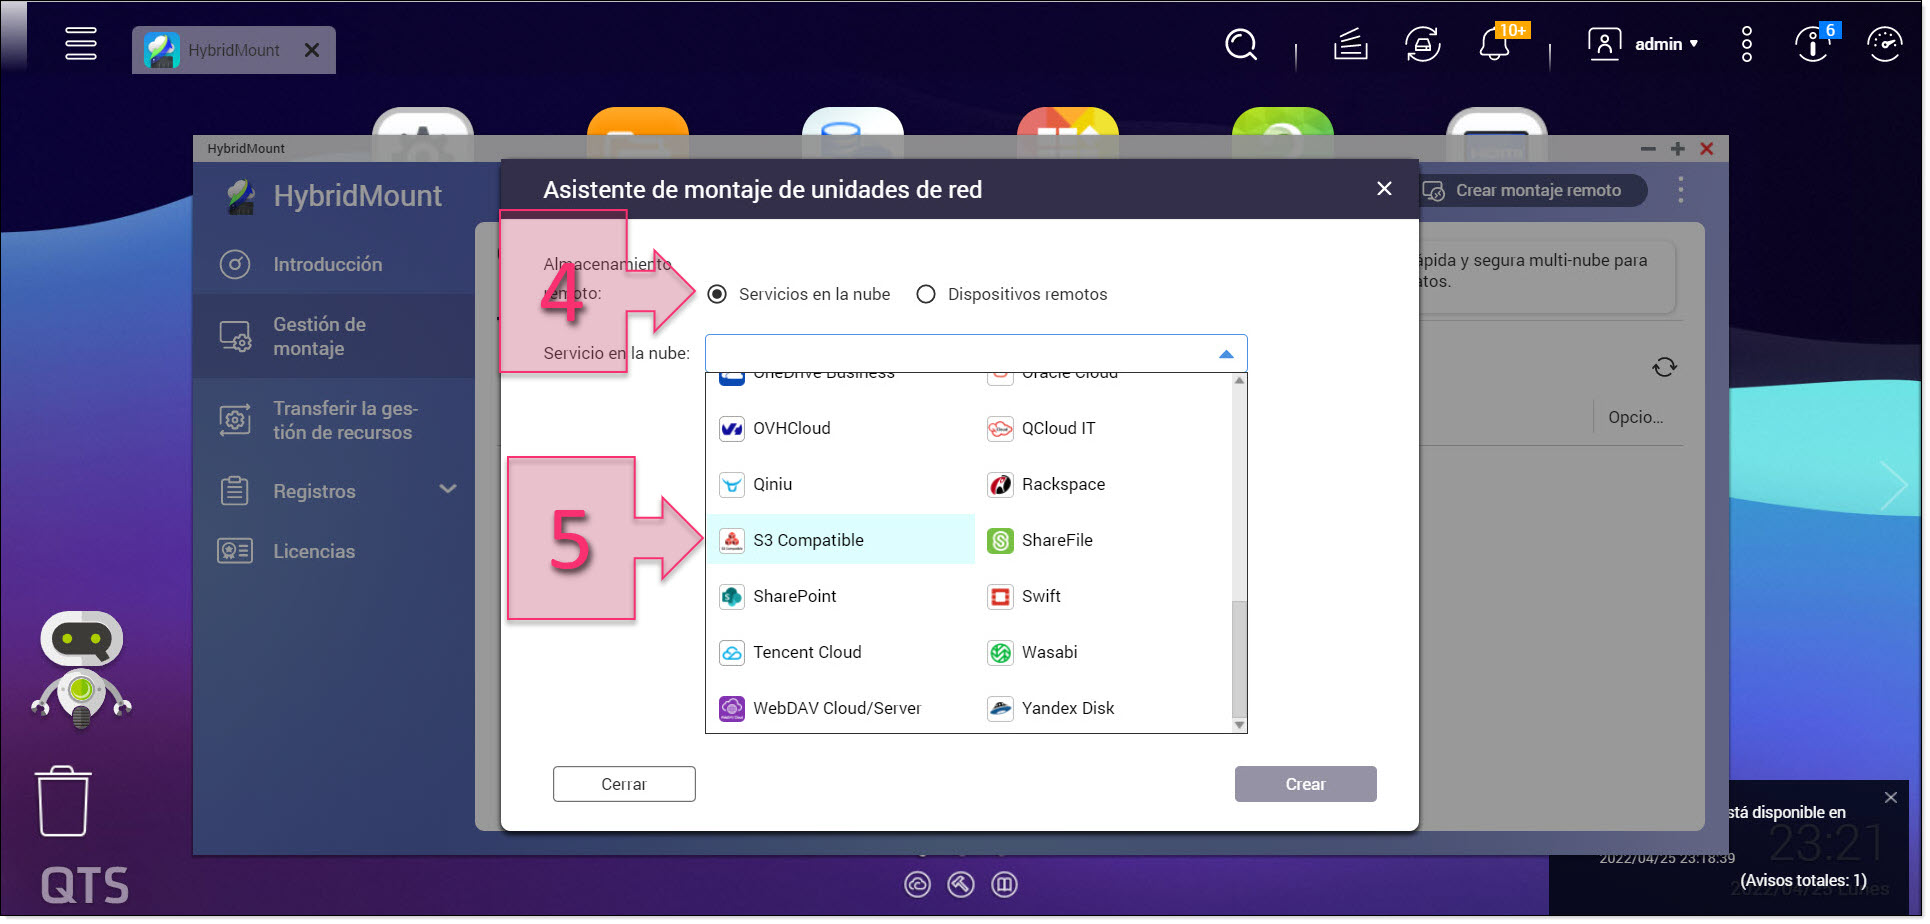
Select “Cloud service” and “S3 compatible”
NOTE: There are plans to add a Jotelulu Object Storage application to the QNAP marketplace, but until then, we are going to use the S3 Compatible option.
At this point, you will need to enter the details required to establish a connection.
You will be asked for the following information (6), which you will need to find on the Object Storage section of the Jotelulu platform:
- Access Key: Enter the key for the Object Storage bucket you wish to connect to.
- Secret Key: Enter the key for the Object Storage bucket you wish to connect to.
- Server Address: Enter “s3.jotelulu.com”, which is basically what the S3 service shows but deleting the “https://” at the beginning.
- Signature Version: Select “V2”, though this should already be the default setting.
- Enable SSL: Mark this tickbox.
- Validate SSL Certificate: Mark this tickbox.
- Device Name: Put the name of the Bucket, using the details from the Jotelulu platform.
- Partition Size: Can be left as 128 MB.
- Load threshold of various partitions: Can be left as 128 MB.
- Connection Name: This should be filled in automatically, but you can change it if you wish.
- Destination Folder: It is possible to limit access by only selecting the Object Storage partition that you want to share. In this tutorial, we will configure access to everything and select “All folders”.
- Use System Proxy Settings: Mark this tickbox.
Next, click on “Create” (7).
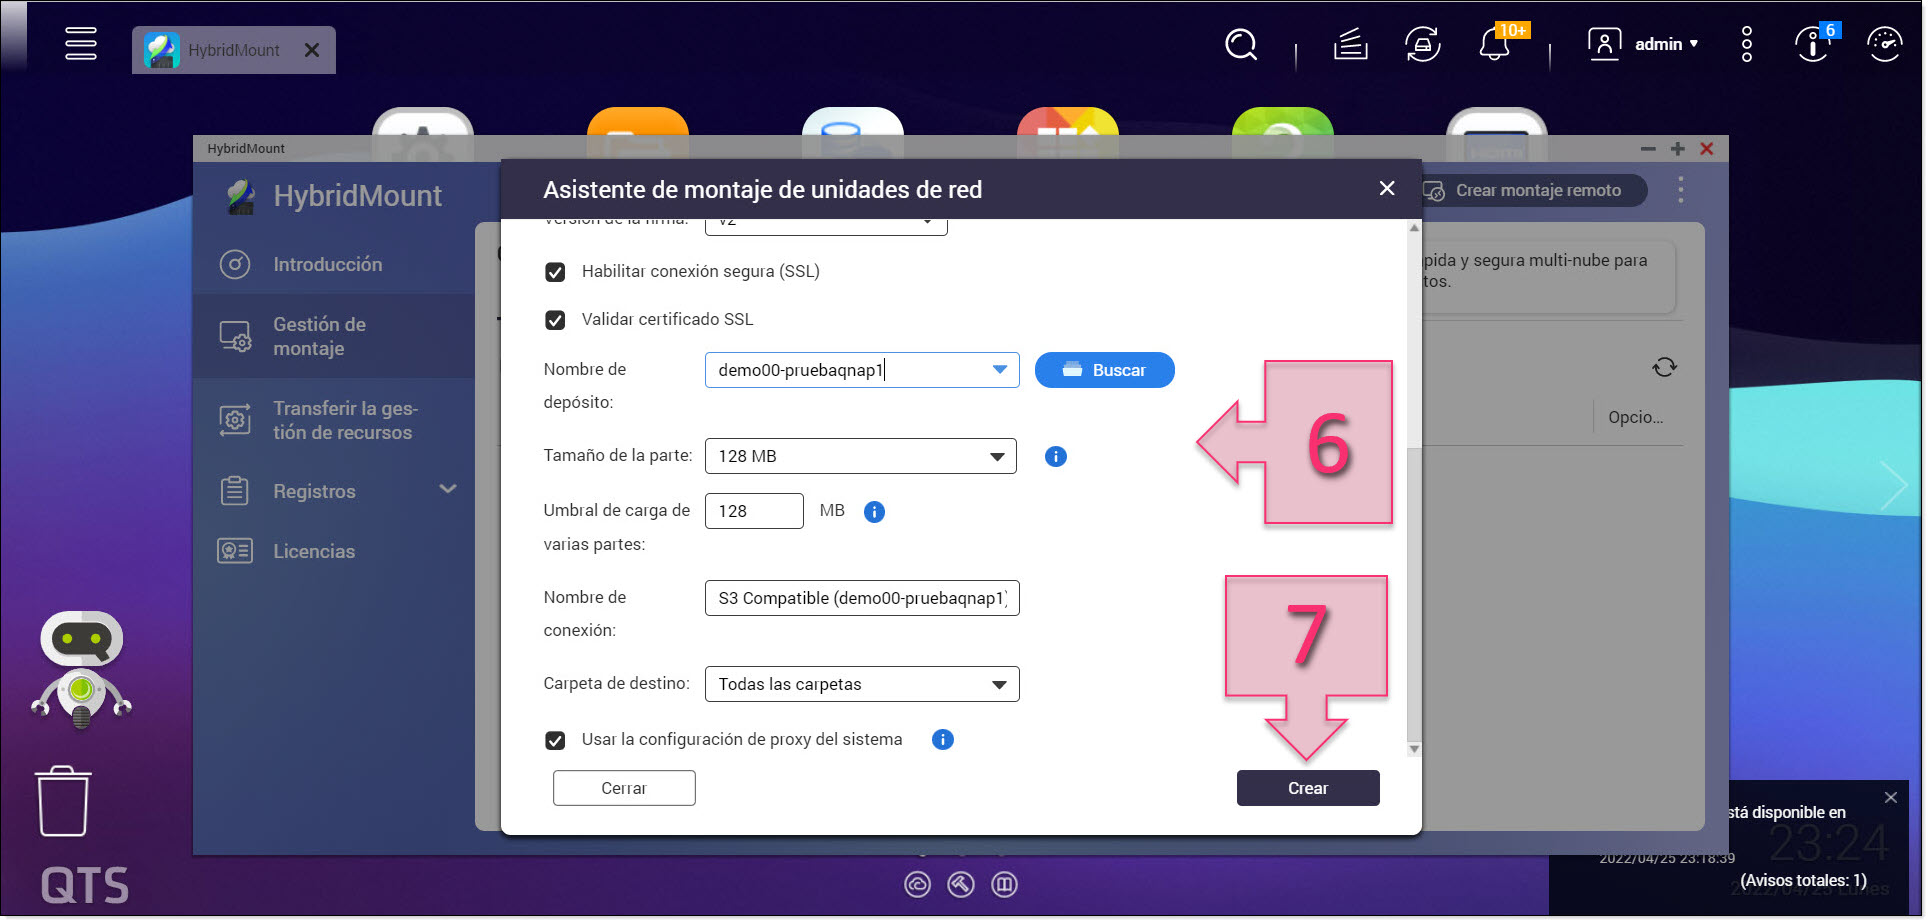
Enter the required S3 details
On the next screen, you will see the message “You can now manage remote data through FileStation when this connection is mounted”.
Then, after a few seconds, you will see the information about the access being created.
It is now possible to mount new Object Storage by clicking on “Create more”. If you do not wish to establish any new connections, simply click on “Close” (8).
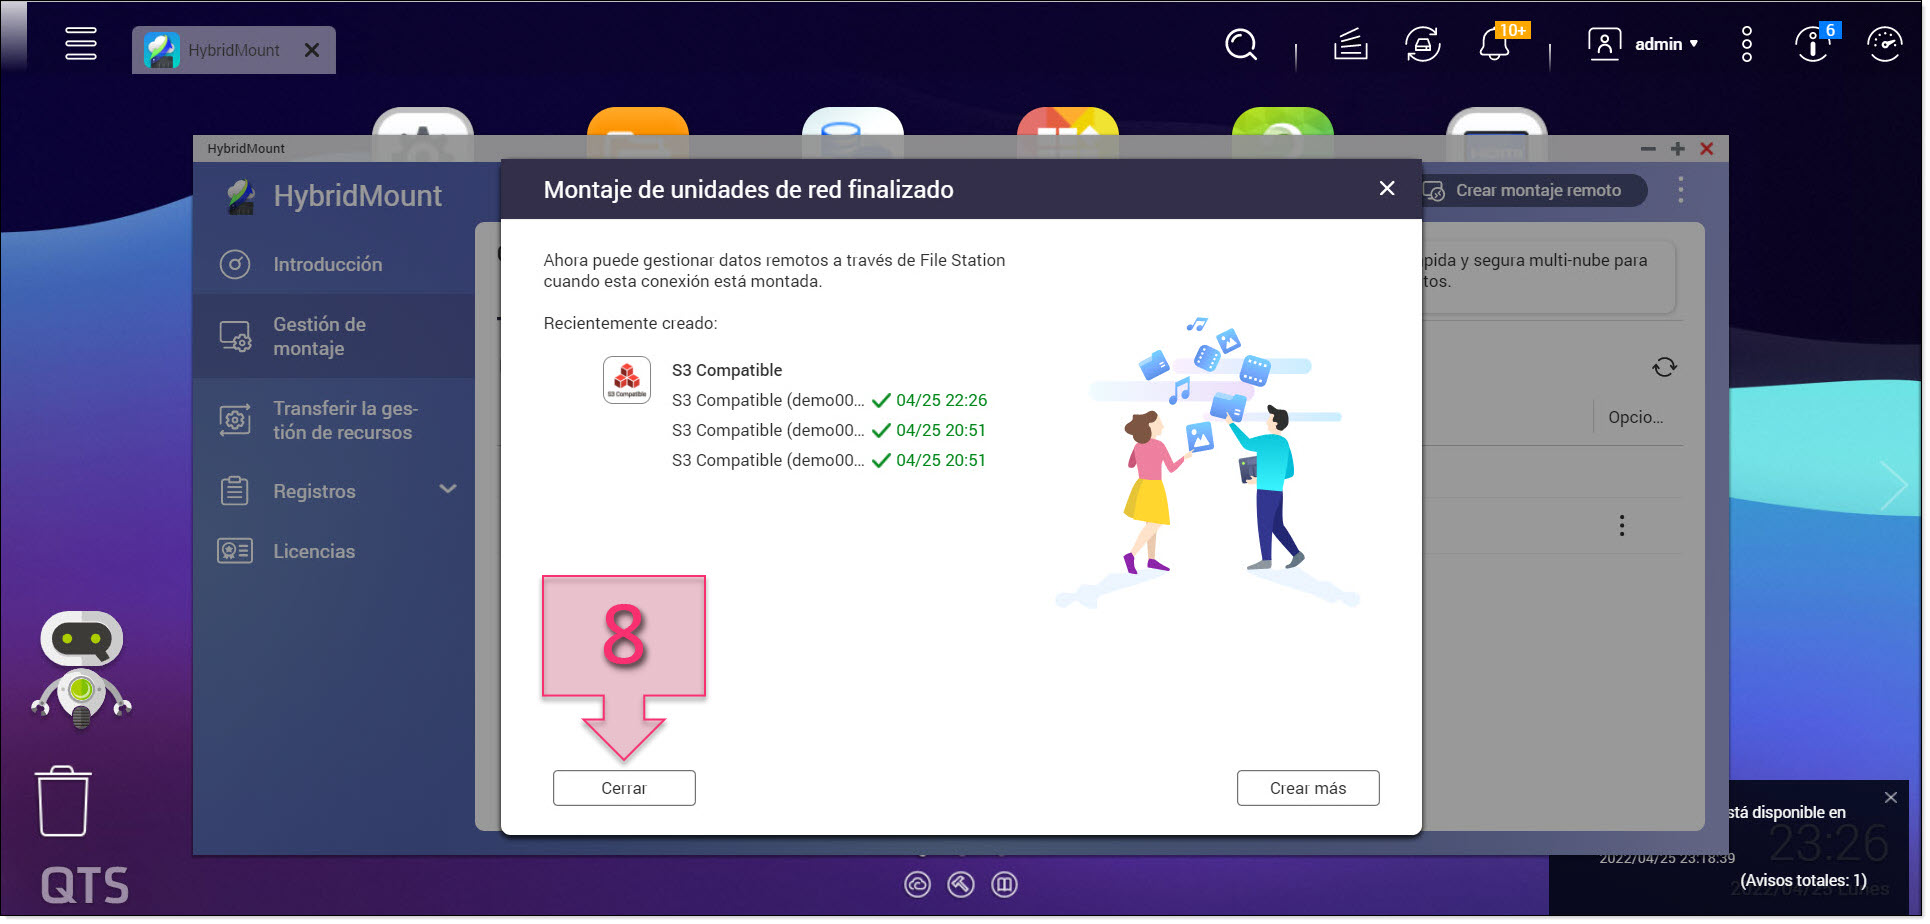
Synchronising the S3 connection
At this point, it is a good idea to open the “Mount Management” section in HybridMount and check that you are able to see the new S3 mount point. Here, you will also be able to disable the mount point.
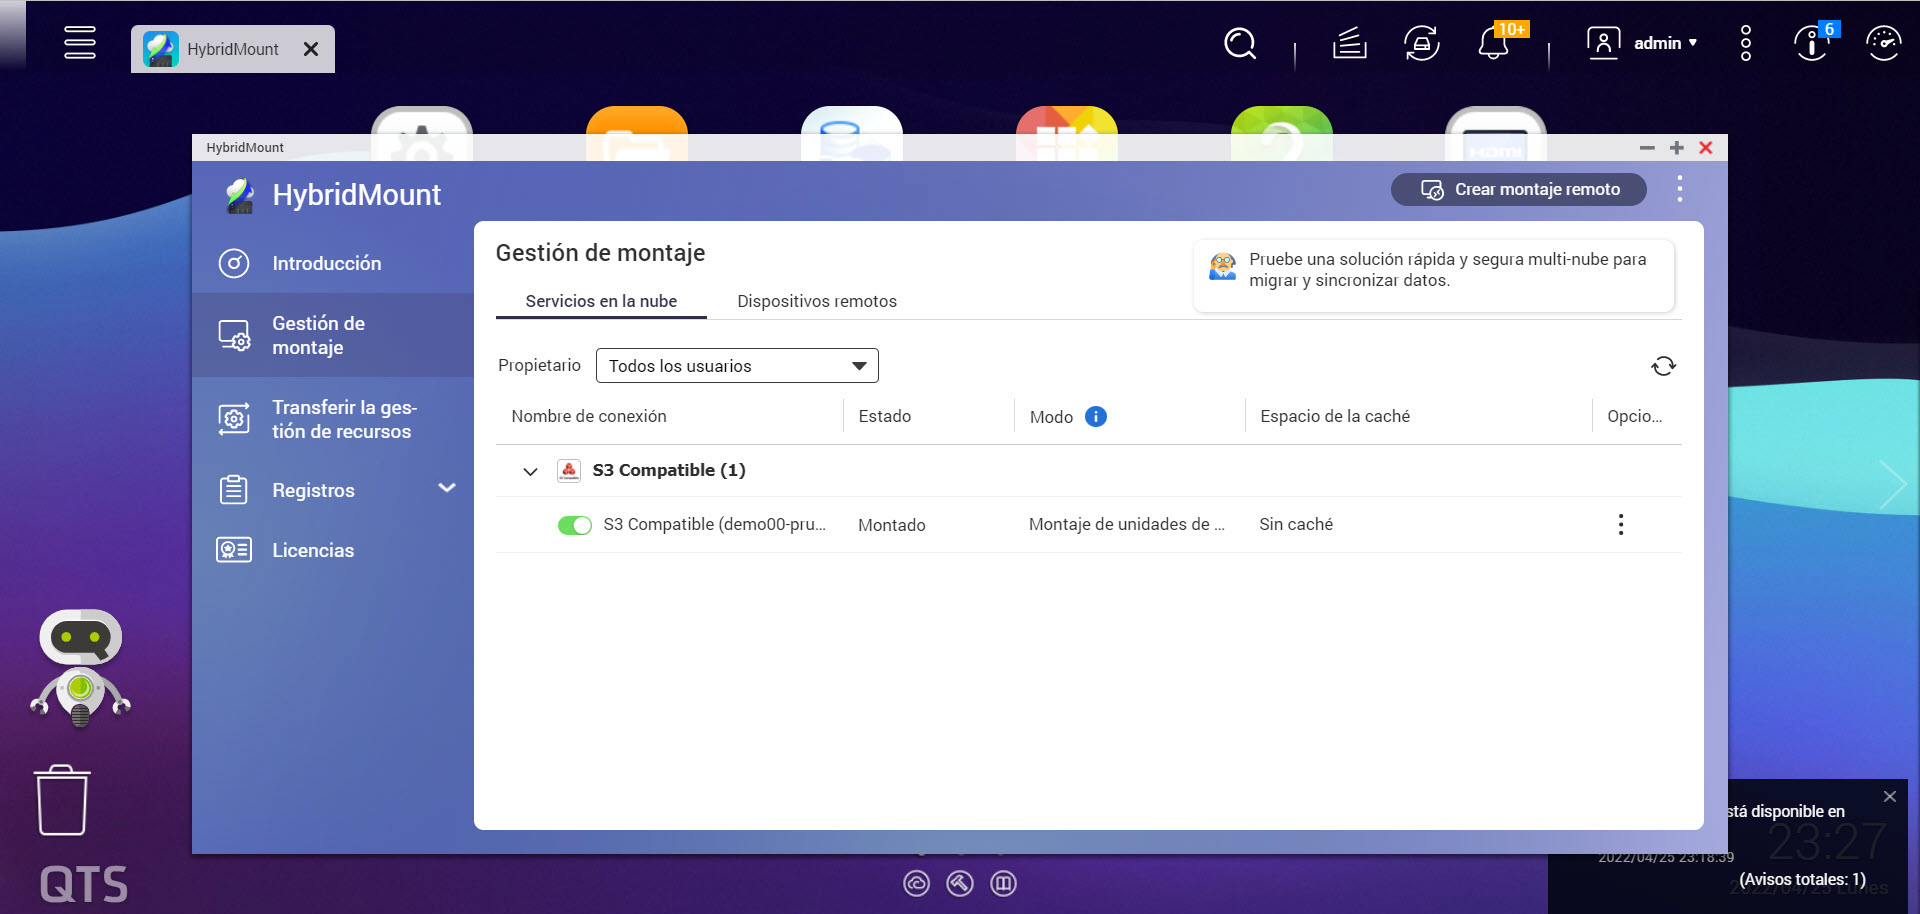
The mount has been created
Next, open FileStation (9), where you will be able to browse all the disks and storage mounted on the cabinet. Here, you should now see the Object Storage bucket that you have just mapped.

Run FileStation
Once you have opened FileStation, on the left-hand side of the screen, you will see the tree of connected drives (10). At the bottom, you should see the S3 bucket. If you do not see the S3 bucket, we recommend that you expand the tree completely so that it updates or restart the application to refresh the data.
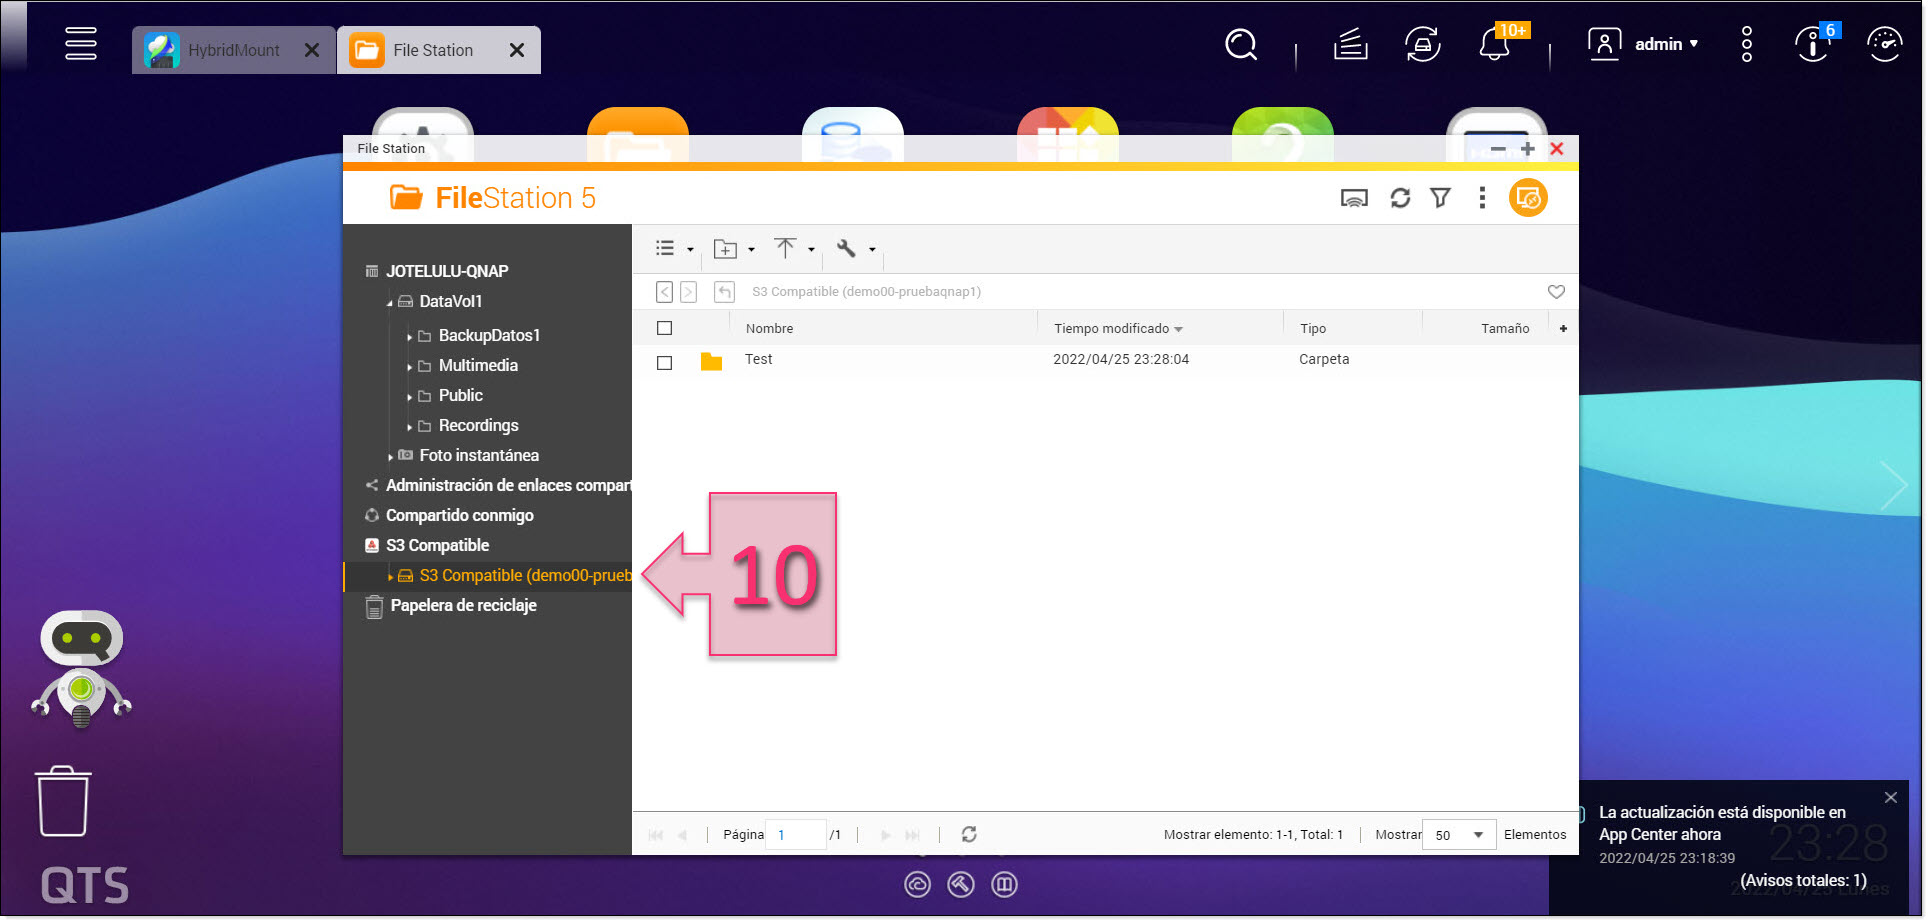
Check that the Object Storage can be accessed from File Station
You have now successfully mapped your Object Storage bucket to your QNAP cabinet.
Conclusions and next steps:
As you can see, mapping a Jotelulu Object Storage to a QNAP cabinet is extremely straightforward and can be an effective way of managing data and backups.
We hope that you have found this tutorial useful. However, if you have any other issues or technical questions, please don’t hesitate to contact us by writing to plataforma@jotelulu.com or calling +34 911 333 710.
Many thanks for choosing Jotelulu!

