In this tutorial, you will learn how to manually copy your Jotelulu Object Storage bucket to a QNAP NAS to create a local backup of your data.
There might be times when you would like to make a local copy of the data you have stored on the cloud. This might be so that you can perform some checks, or maybe you would just feel more reassured if you also had your own physical backup.
In this tutorial, we will briefly explain how to copy your Jotelulu Object Storage to a QNAP NAS.
How to manually copy a Jotelulu Object Storage bucket to a QNAP NAS
NOTE: For this tutorial, we have used a QNAP TS-x73A. If you use a different model, it’s possible that there will be small differences.
Before you get started
To successfully complete this tutorial and manually copy your Object Storage bucket to a QNAP NAS, you will need:
- To be registered on the Jotelulu platform and have logged in.
- To have previously mapped your Object Storage on the QNAP system. To do this, please review the tutorial titled “How to Map a Jotelulu Object Storage Bucket on a QNAP System”.
- To have an operational QNAP cabinet connected to the internet and have administrator access.
Manually copying data using FileStation
For the purposes of this tutorial, we have assumed that the user has already deployed the Object Storage service on Jotelulu and has configured their QNAP system to access the service (see requirements above).
Once everything has been prepared, the first thing you will need to do is access your Object Storage and establish what data you wish to copy.
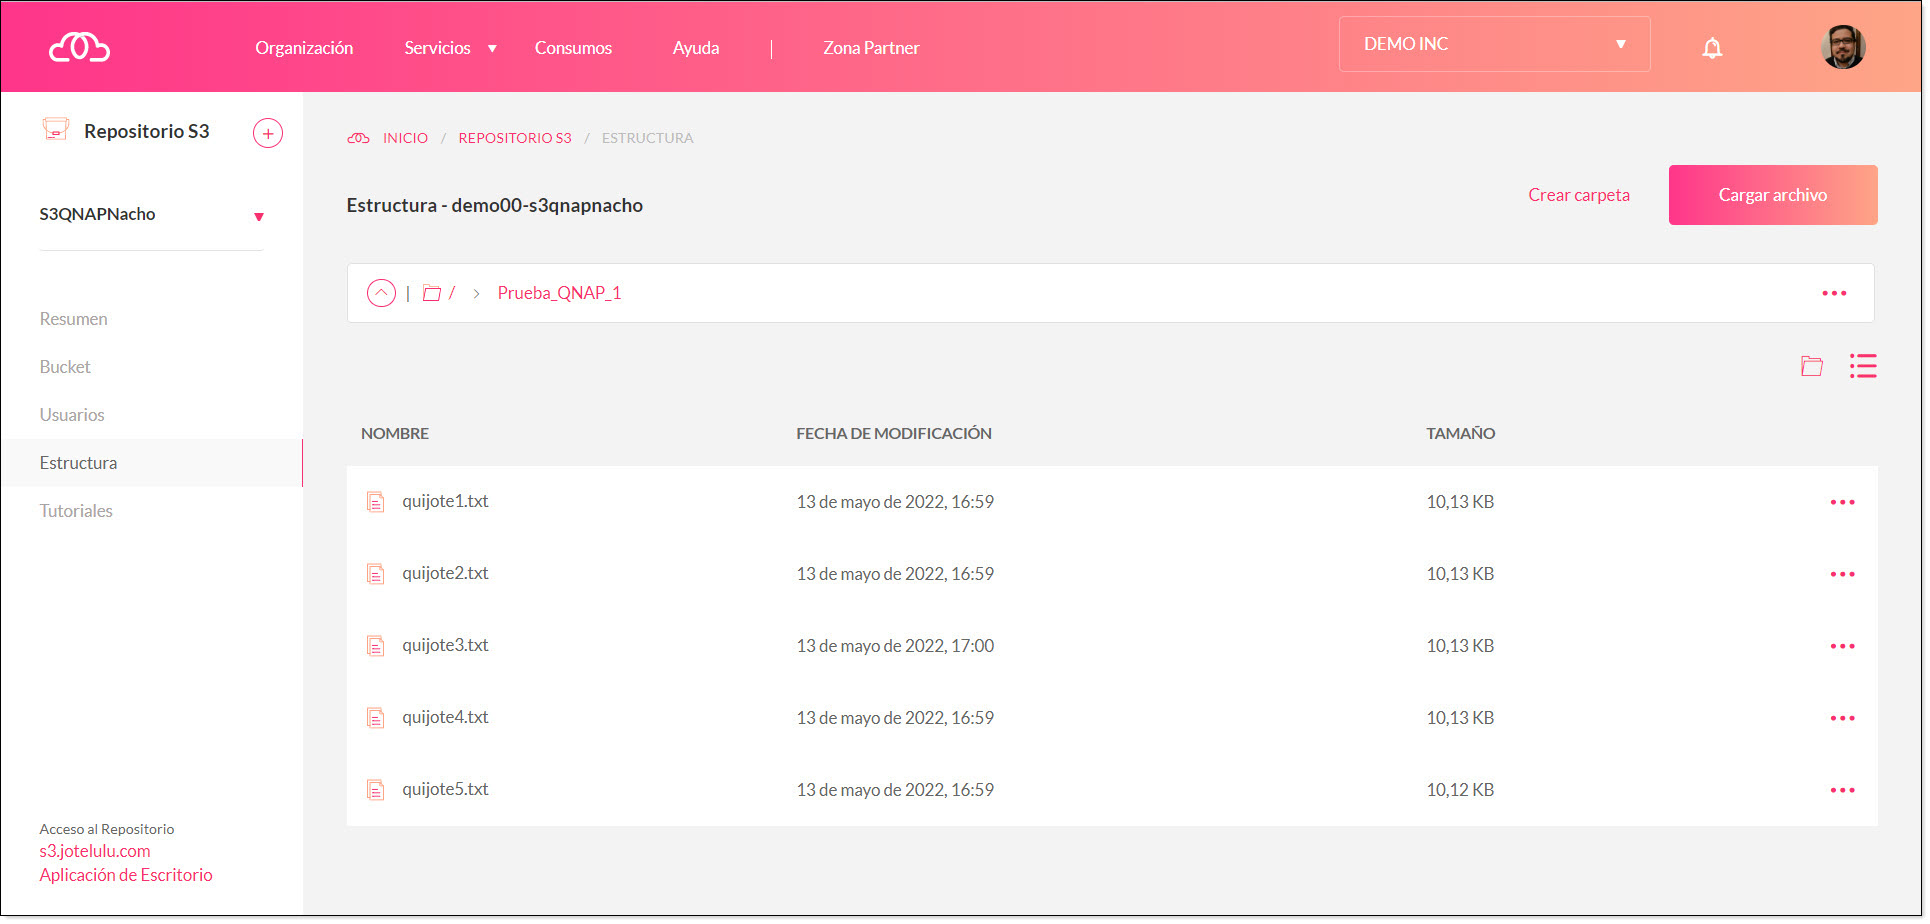
Viewing the files stored on the Object Storage
Then, open FileStation from the QNAP management console and browse to the resource that you wish to copy to the QNAP NAS.
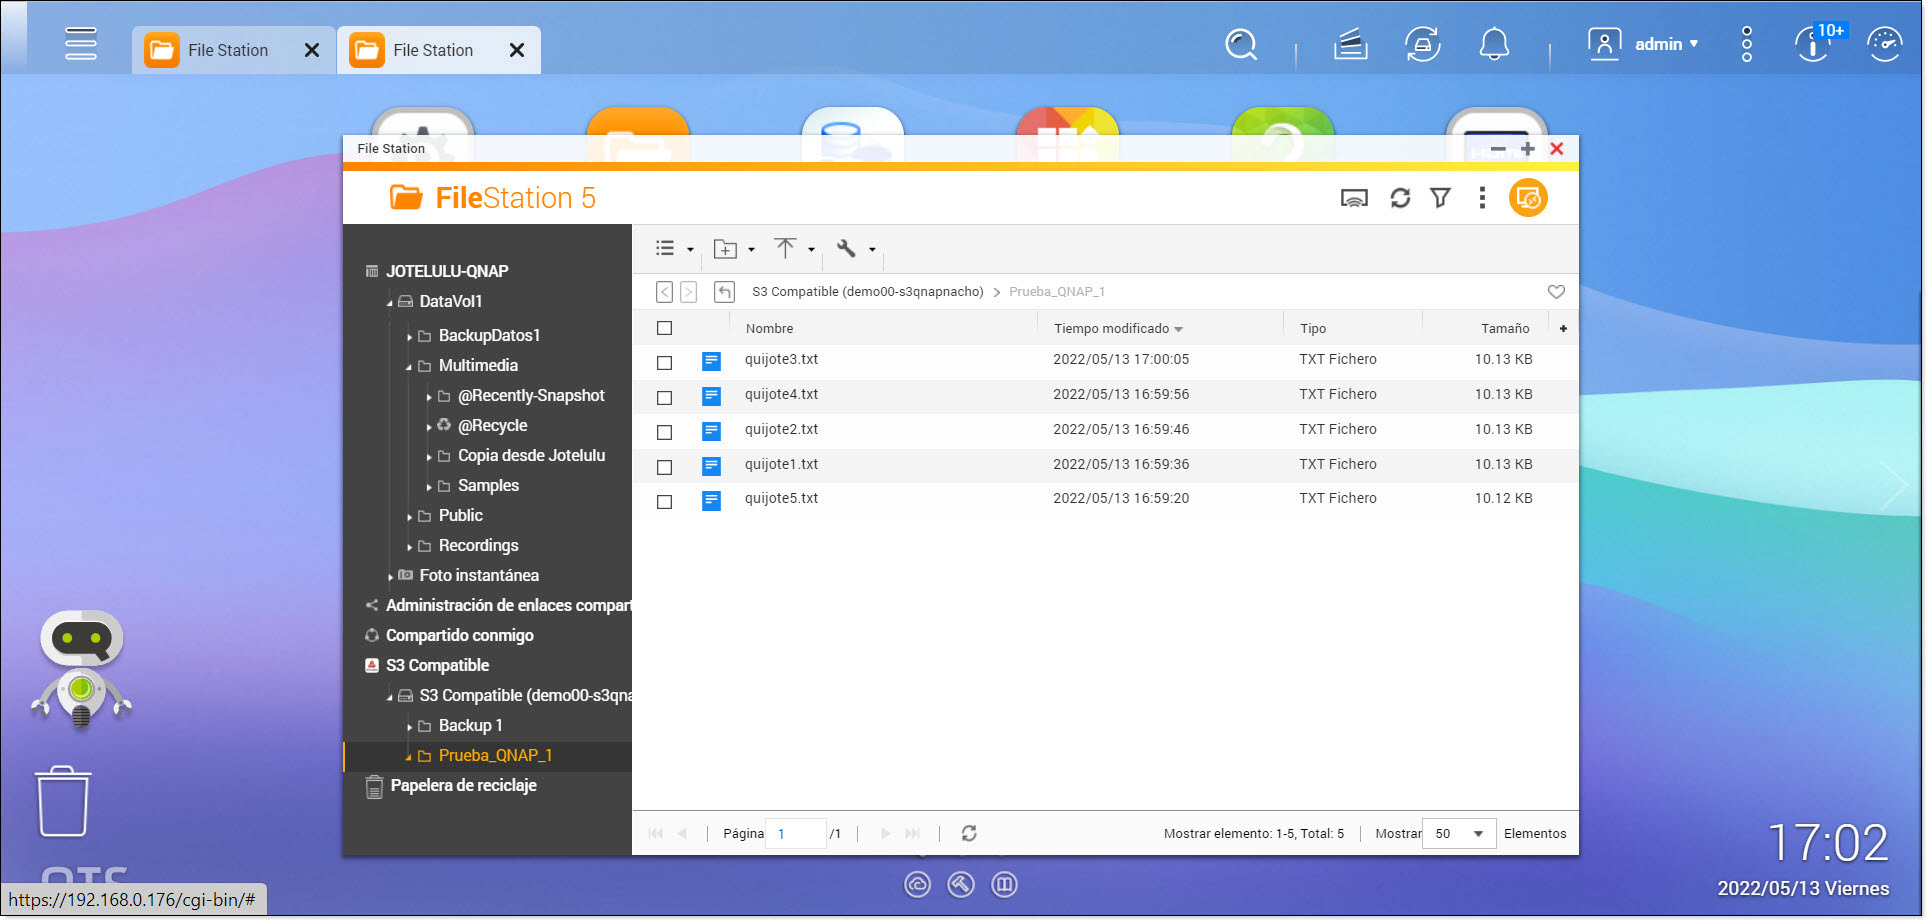
Check that the QNAP can see the data
Hover over the resource you wish to copy and right-click on it (1). Then, choose “Download” (2) and select “NAS” (3).
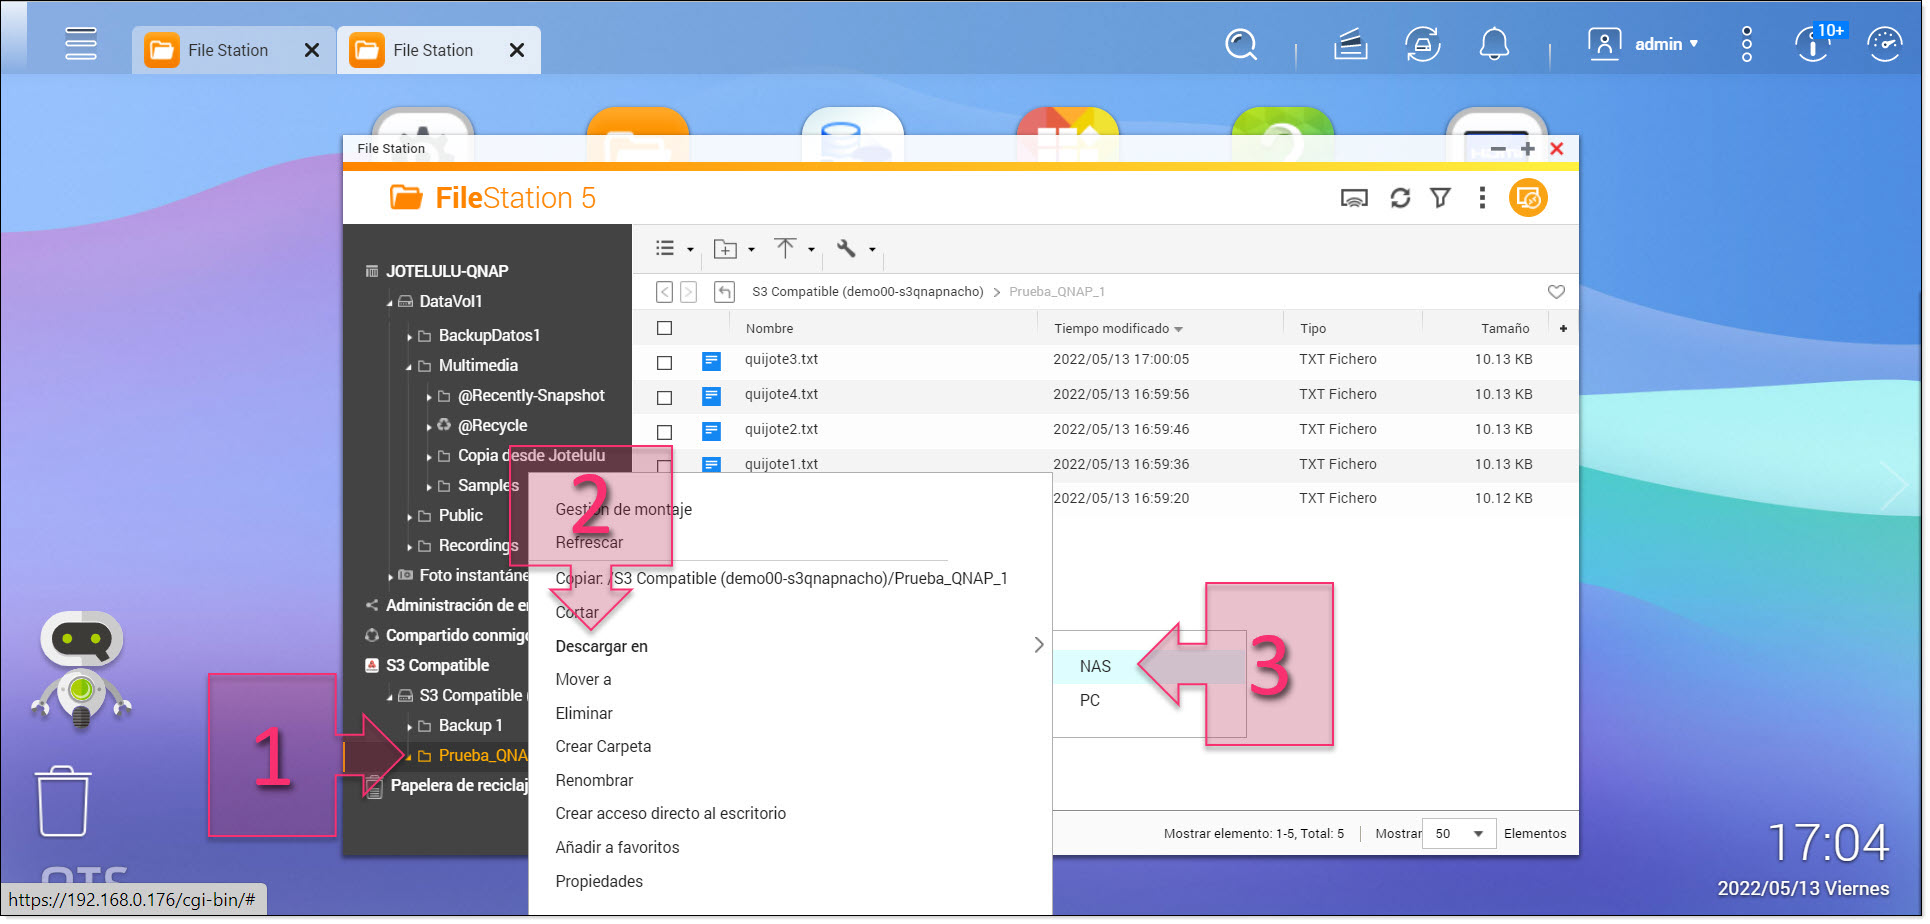
Click on “Download” and “NAS”
Next, choose the path on the QNAP where you wish to save your data (4). If you wish to save it in a new folder location (recommended), you should click on “Create new folder” (5).
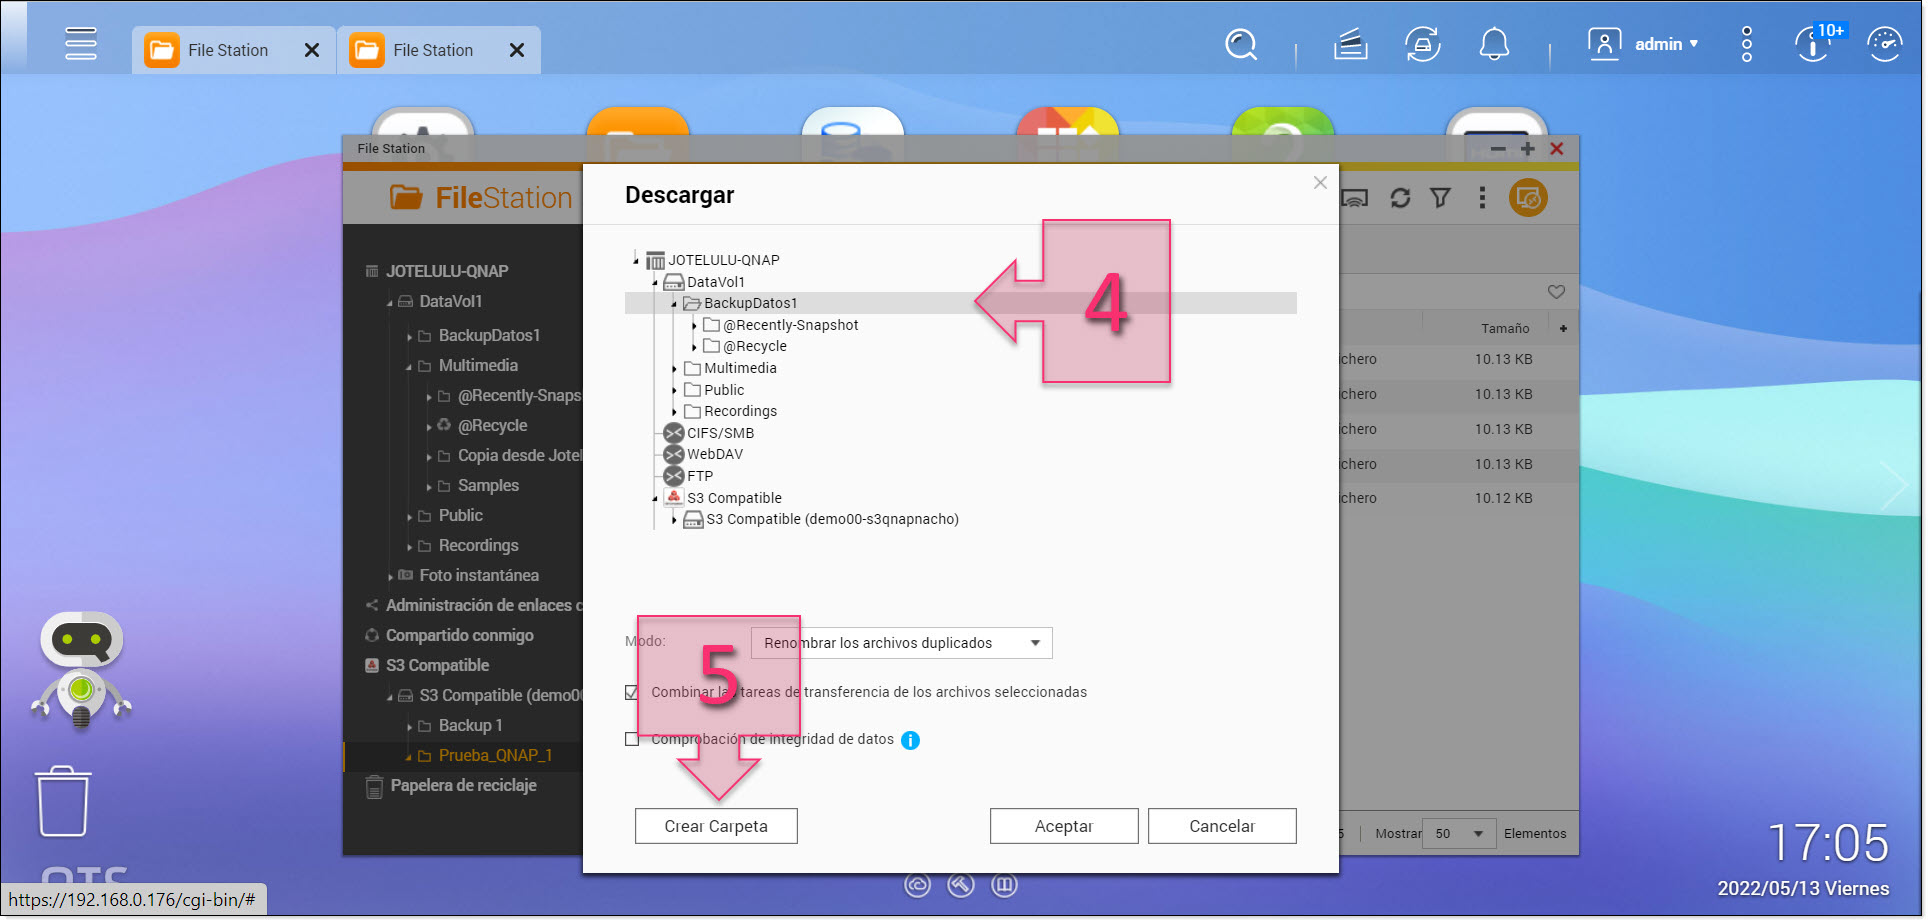
Select the folder where you wish to save your data
Next, give the new folder a name (6).
NOTE: A good practice when saving backup copies is to use folder names that include the date they were created. That way, it will be easier to find the copy that you want in the future.
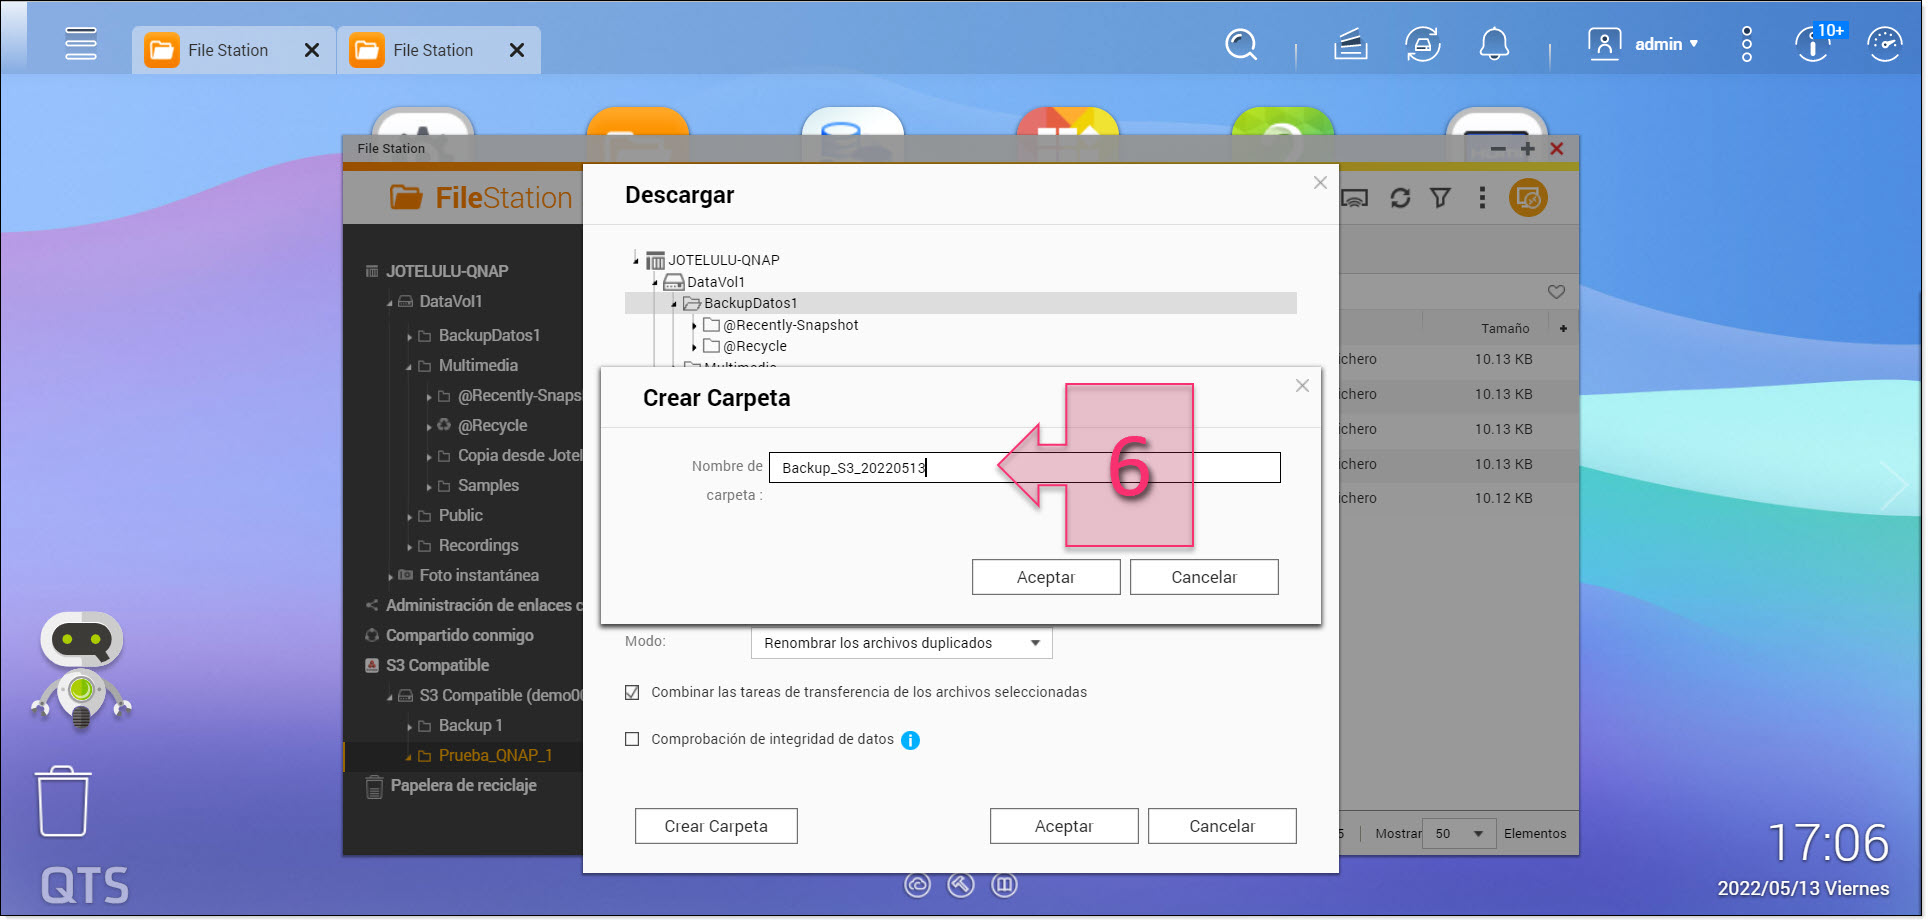
Create a new folder in which to store your backup
Another good practice is to mark the tickbox “Data Integrity Check” (7).
Once you have done this, click on “OK” (8) to begin making your security copy.
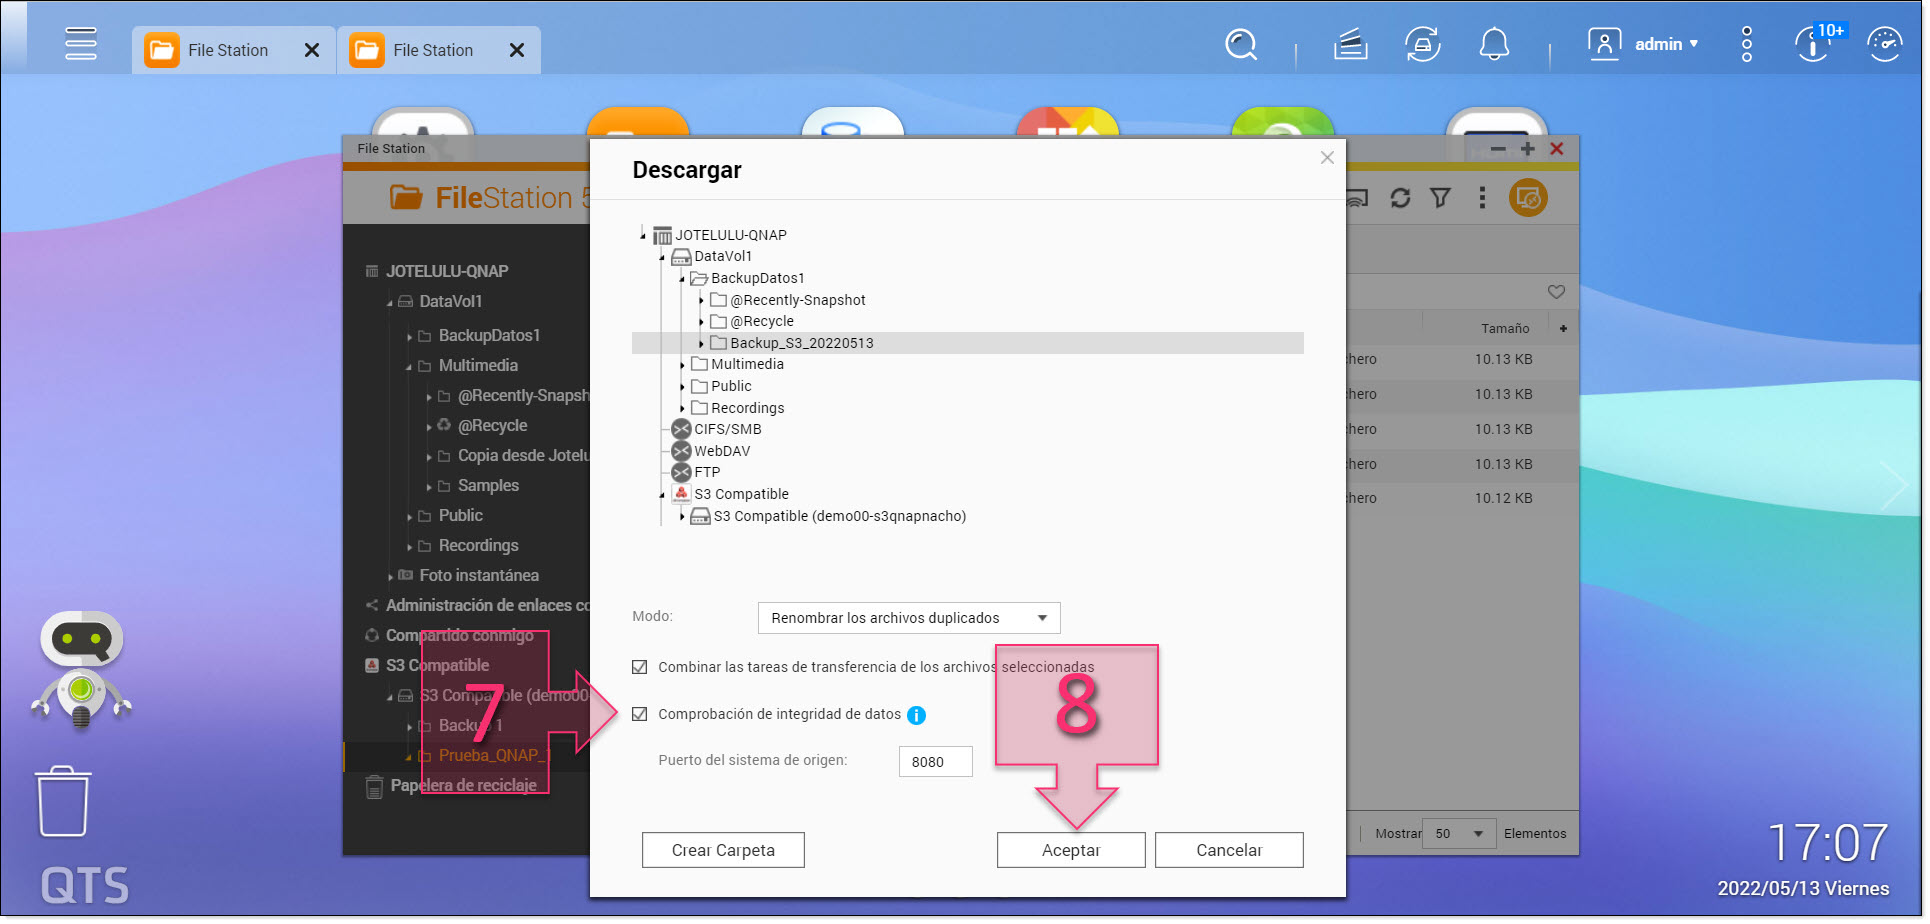
Select “Data Integrity Check” when making your backup copy
How long the copy takes to create will depend on the amount of data being copied, the speed of your internet connection and whether or not you have opted to perform a data integrity check. The data integrity check in particular can add a significant amount of time to the process.
If you wish to check the progress of your security copy, click on the “Tasks” icon (9).
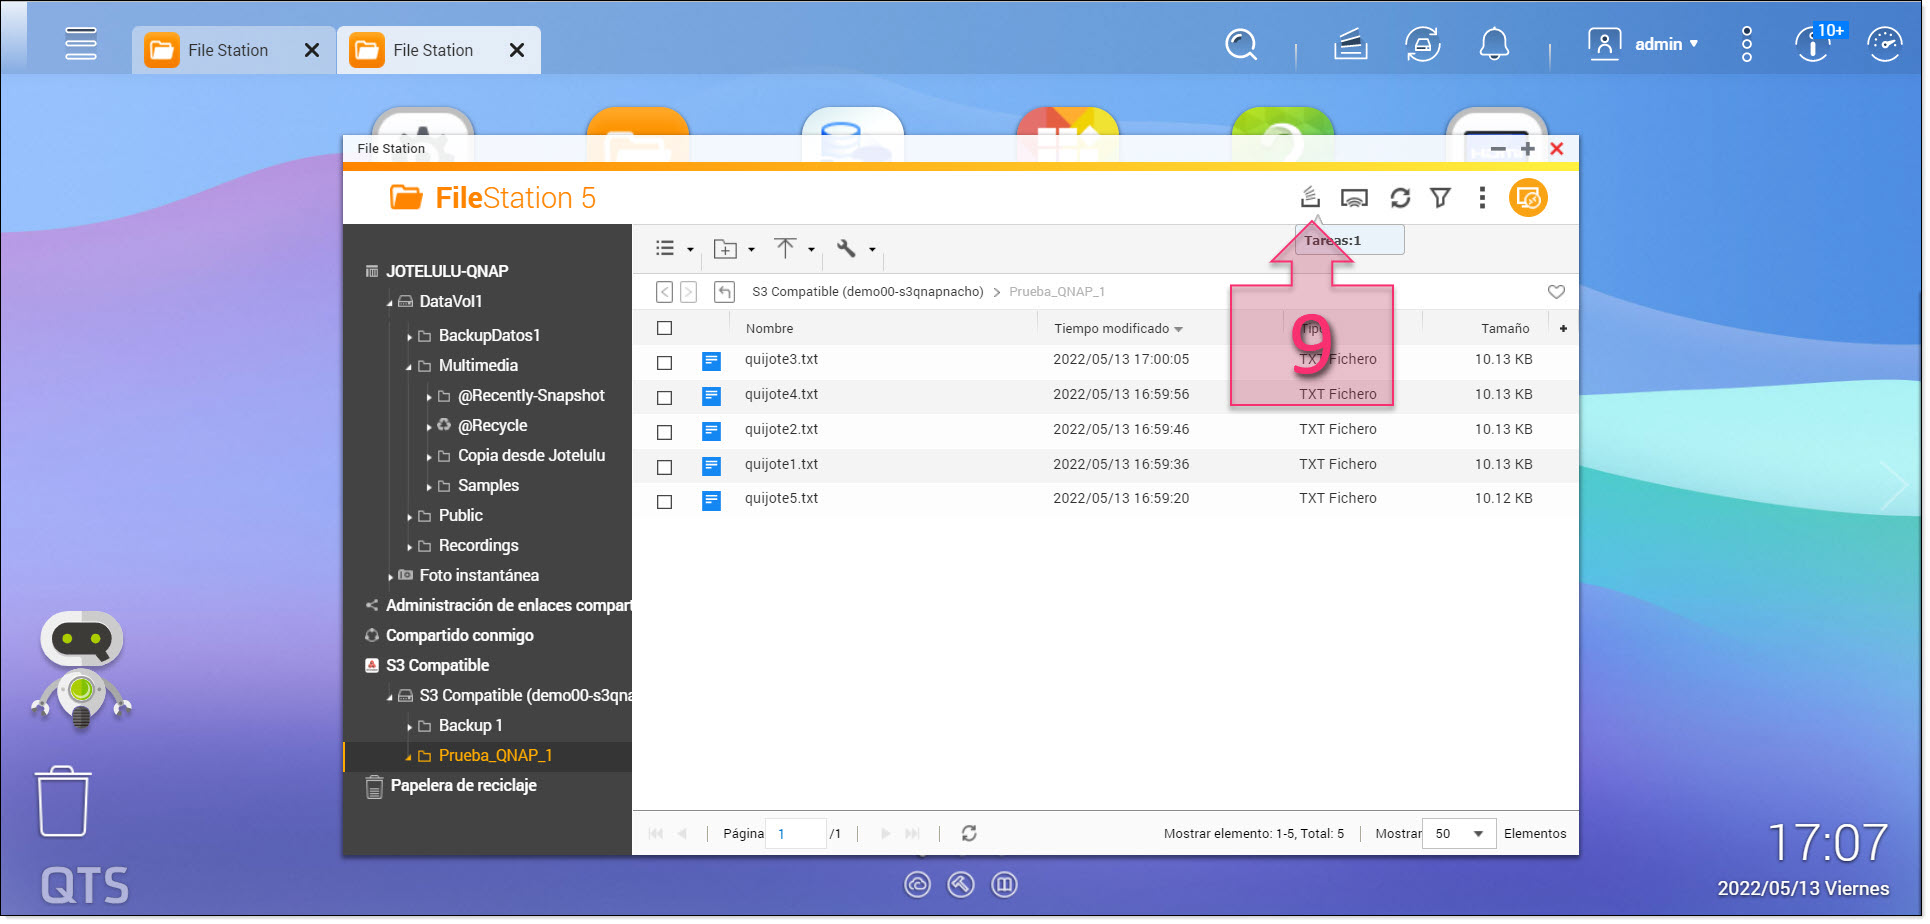
Open the tasks list to see the task progress
Under “Background Tasks” you can see the details regarding all tasks that the NAS is running, including the type of operation, the folder path, its progress, the amount of data being transferred, when the task began and the task owner.
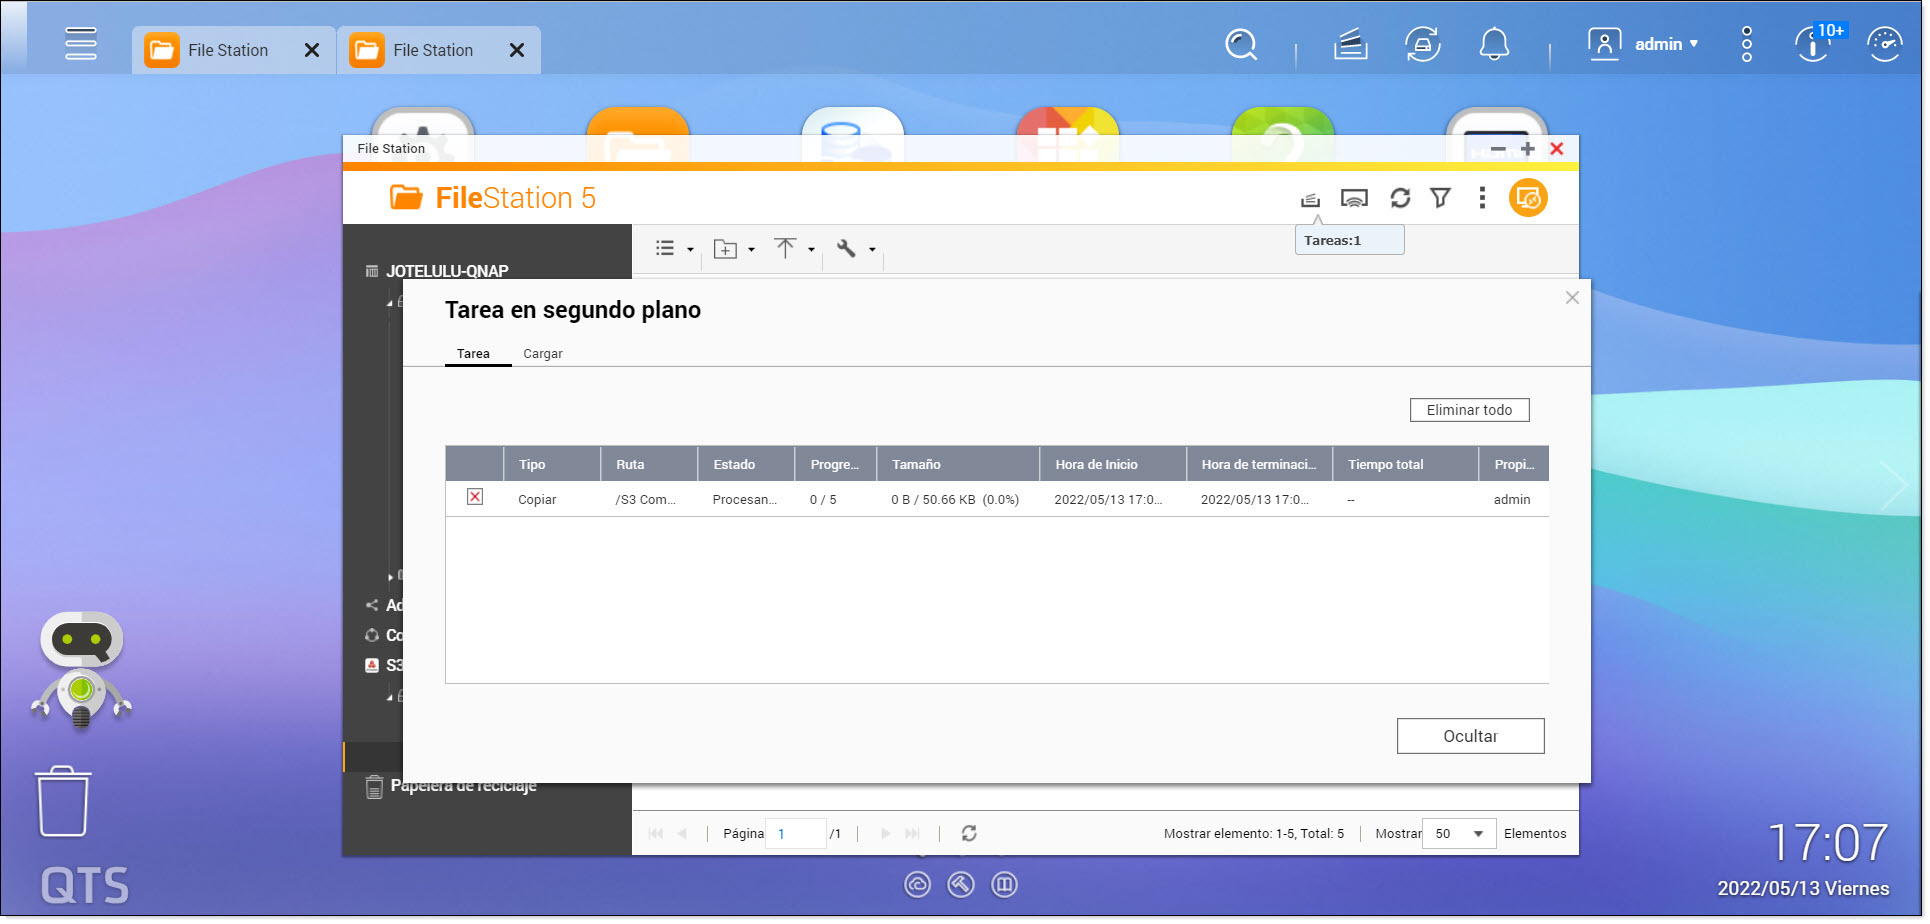
Check the progress of your security copy.
Lastly, it is generally a good idea to check that your copied data can be accessed and opened without any issues.
You have now successfully copied your Object Storage to your QNAP NAS!
Conclusions and next steps:
Manually copying a Jotelulu Object Storage to a QNAP cabinet is very straightforward and can be done as often as you need, allowing you to create a copy of a specific point in time and have an additional security copy of your data stored on Jotelulu.
We hope that this tutorial has helped you. But if you still have any problems or technical questions, please don’t hesitate to contact our team by writing to plataforma@jotelulu.com or calling +34 911 333 710.
Many thanks for choosing Jotelulu!


