In this tutorial, we’ll look at how to install Hyper-V on Windows 10 so you can run virtual machines on your desktop computer.
When it comes to choosing a hypervisor, there are many things to take into consideration, like ease of use, compatibility, available licences or whether learning to use the desktop version is likely to be useful when you later move onto a server.
From all the options available on the market, many people opt for Oracle Virtual Box, a free hypervisor that is easy to install. However, as this isn’t a professional solution, I’ve always felt that learning to use this tool doesn’t have any additional benefits, aside from it being a fully functional, free hypervisor.
The way I see it, the best options are actually VMWare and Hyper-V. These are the most popular among professionals and what you learn by using the desktop version will definitely come in handy when you later use the server version.
In the case of Hyper-V, the desktop edition is very similar to the server version, but as is to be expected, it doesn’t include all the features of the server version, particularly when it comes to redundancy or security features.
So, in this tutorial, we’re going to explain how you can deploy Hyper-V on Windows 10 or Windows 11. The great thing about this option is that it is already part of the operating system so you don’t need any third-party software. You just need to enable it and you can start using straight away.
Before you begin
To successfully complete this tutorial and install Hyper-V on Windows 10, you will need:
- A computer running either Windows 10 or Windows 11 (NOT HOME EDITION).
- Administrator privileges for your computer.
- To satisfy certain hardware specifications, including the necessary virtualisation capabilities.
Option 1 – Installing Hyper-V on Windows 10 Using the Graphic Interface
NOTE: As we just mentioned, you cannot install Hyper-V on Windows 10 Home Edition.
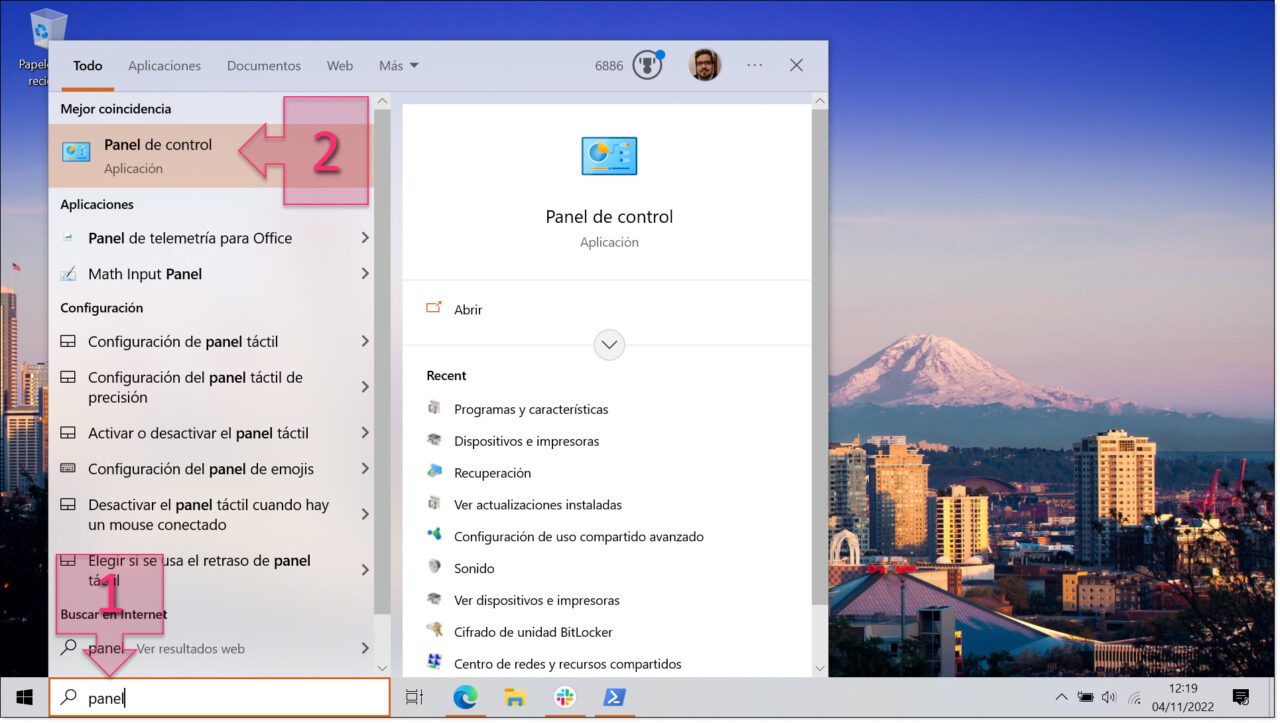
First, go to the search bar and type “Control Panel” (1). Then, double-click on Control Panel (2).
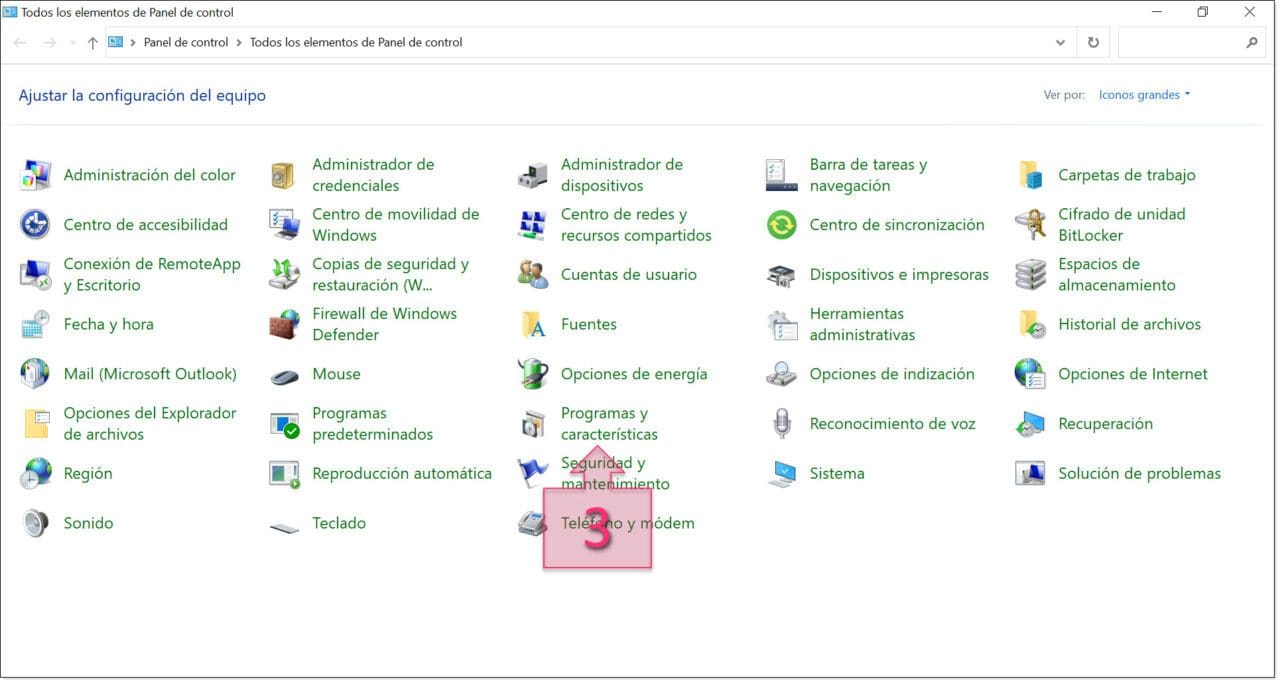
Next, select “Programs and Features” (3).
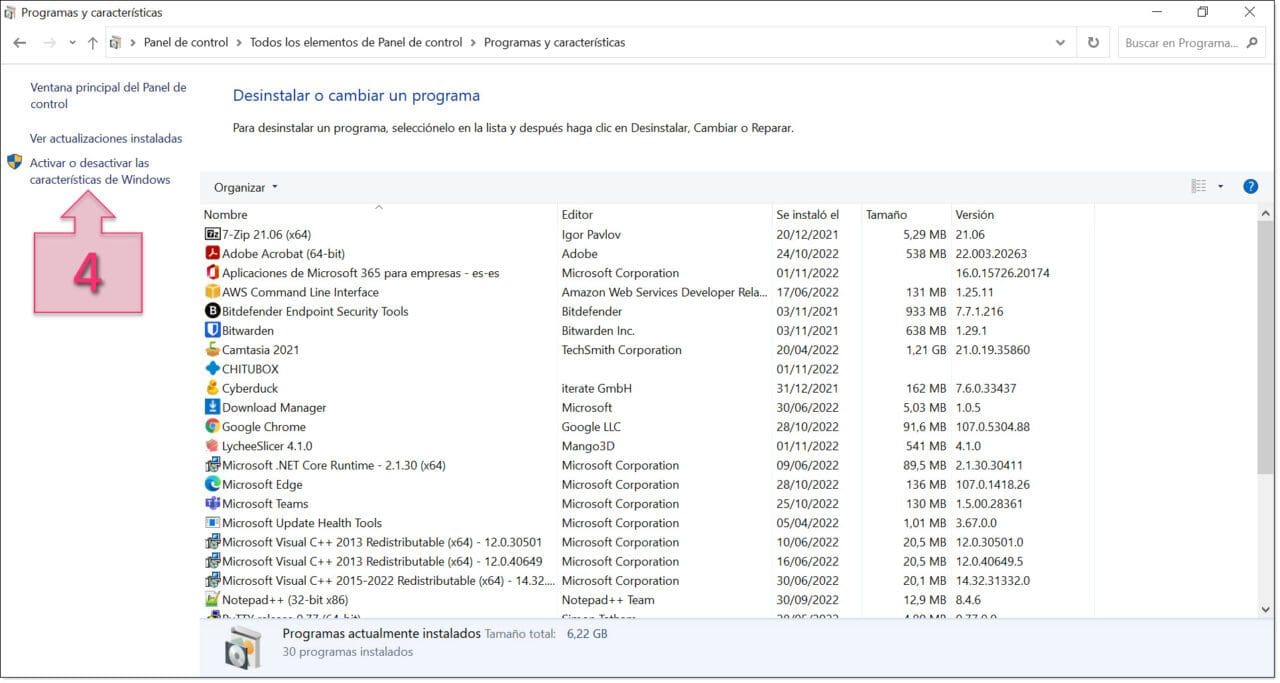
Then, click on “Turn Windows features on or off” (4).
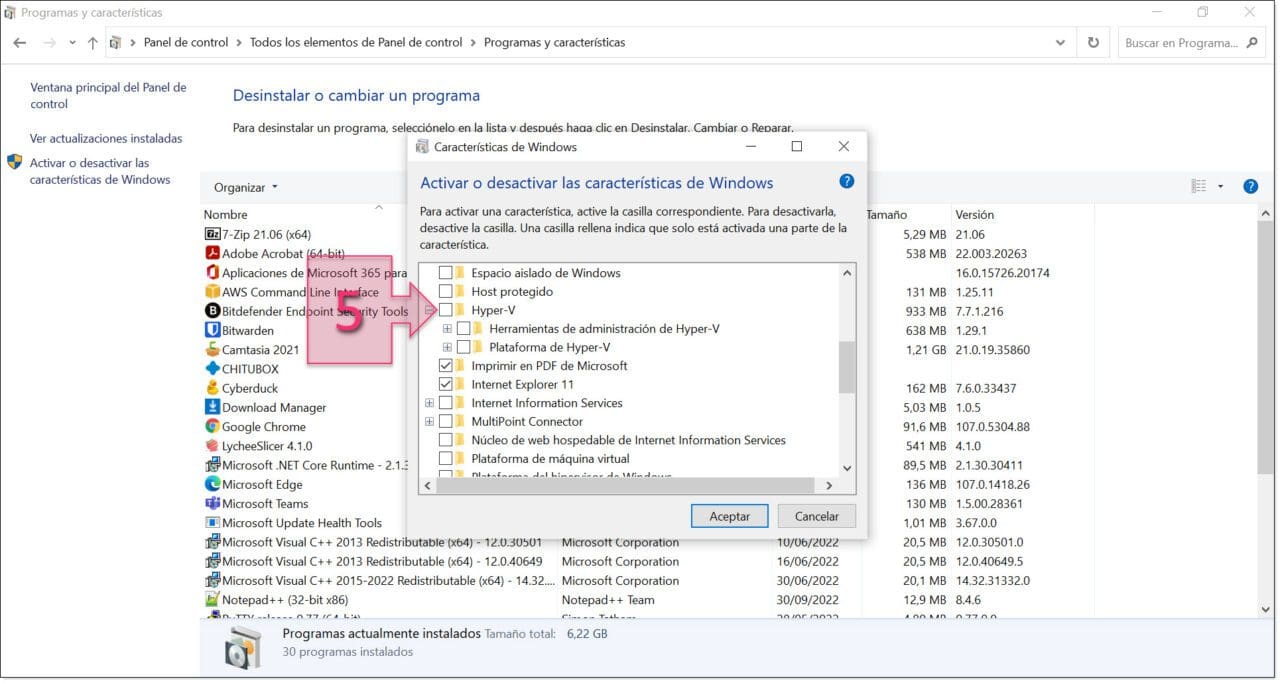
At this point a window will appear showing the Windows features that you can turn on or off. Select the available “Hyper-V” options and click on “OK”. You may only see “Hyper-V” on its own, or you might also see the following two options:
- Hyper-V Management Tools
- Hyper-V Platform
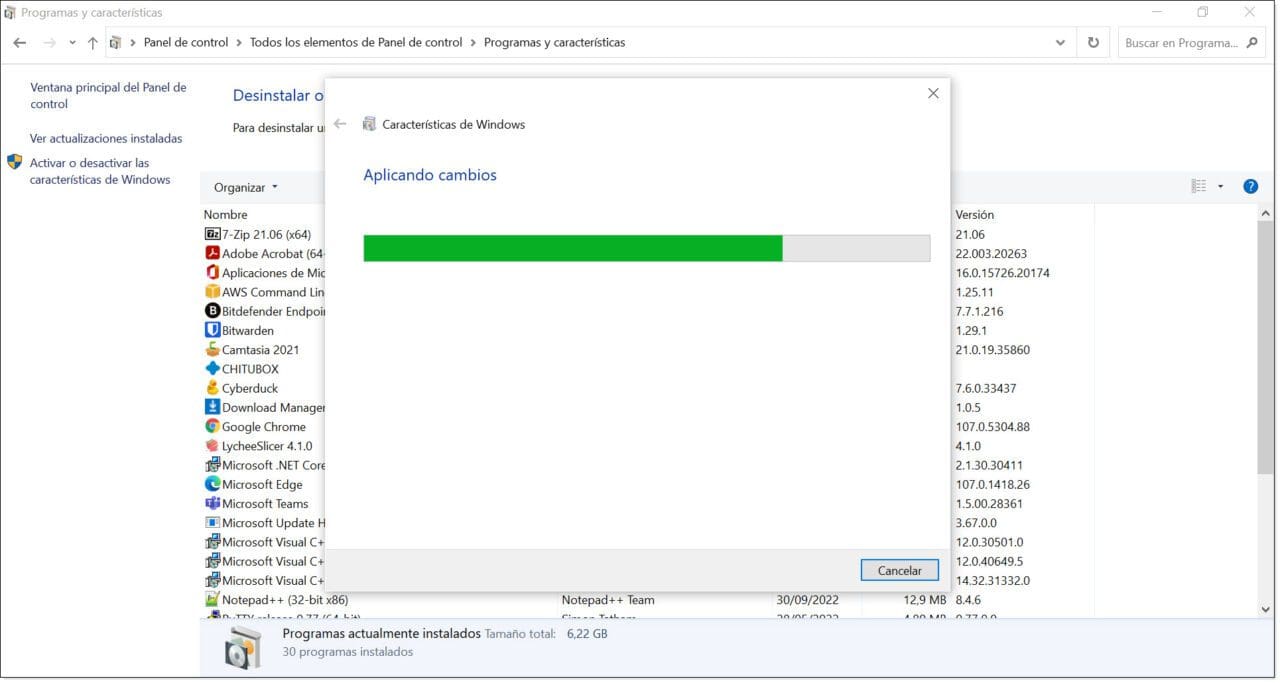
Then, a progress bar will appear and you will have to wait for the process to finish. The time this takes will vary depending on your hardware.
When the installation has finished, you will see the message “Windows completed the requested changes”. To finish, simply click on “Restart now” (6).
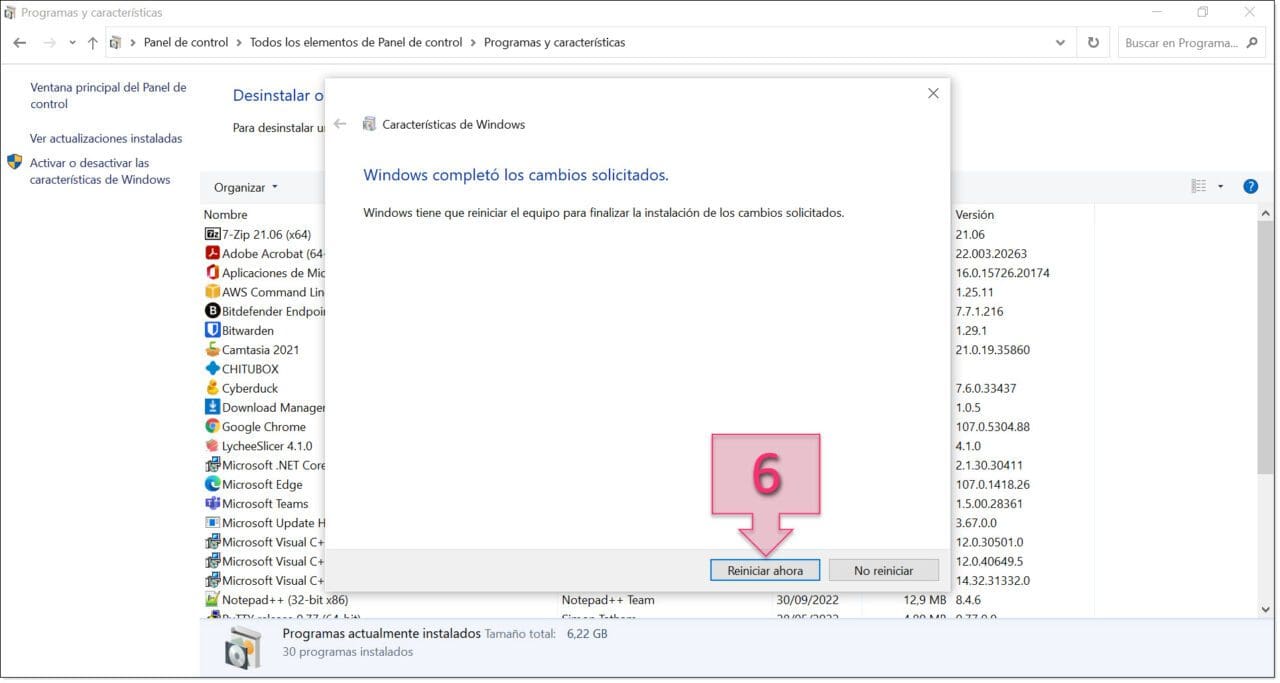
You have now enabled Hyper-V on your computer.
Option 2 – Installing Hyper-V on Windows 10 Using PowerShell
The alternative way of installing Hyper-V on a Microsoft desktop machine is by using PowerShell commands.
NOTE: We remind you that you cannot install Hyper-V on Windows 10 Home Edition.
To install the Hyper-V feature on a Windows machine, you need to run the PowerShell console with administrator privileges or run a PowerShell console normally and enter the administrator details when required. Once you’ve done this, run the following command:
Enable-WindowsOptionalFeature -Online -FeatureName Microsoft-Hyper-V -All
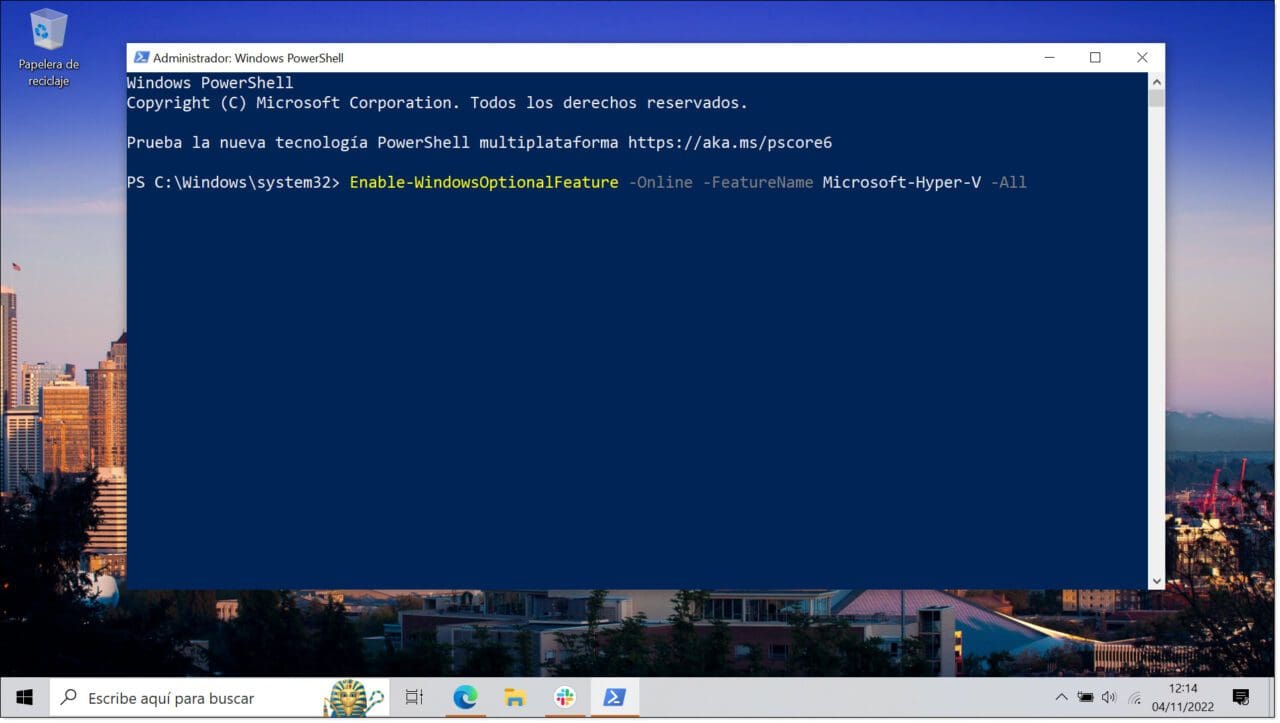
A window will then appear displaying the installation progress. It will look a little unusual because it is running in PowerShell (unless the default output has been modified) and the progress bar will be displayed in text format.
When this process has finished, Hyper-V will be installed on your computer.
Conclusion
This tutorial explains now to install Hyper-V on Windows 10 or Windows 11 so that you can run virtual machines on your desktop computer. As you can see, this is a very simple process indeed.
We hope that you don’t encounter any issues, but if you do have problems, please don’t hesitate to get in touch with us so that we can help you.
Thank you for choosing Jotelulu!


