In this tutorial, you will find out how to manually install any application on your remote desktop.
Most companies work with a wide range of applications. Some of these are common programmes like word processors, spreadsheets or PDF readers, but others may be applications specifically developed for their sector or even their company. A lot of these applications do not have a cloud-based version, which makes it difficult for employees to use them remotely. However, with the Jotelulu remote desktop service, you can install these applications on the cloud and provide them remotely to your users.
How to manually install an application on your remote desktop?
Before you begin
To successfully complete this tutorial, you will need:
- To be registered on the Jotelulu platform and have signed in using your username and password.
- To have subscribed to the remote desktop service and set up your remote desktop.
- To have an application that you want to install on the remote desktop server.
- To have administrator permissions and remote desktop permissions for the user that will install the application.
Step 1. Open the Applications section on the remote desktop subscription page
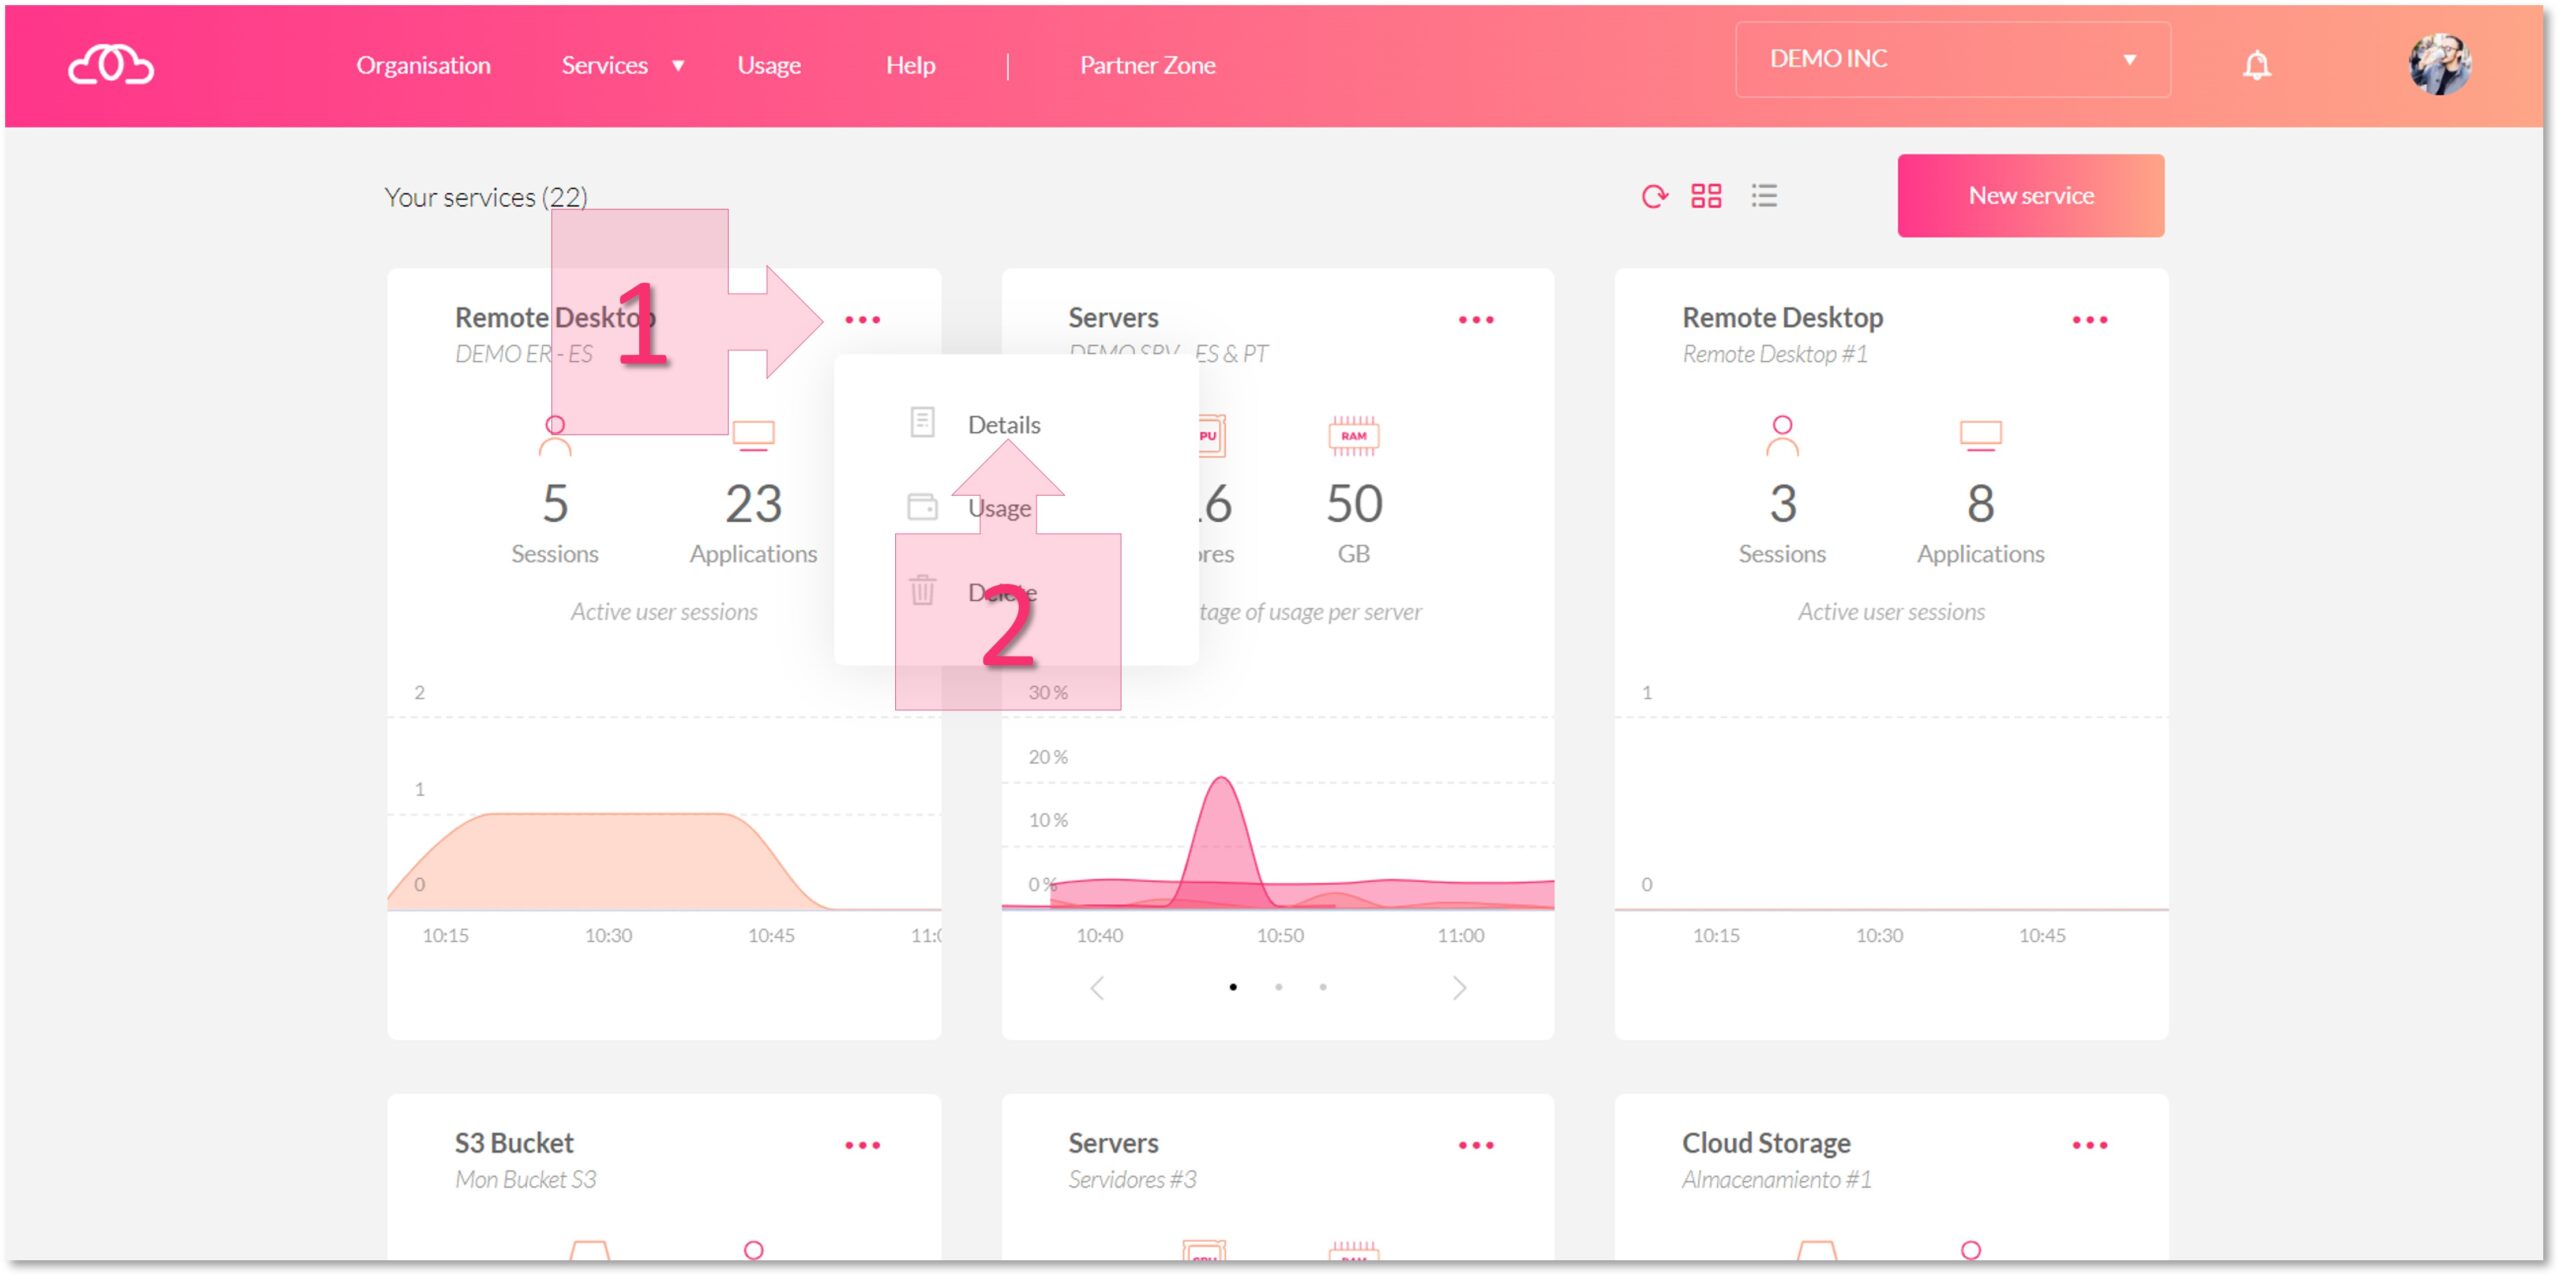
On the main dashboard, either click on the top of the remote desktop card or click on the three dots at the top of the card (1) and click on “Details” (2).
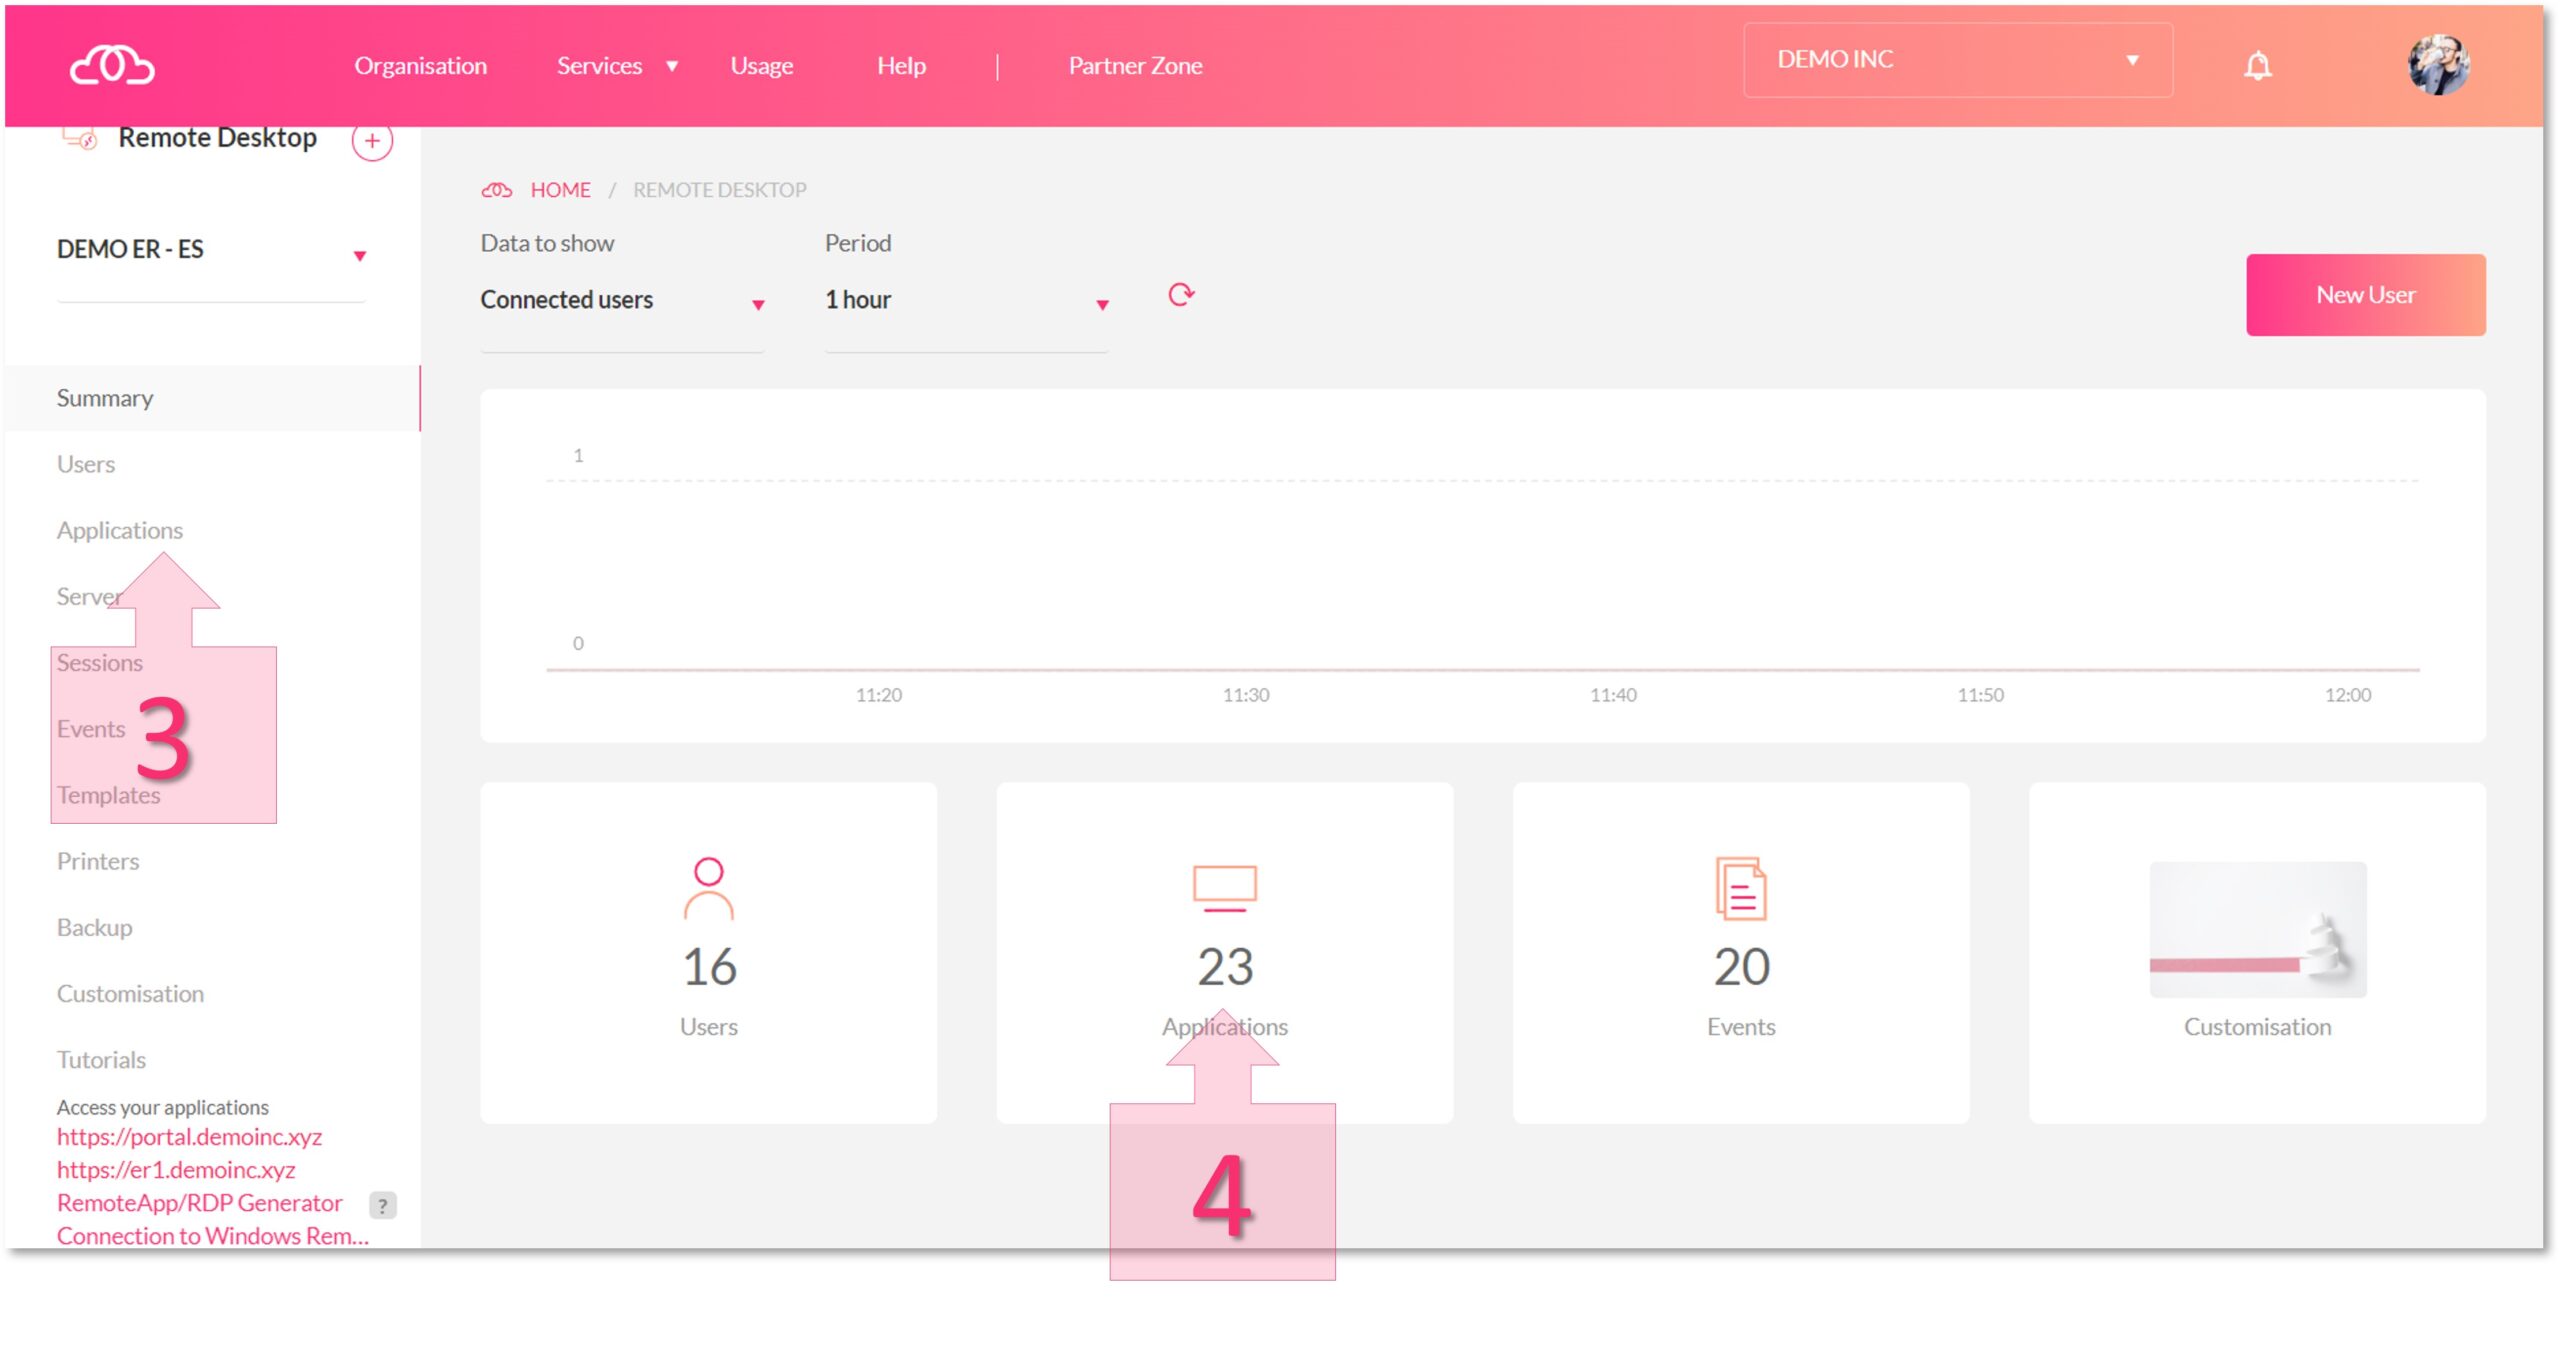
Next, click on the “Applications” section (3) on the left-hand menu and then click on the “Summary” section (4).
Step 2. Installing and publishing applications through the server
Next, click on the “New Application” button (5).
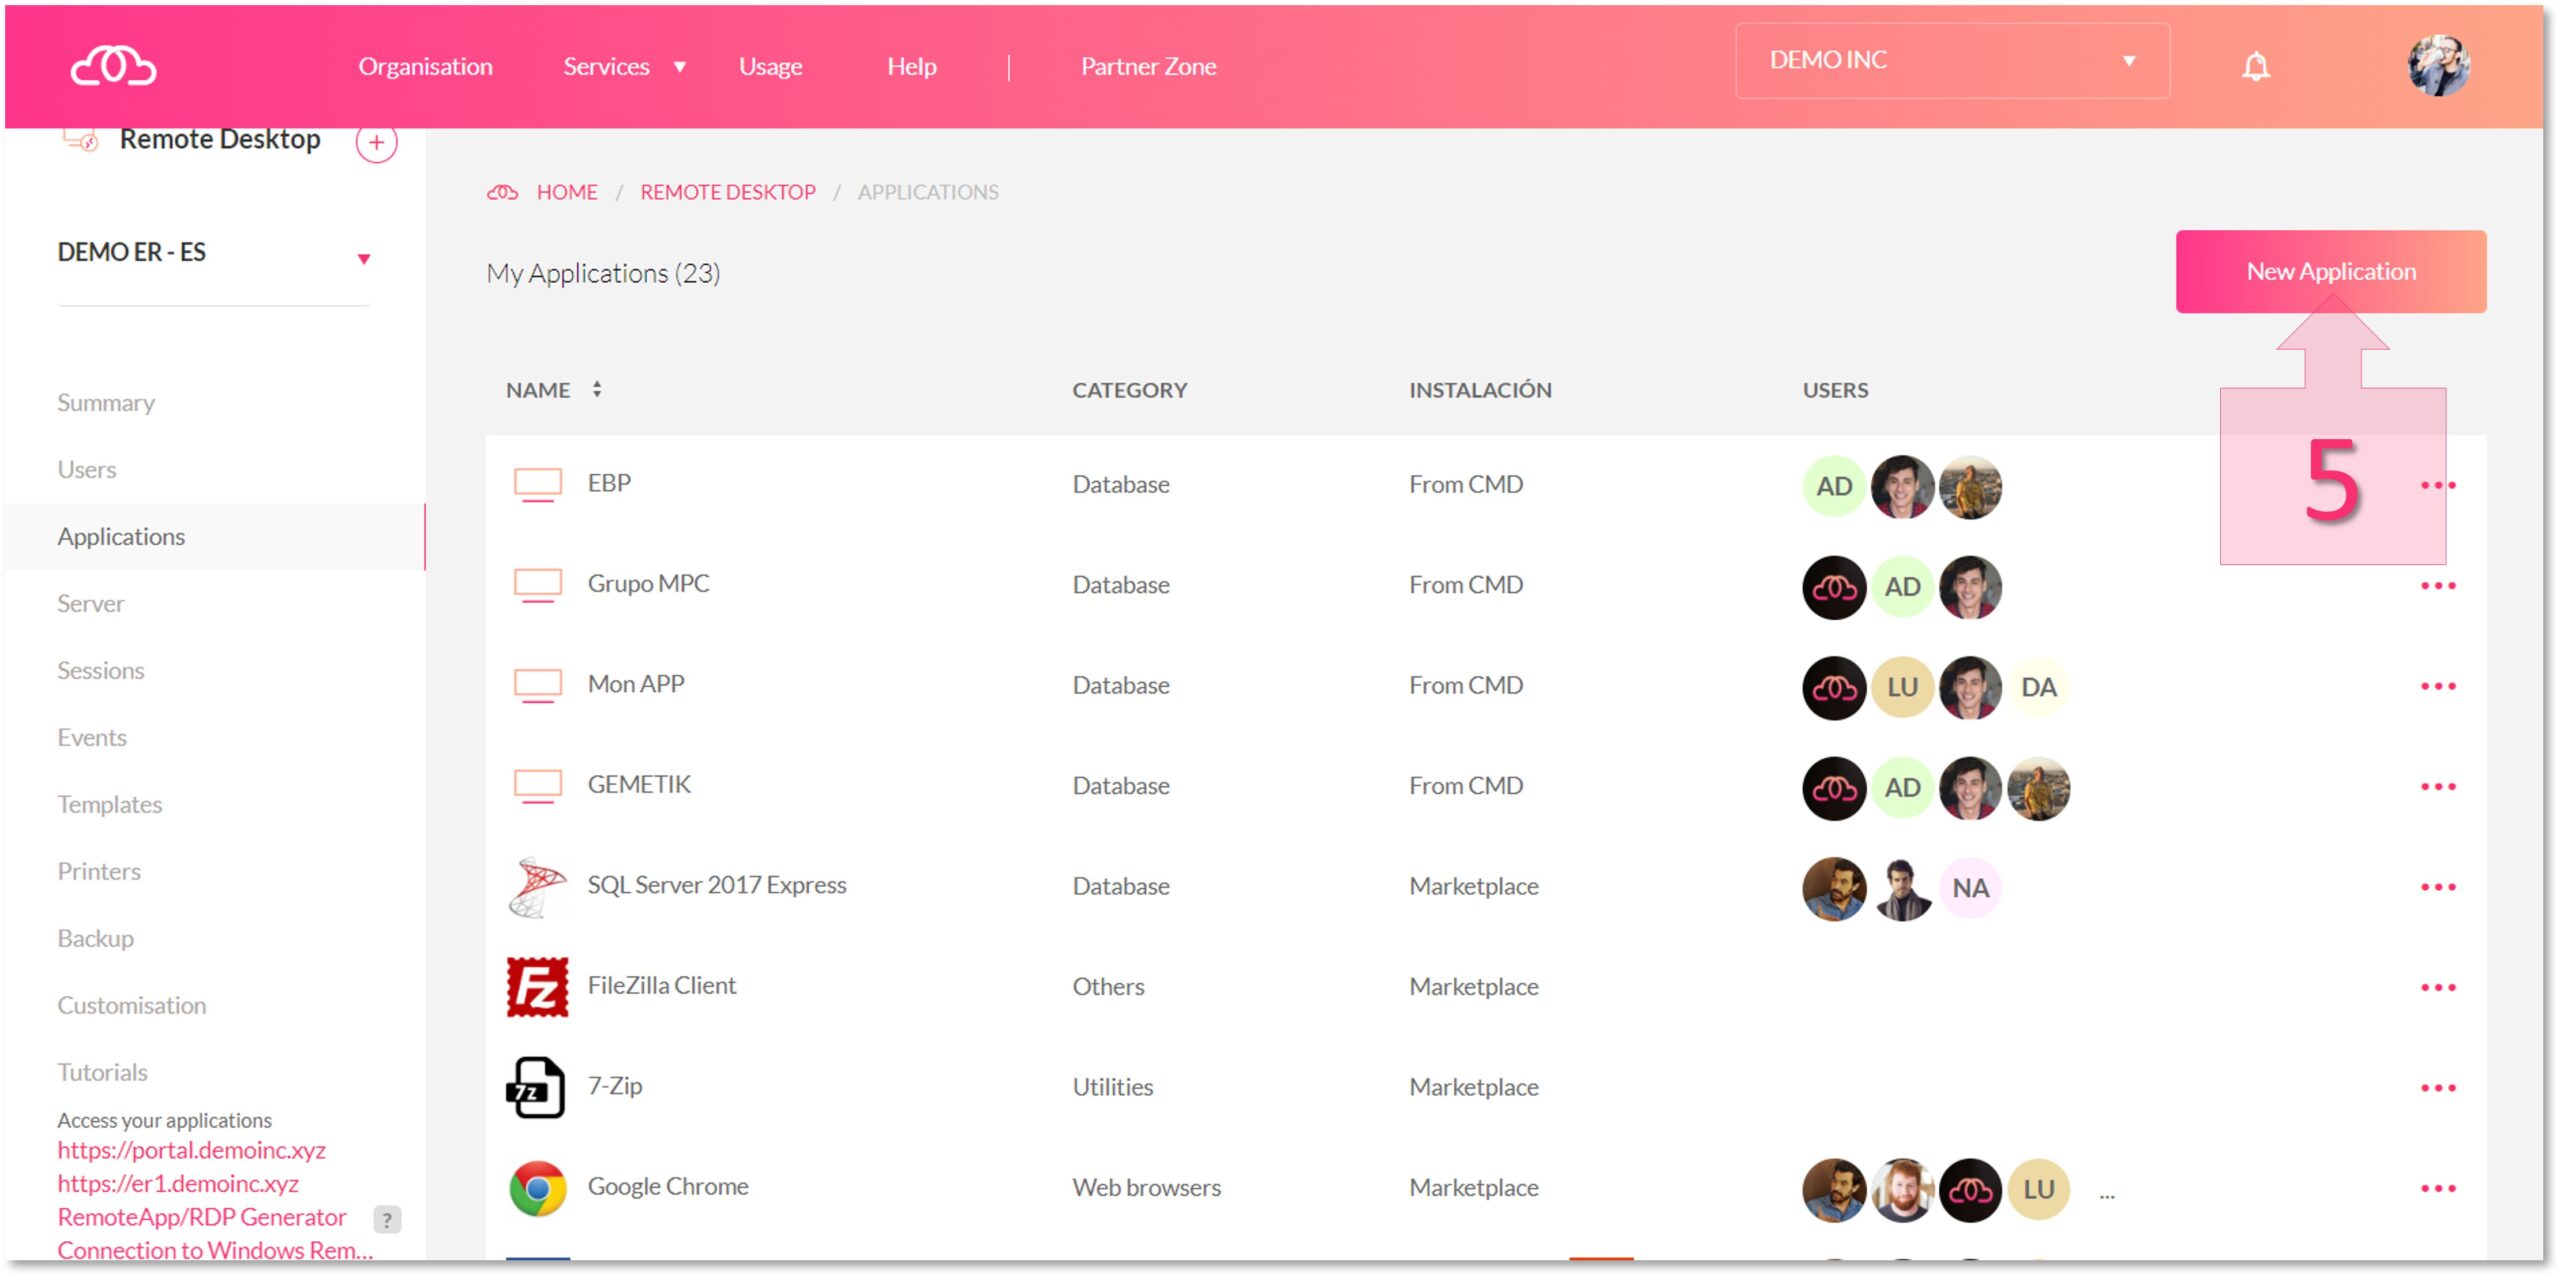
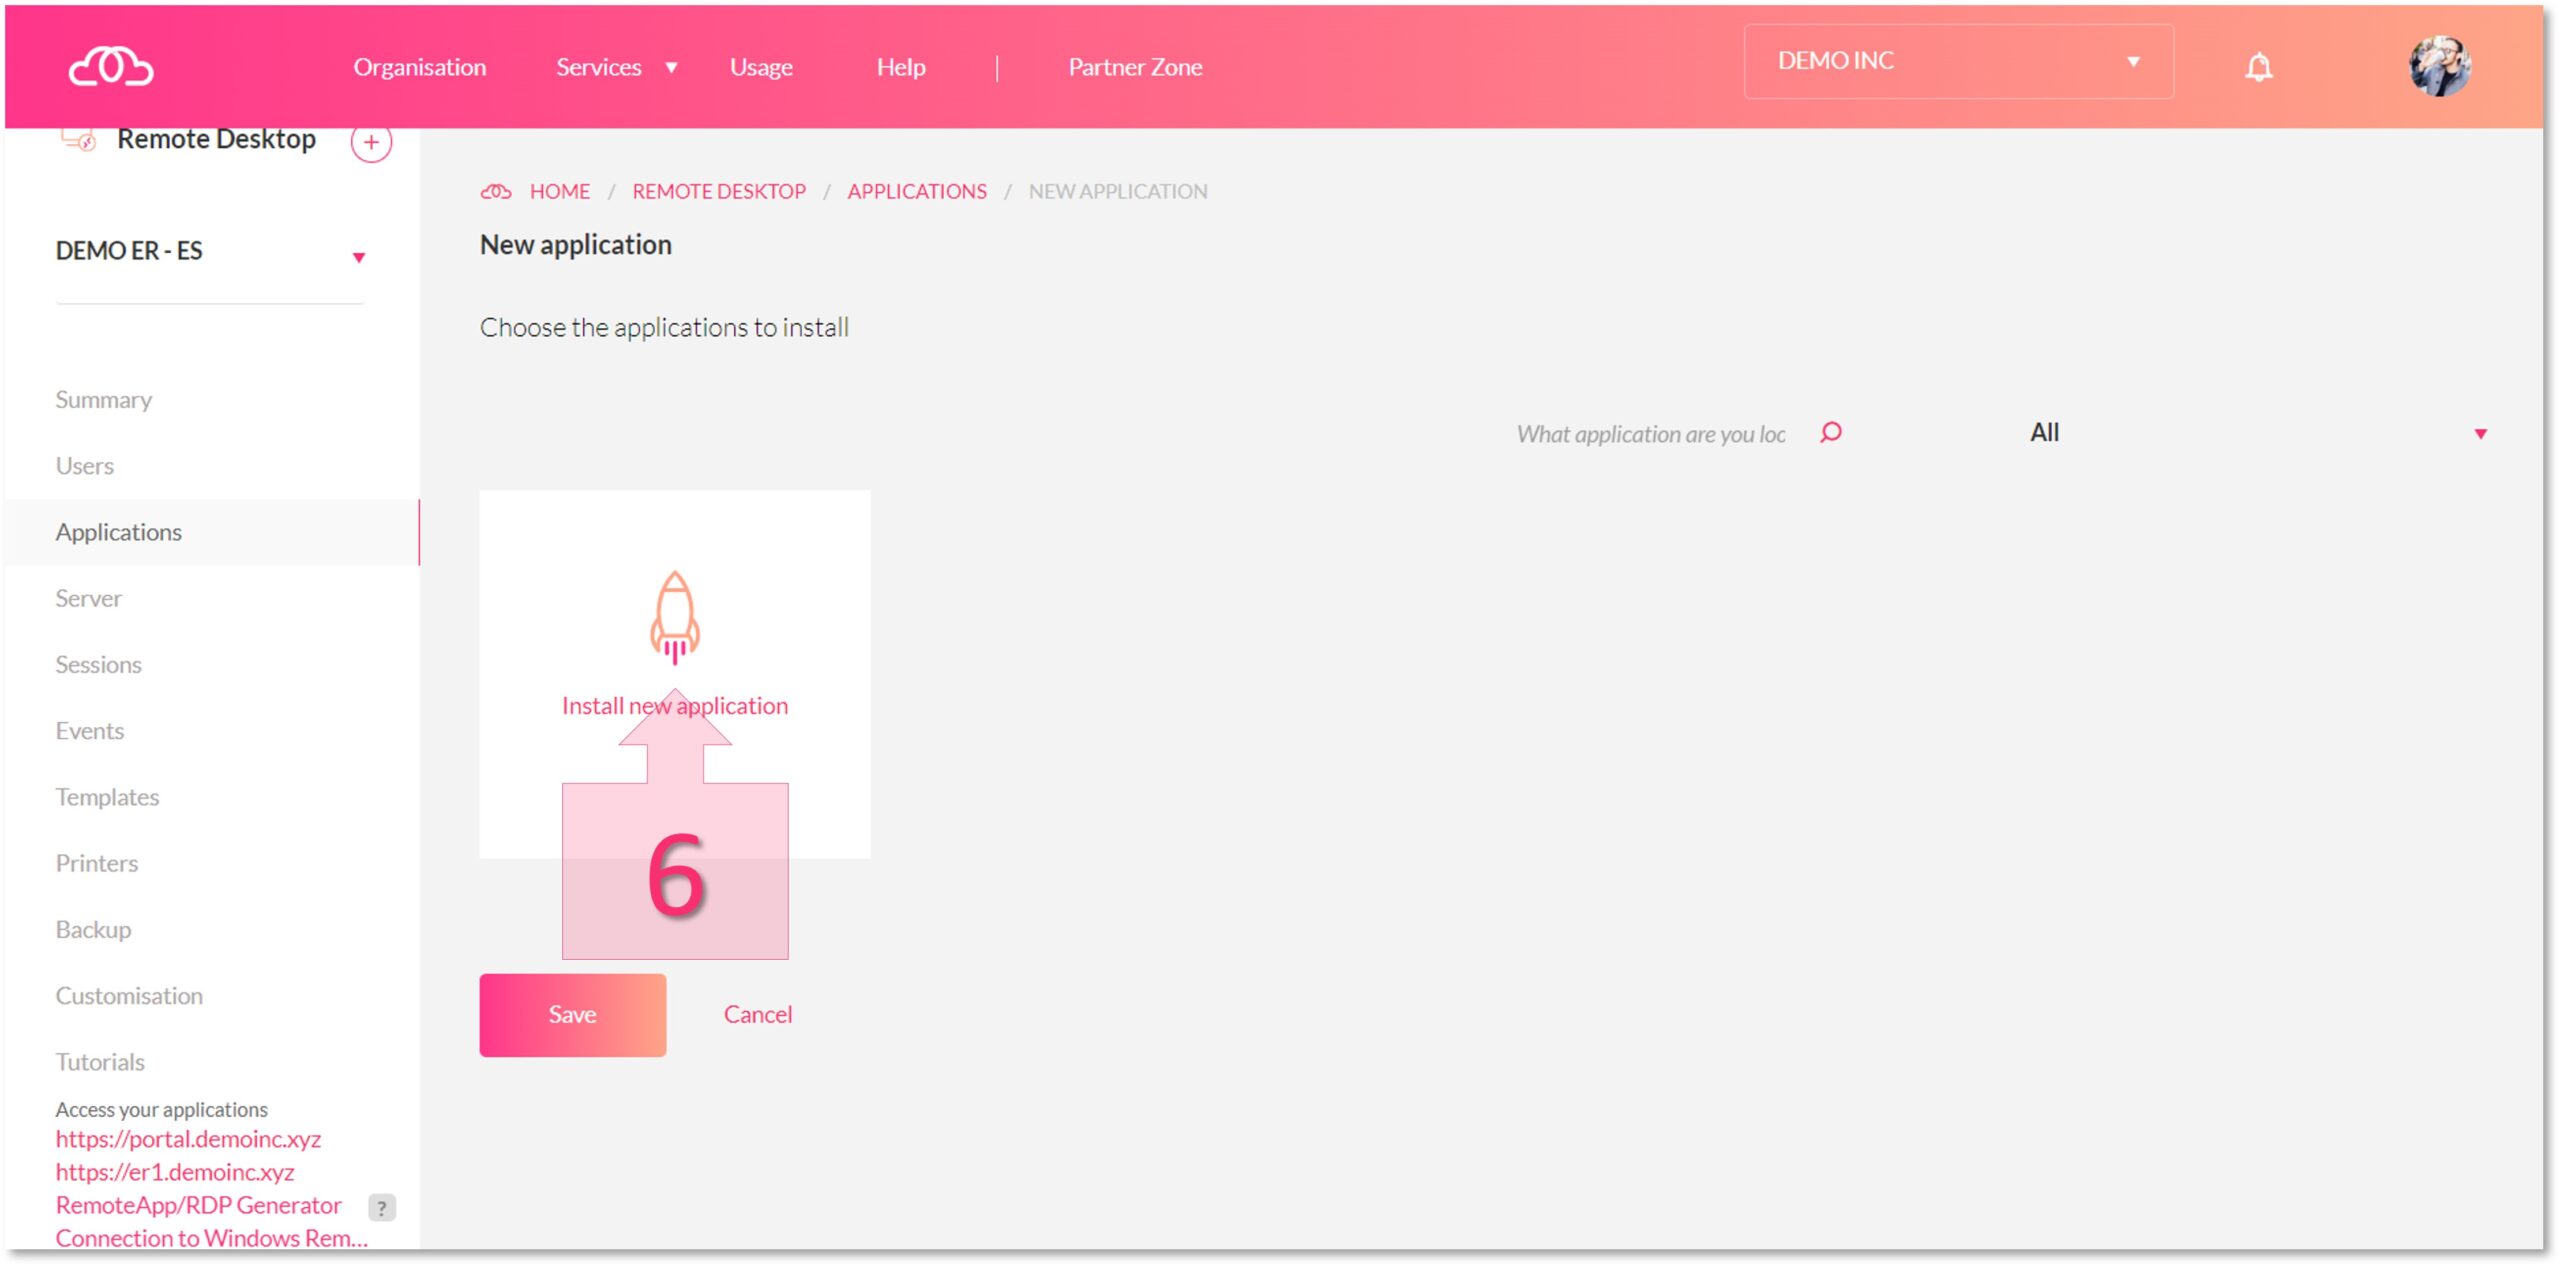
The next page will show all the applications available on the Marketplace that can be installed automatically. However, if the programme you want is not available, you will need to click on “Install New Application” (6).
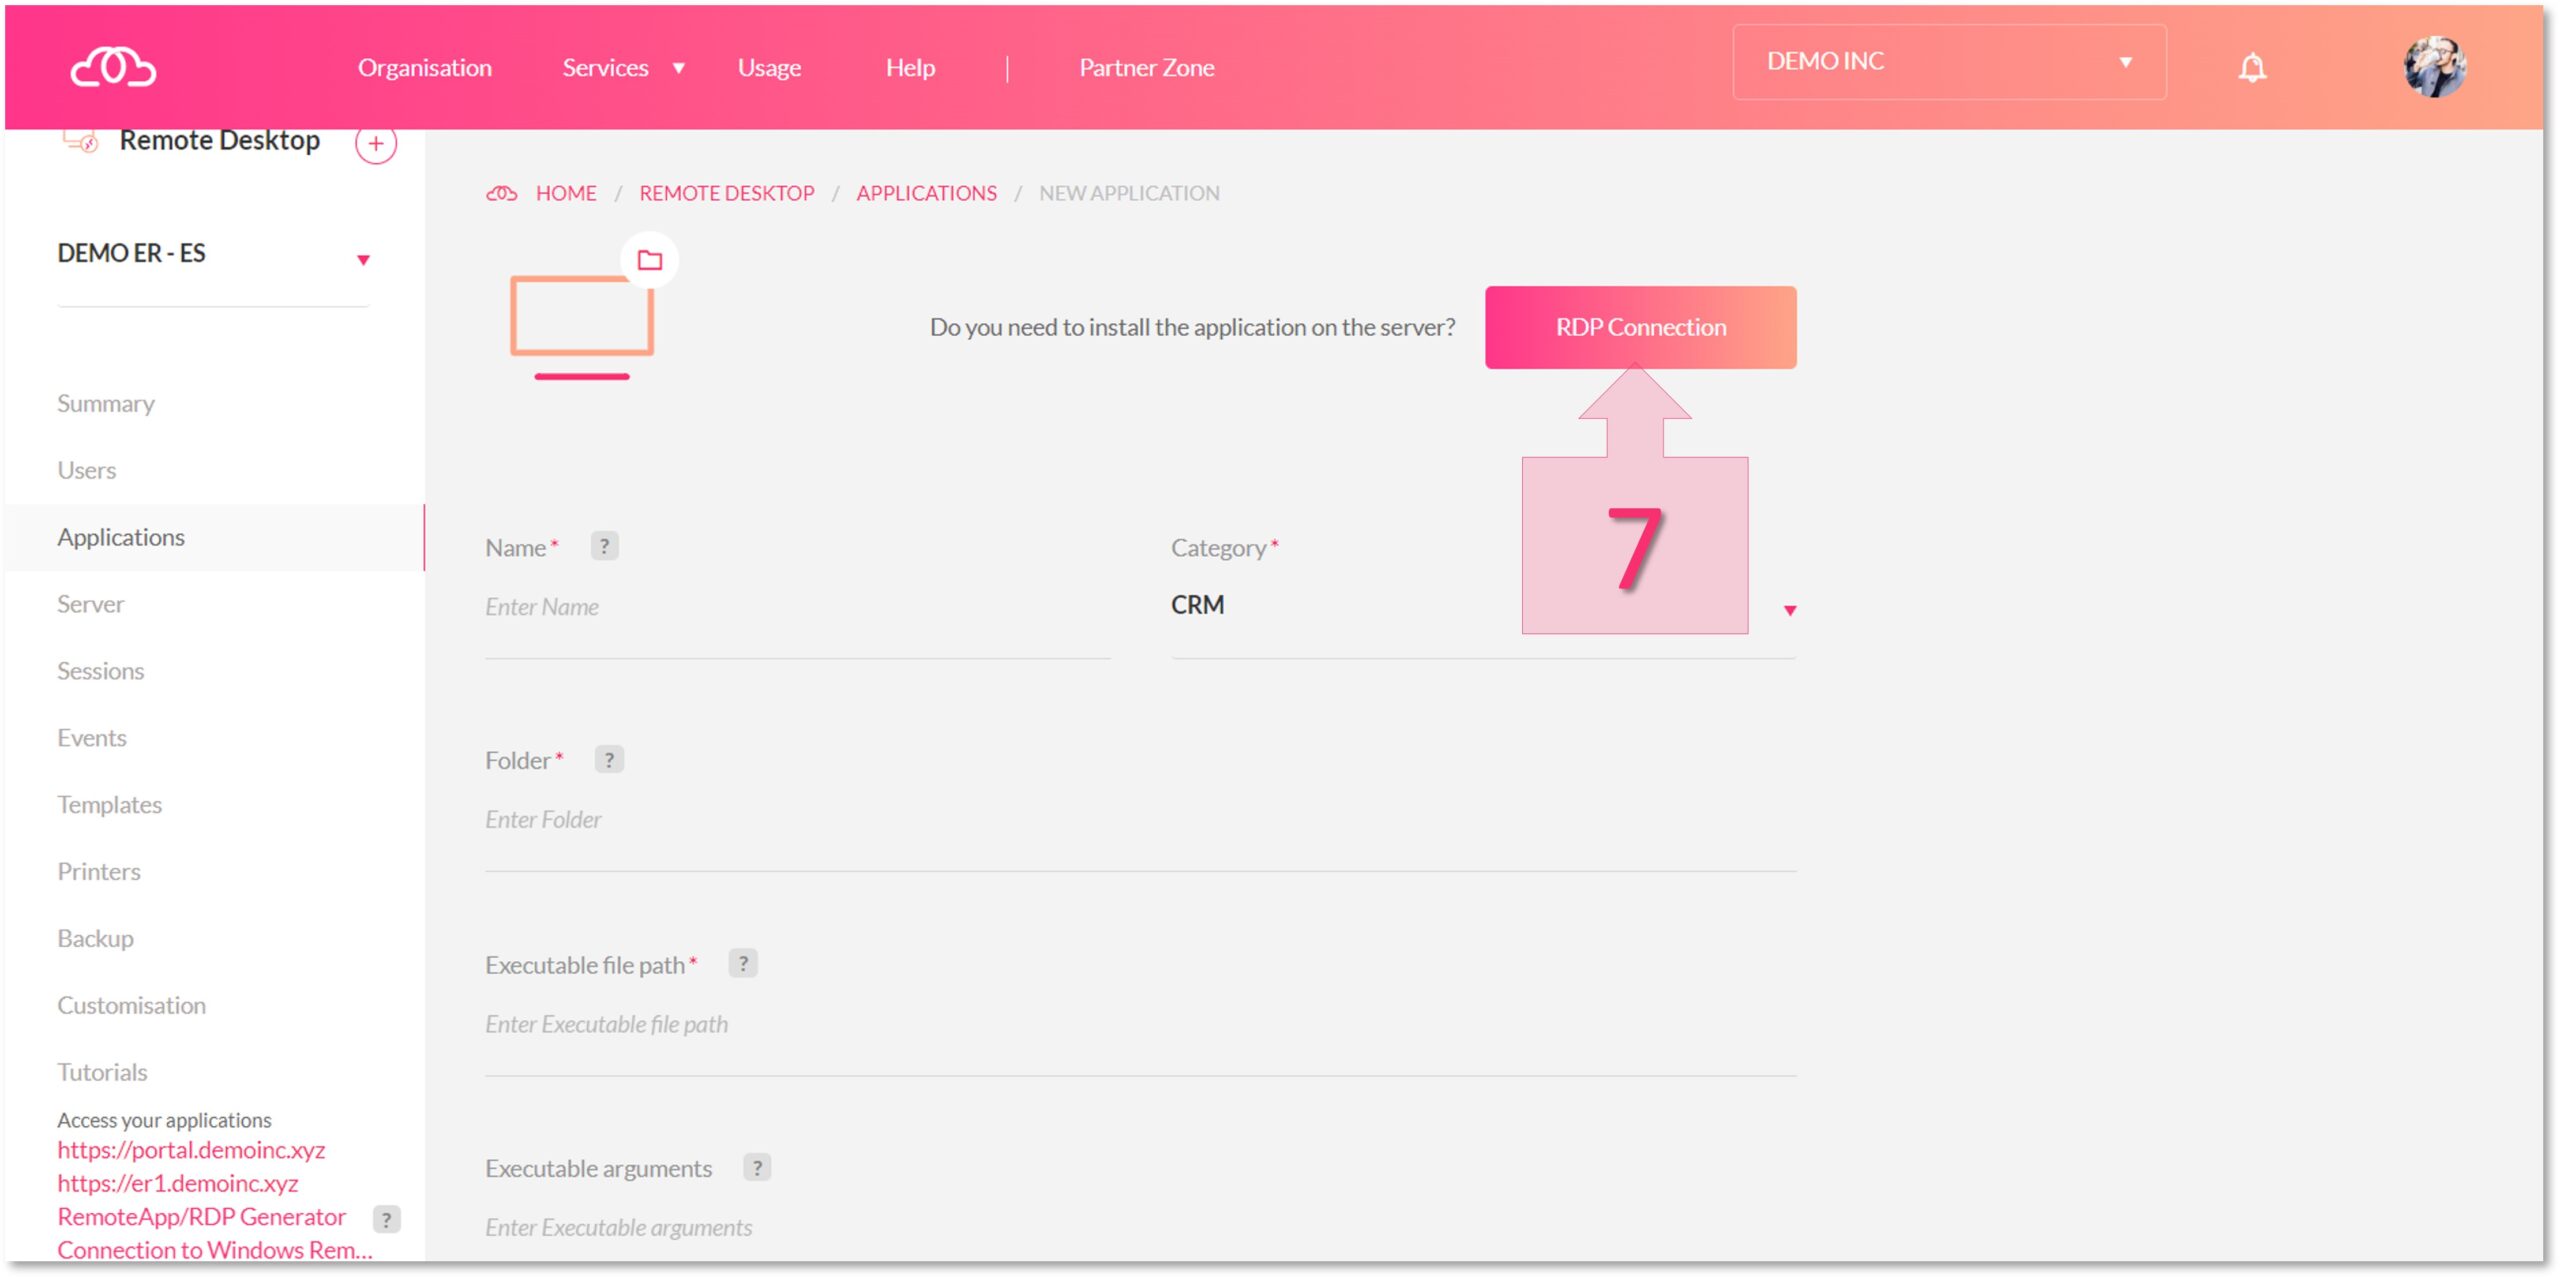
Next, click on the “RDP Connection” button (7).
At this point, you will be asked to sign in (8), and the system will download an .rdpfile (9). Run the downloaded file and a dialogue window will appear (10) where you will need to enter your username and password to connect to the server.
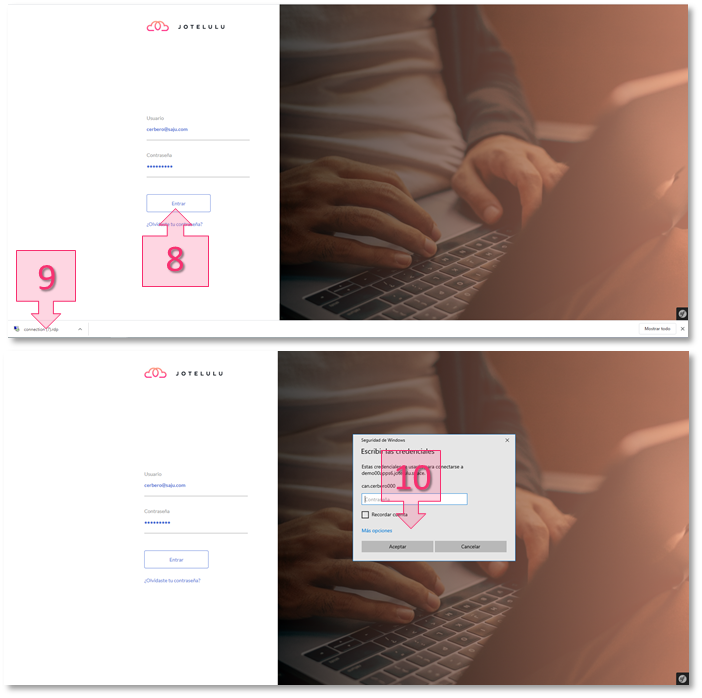
Step 2: RDP connection to the remote desktop server
You will now be successfully connected to the server where you can install your applications (11).
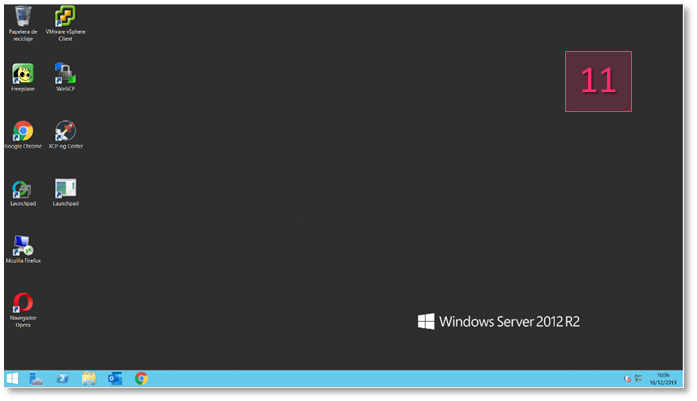
Step 2: Once signed into the server, begin installing your application(s).
Once you have installed your application(s), the next step will be to publish them on the remote desktop.
To do this, return to the Applications section on the remote desktop page. Here, you will need to add the application’s logo, name, category, working directory and executable file. Once complete, click on the “Save” button (12) and the application will have been successfully published on the remote desktop (13).
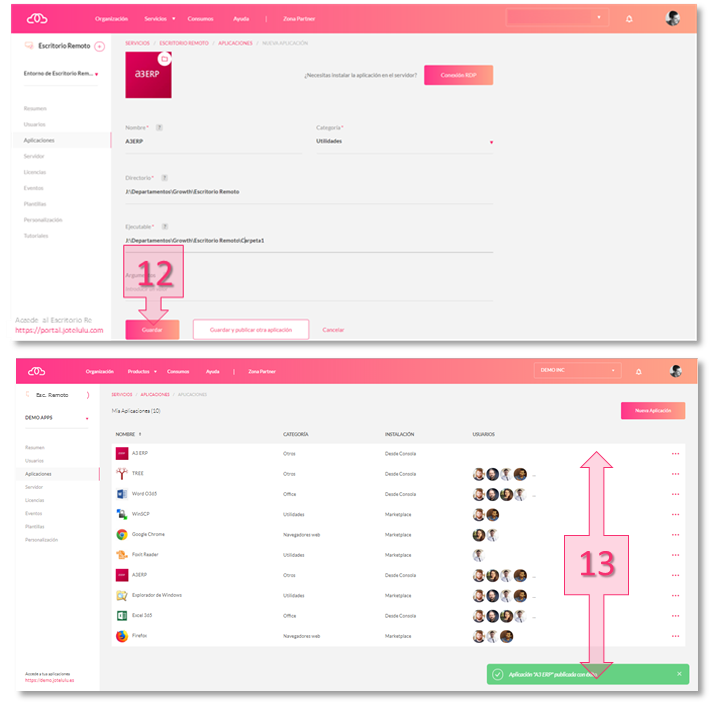
Step 2: Customise, save and publish your applications
All that is left now is to link this new application to the users that need to access it. To do this, click on the three dots to the right of the application and choose which users should have access.
Summary
Adding applications that are not available on the Marketplace is a simple process. Once added, they can then be linked to specific users so that they can be used on the remote desktop. This way, you can create a customised work environment for users so that they have everything they need.
If you found this tutorial helpful and would like to learn more about what you can do with the remote desktop service, take a look at the following tutorials:
- Printing from the Remote Desktop.
- How to Connect to the Remote Desktop Using a Site-to-site VPN.
- How to Create Templates on a Server for Reuse on the Remote Desktop.
We hope that you have found this tutorial useful. Good luck!
Glossary
- Device: Machine that allows someone to run an IT programme and display computer/server data.
- Application/Programme: Software and resources that make it possible to carry out different tasks on a computer or server.


