
In this tutorial, we’ll show you how to create a GPO to deploy software on your client devices, saving you the boredom and time involved in carrying out the same task over and over.
Since we’re going to be working with Group Policy Objects (GPO), to complete this tutorial, your server(s) will need to be running Microsoft Active Directory Domain Services (AD DS). However, aside from that, we’re going to try and make sure that this tutorial is useful for both novices who are just getting started and more experienced technicians who just need to refresh their memories.
The tutorial is broken up into three parts, but feel free to skip anything that you already know. Specifically, we’re going to look at:
- Part 1 – Deploying AD DS.
- Part 2 – Creating a shared network location.
- Part 3 – Creating a GPO for deploying software.
How to Create a GPO to Deploy Software
Before you get started
To complete this tutorial successfully, you will need the following:
- To have registered on the Jotelulu platform and have logged in.
- To have a Windows Server with AD DS installed.
- To have an account with administrator privileges.
Part 1 – Deploying AD DS
If you haven’t already done so, you’ll first need to install and configure an AD DS domain, register your Domain Controllers and then register your devices. The devices on your domain will be where we’ll deploy the software later on.
If you haven’t already configured a domain, check out How to Configure AD DS on Your Windows Server.
Part 2 – Creating a Shared Network Location
Next, you need to set up a shared network folder so that you can publish the software and map it on your client devices. This is how they will install the software using a GPO.
First, create a folder, right-click on it (1) and select Properties (2).

Next, click on the Sharing tab (3) and click on “Advanced Sharing…” (4).
A new window will then appear. Here, you should click on the checkbox “Share this folder” (5) and then, click on Permissions (6
Next, remove access from Everyone (7) and click on Add (8) to add new users like the devices and users in your domain.
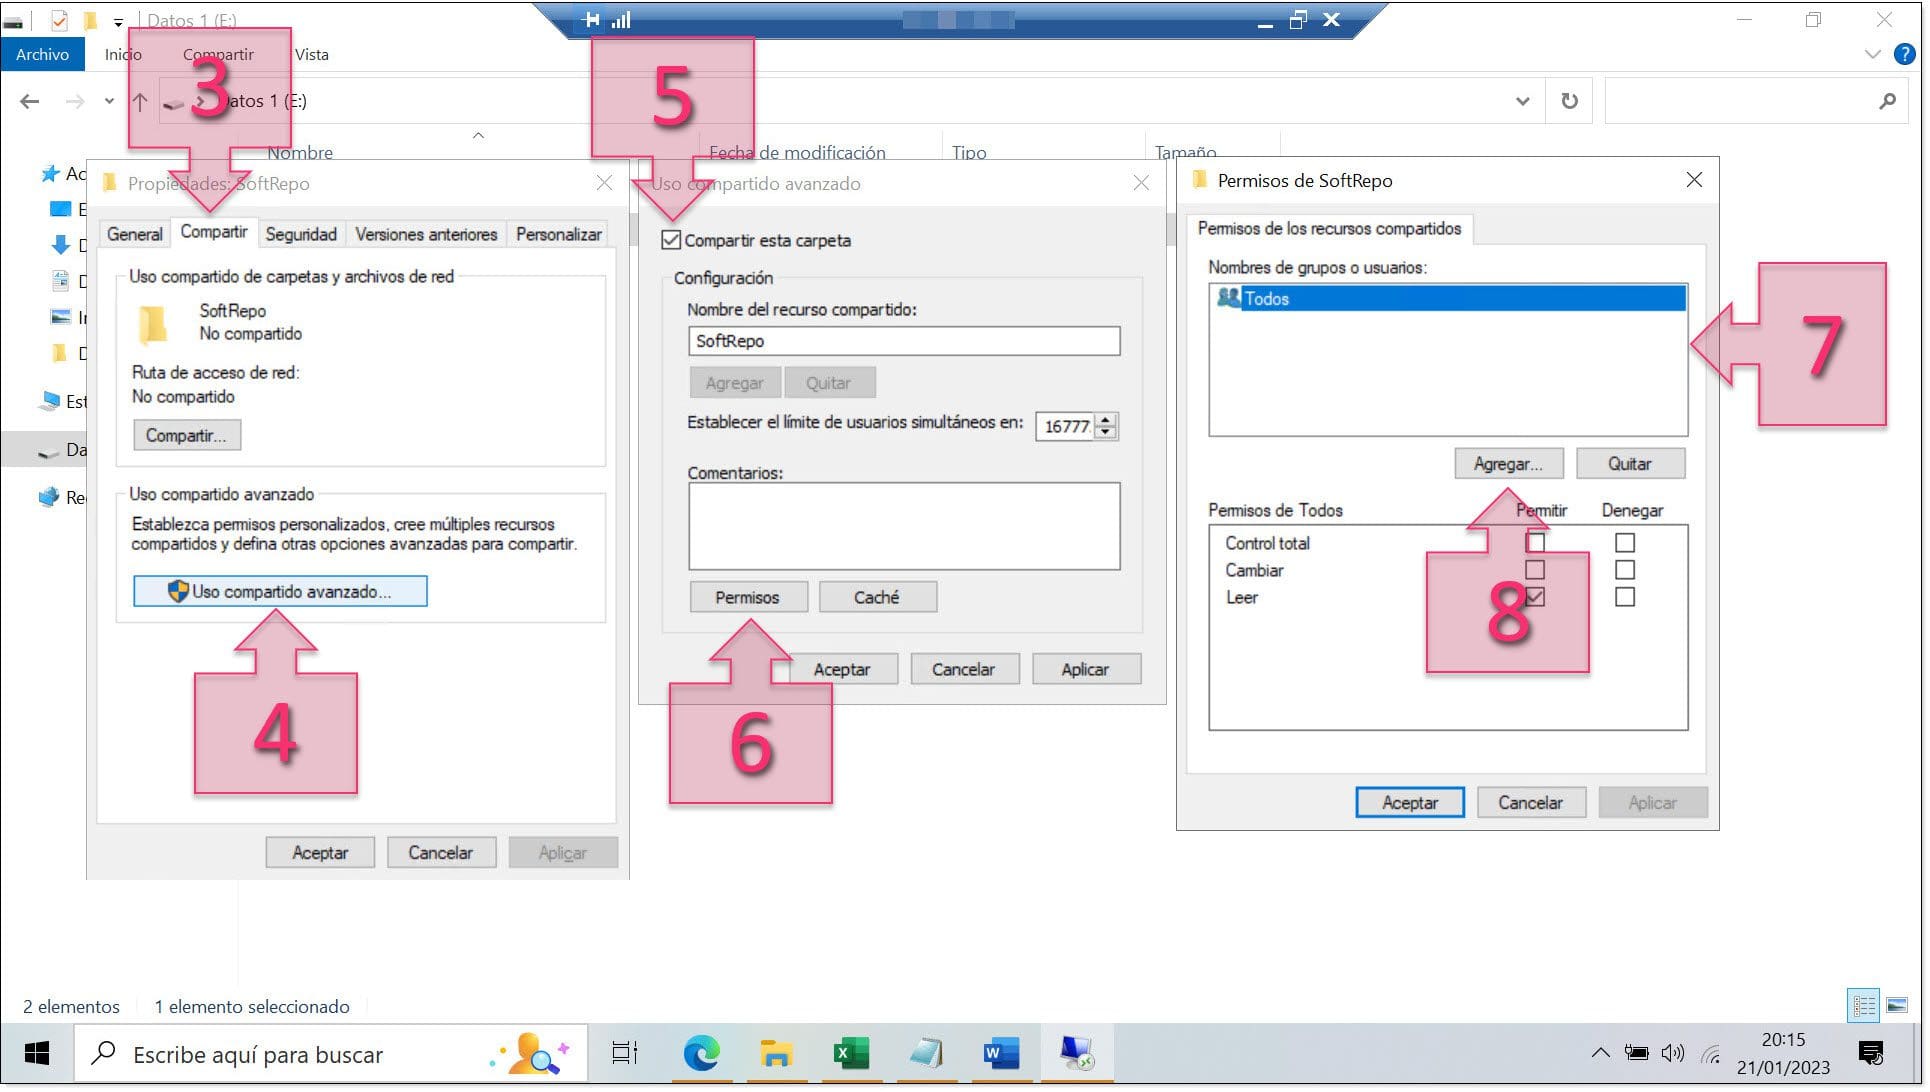
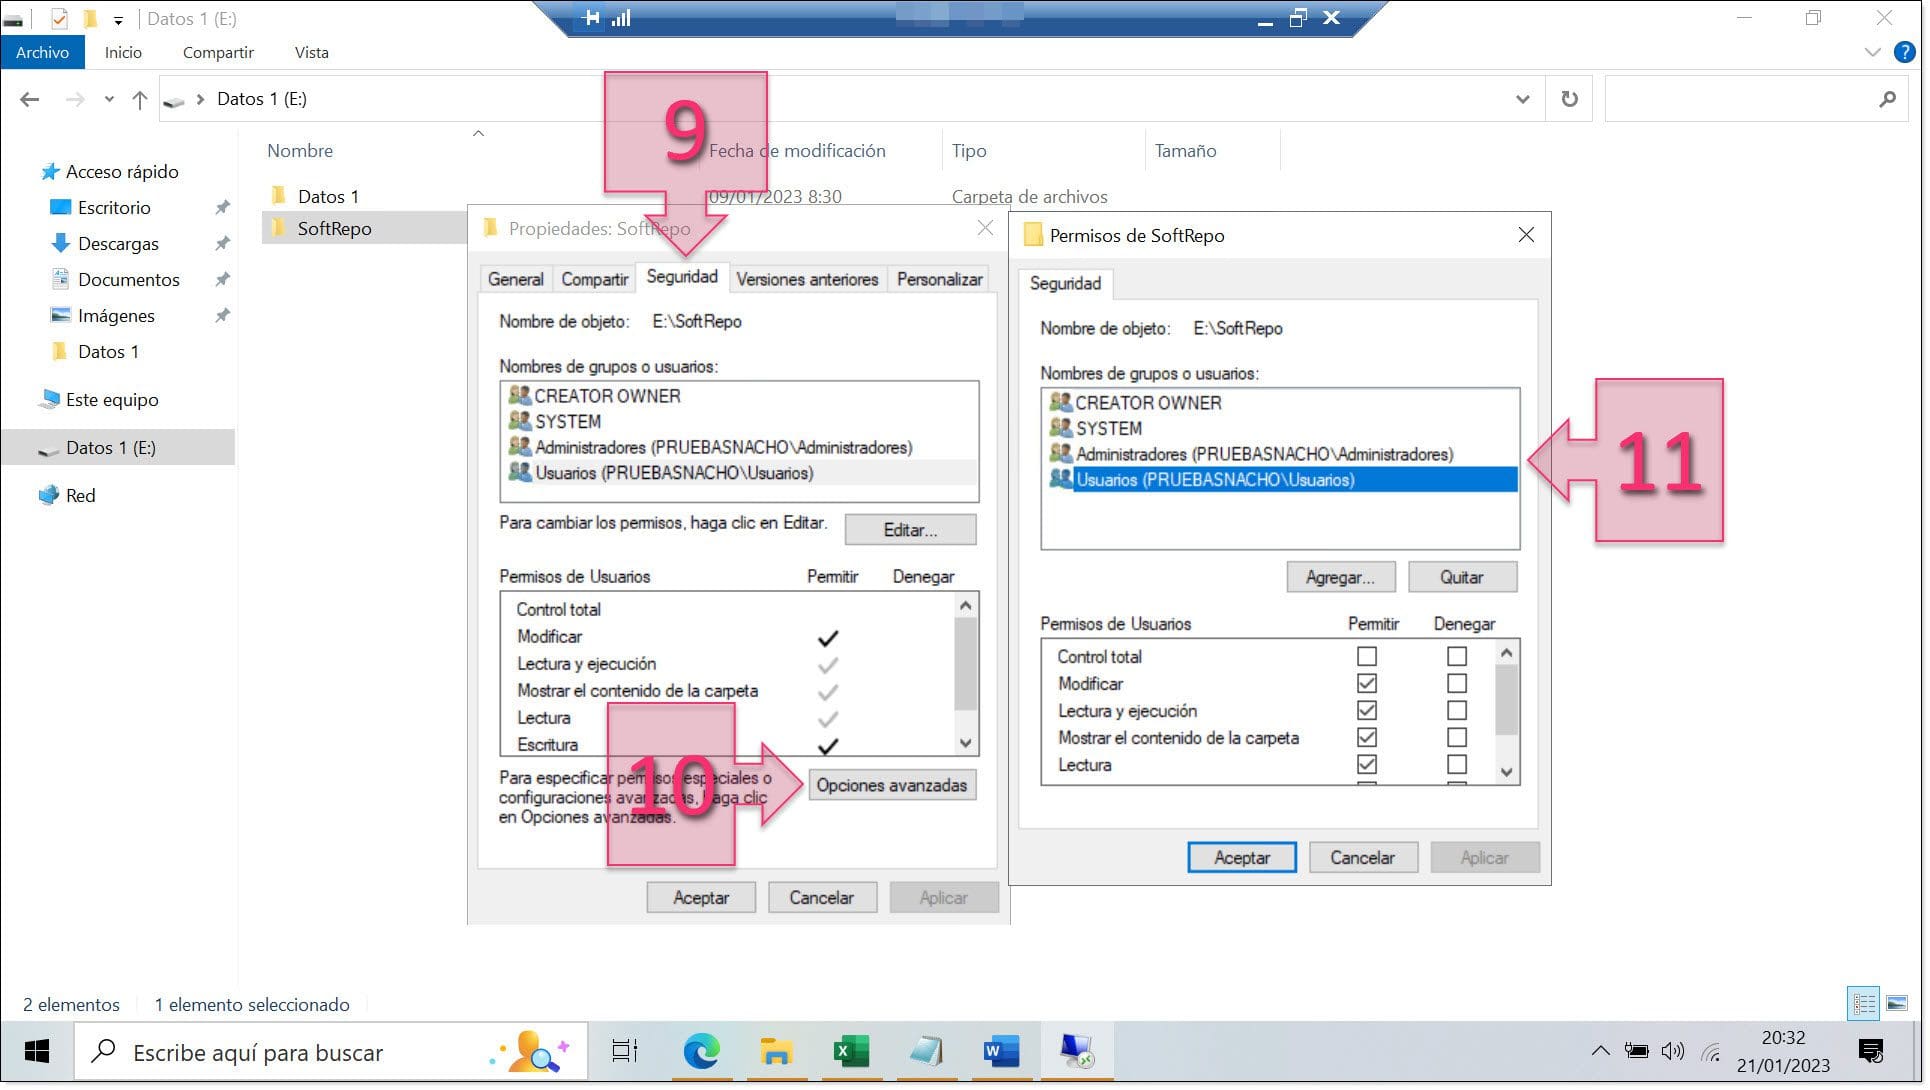
Next, click on the Security tab (9) and click on Advanced (10). In the window that appears, select Users (11) to add the necessary permissions.
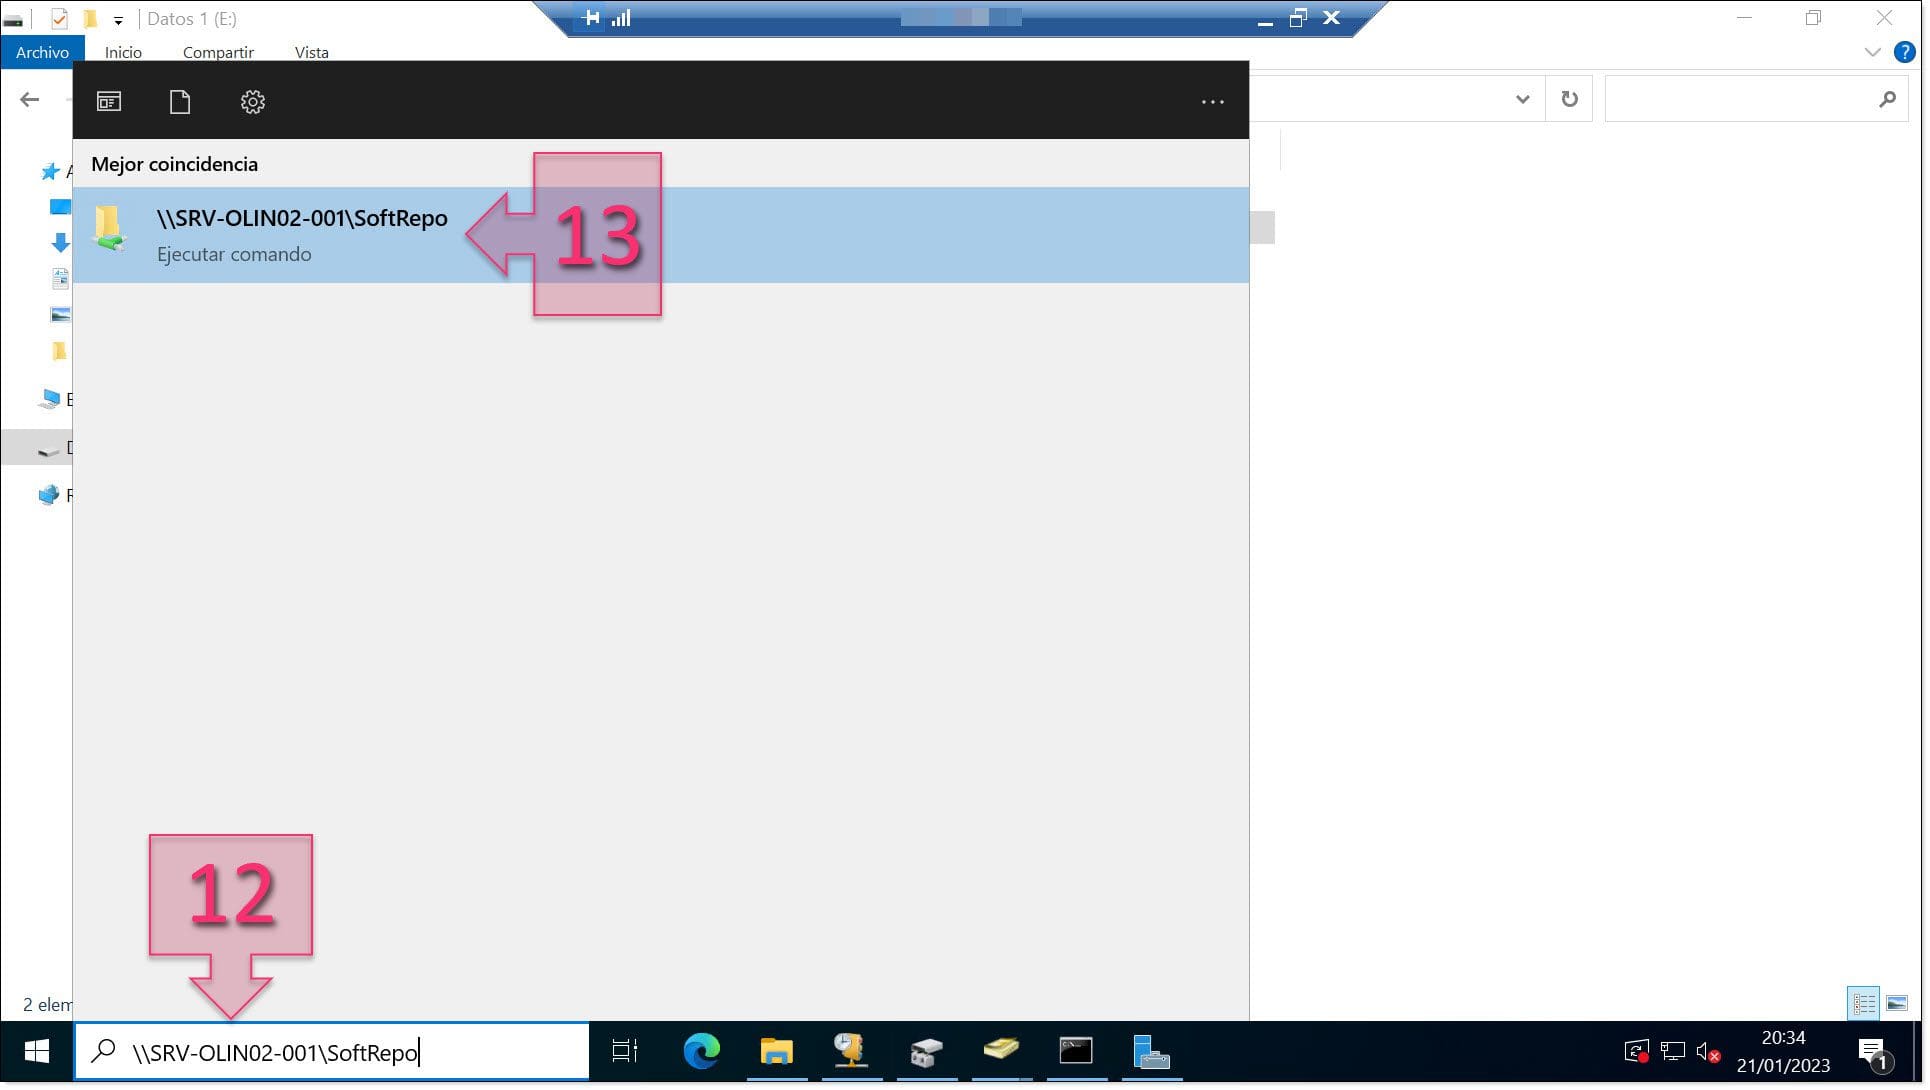
Now that you have given access to your users, you need to check that your changes have been applied successfully. Type the full folder path in the search bar (12) and the folder should appear in the results. Double–click on the folder to open it (13).
In the image below, you can see the example “\\SRV-OLIN02-001\SoftRepo”
If you can access the folder without any problems, then everything has been done correctly.
Part 3 – Creating a GPO to Deploy Software
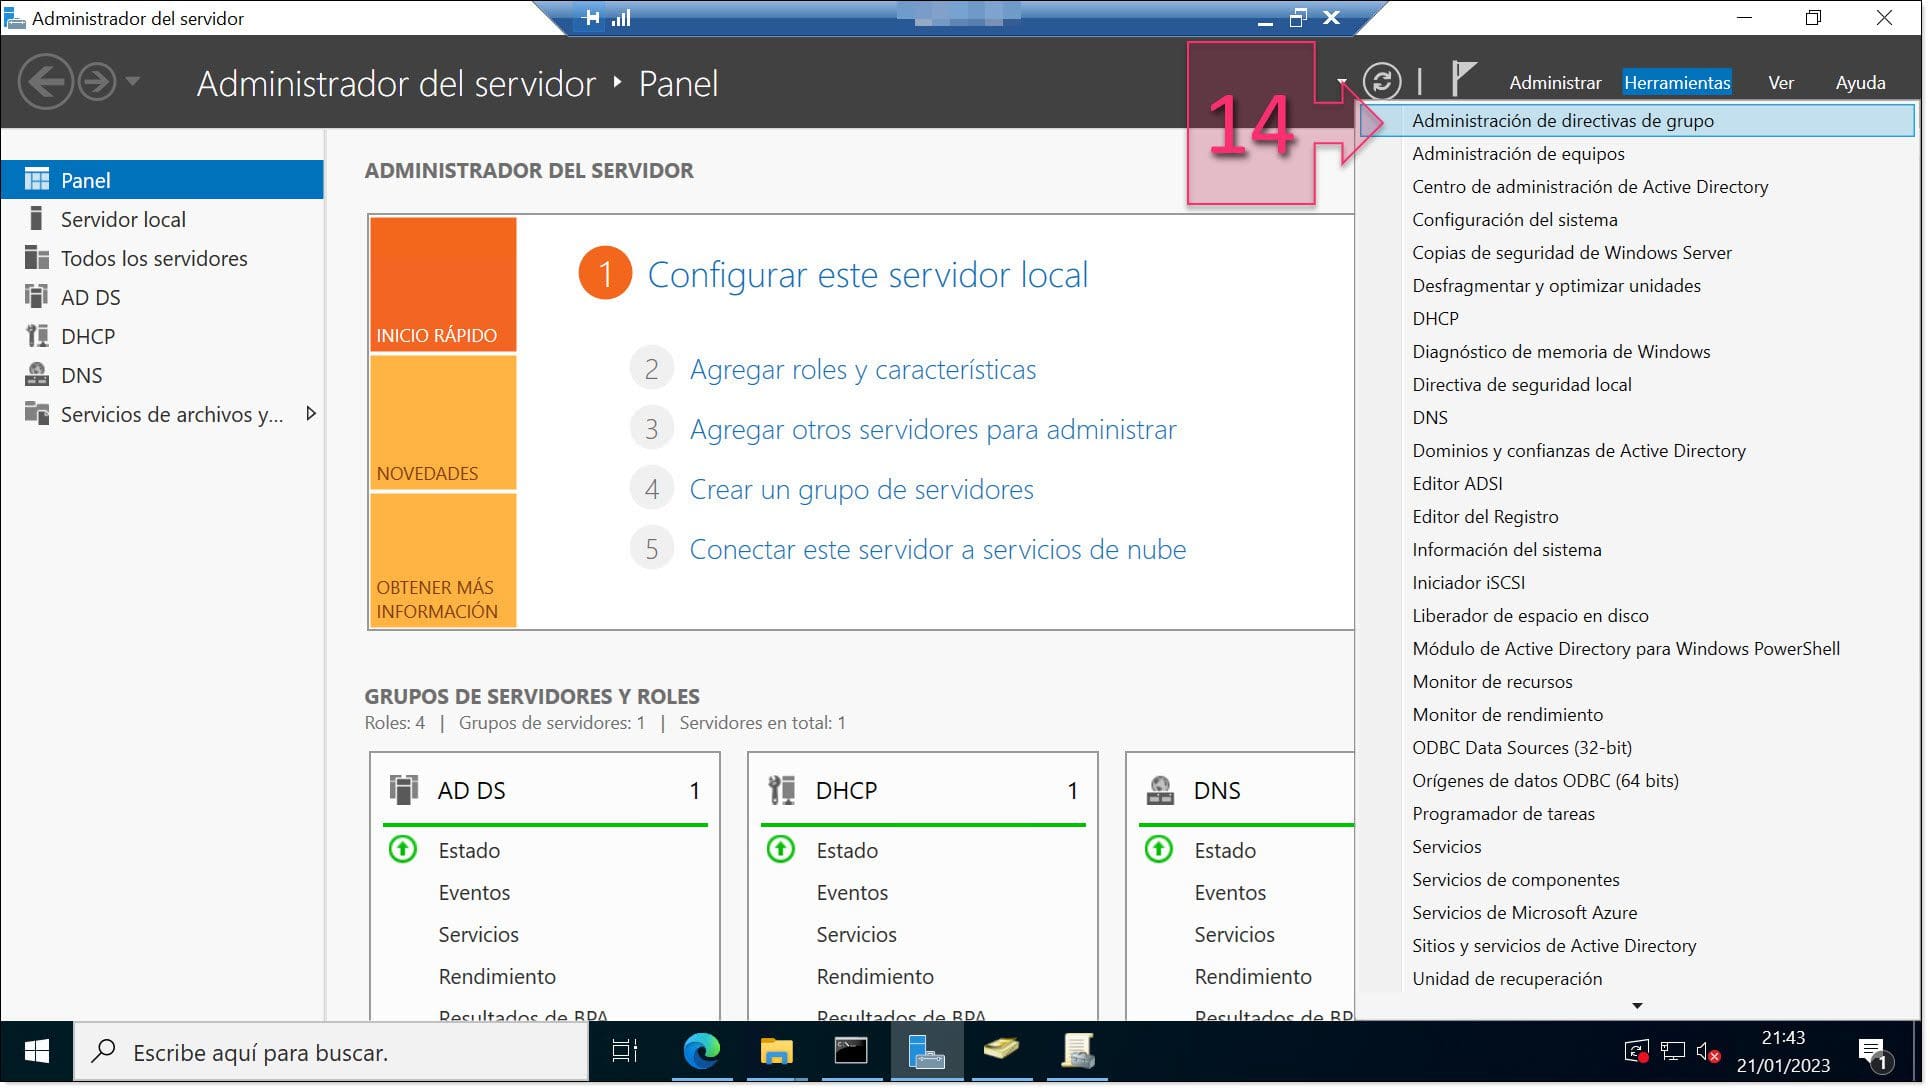
To create a GPO, first run Server Manager, click on Tools and then, click on Group Policy Management (14).
NOTE: You can also open the Group Policy Management window by running GPMC.MSC.
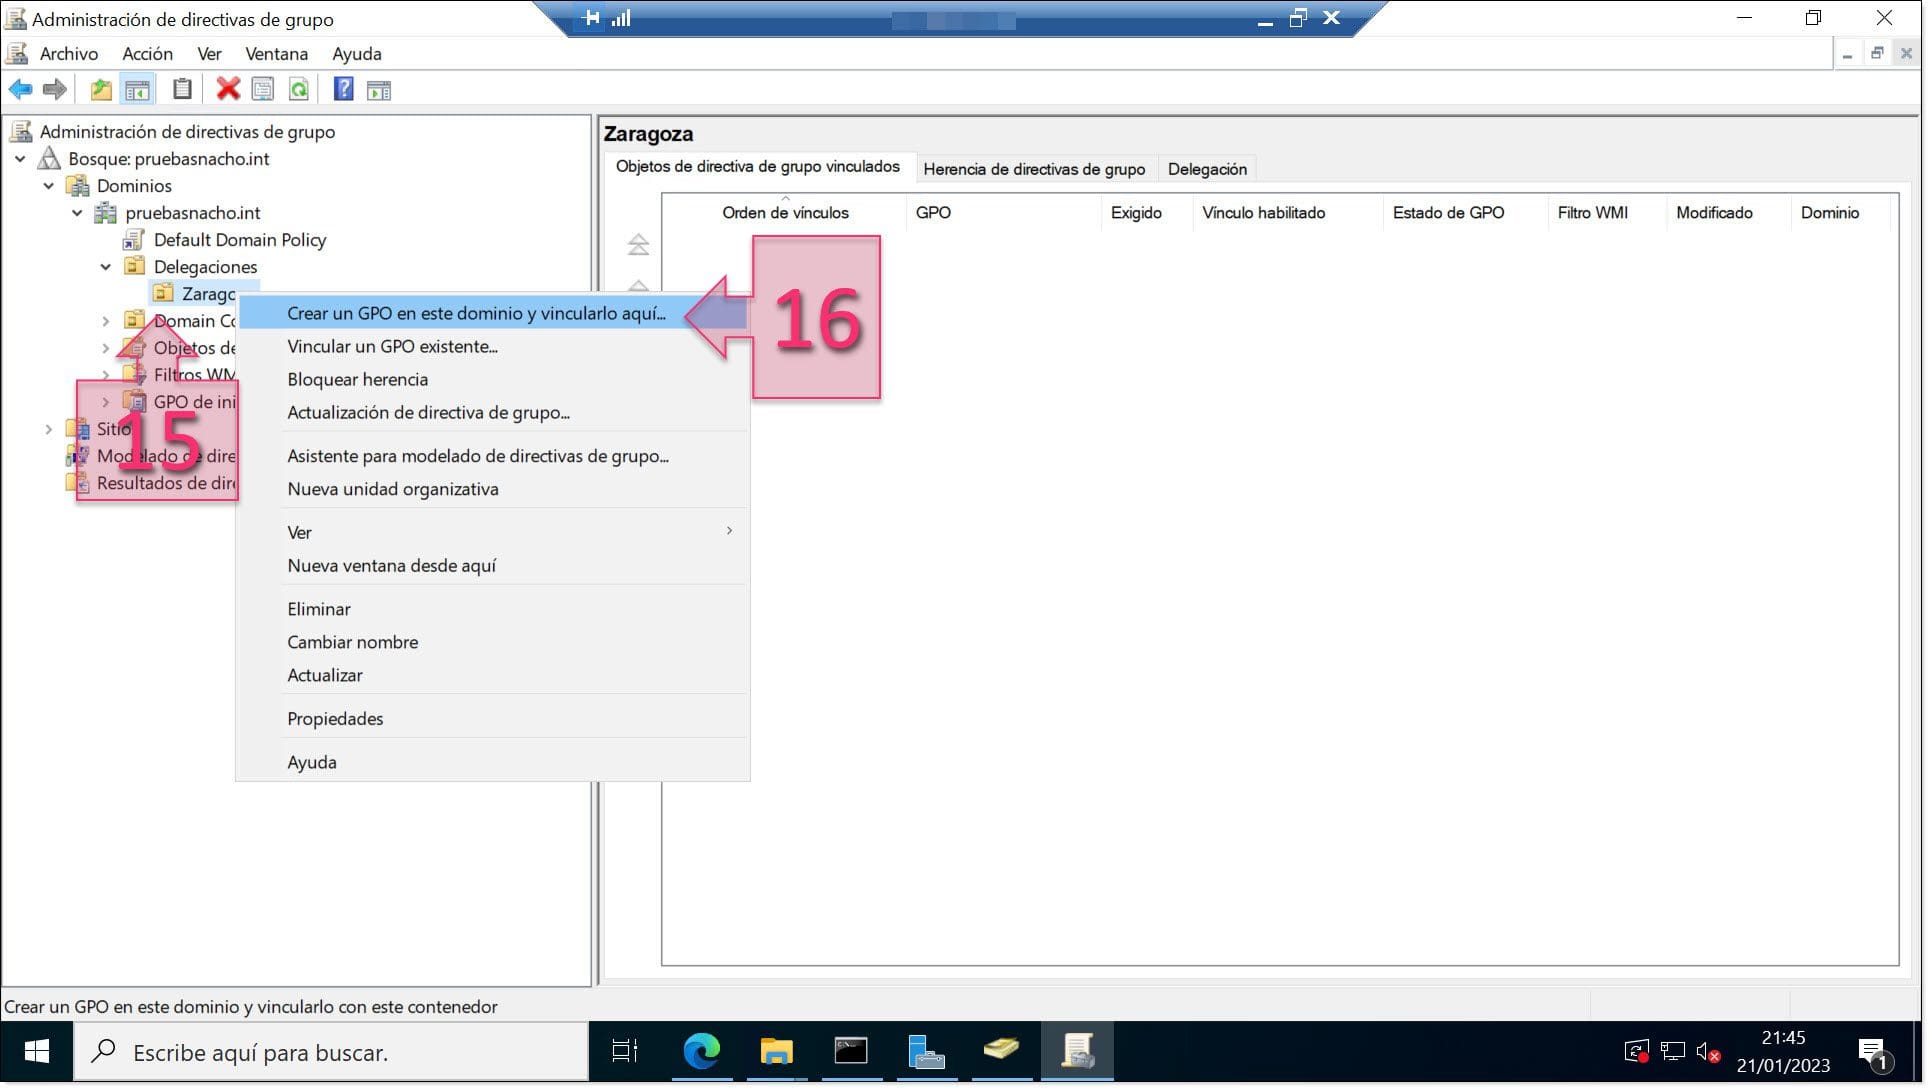
In the Group Policy Management window, expand the tree on the left-hand side (15) to find the Organisational Unit (OU) on which you want to deploy your new software.
In this tutorial, we want to deploy software on the delegation in Zaragoza.
Once you’ve found the right OU, right-click on it and select Create a GPO in this domain, and Link it here… (16).
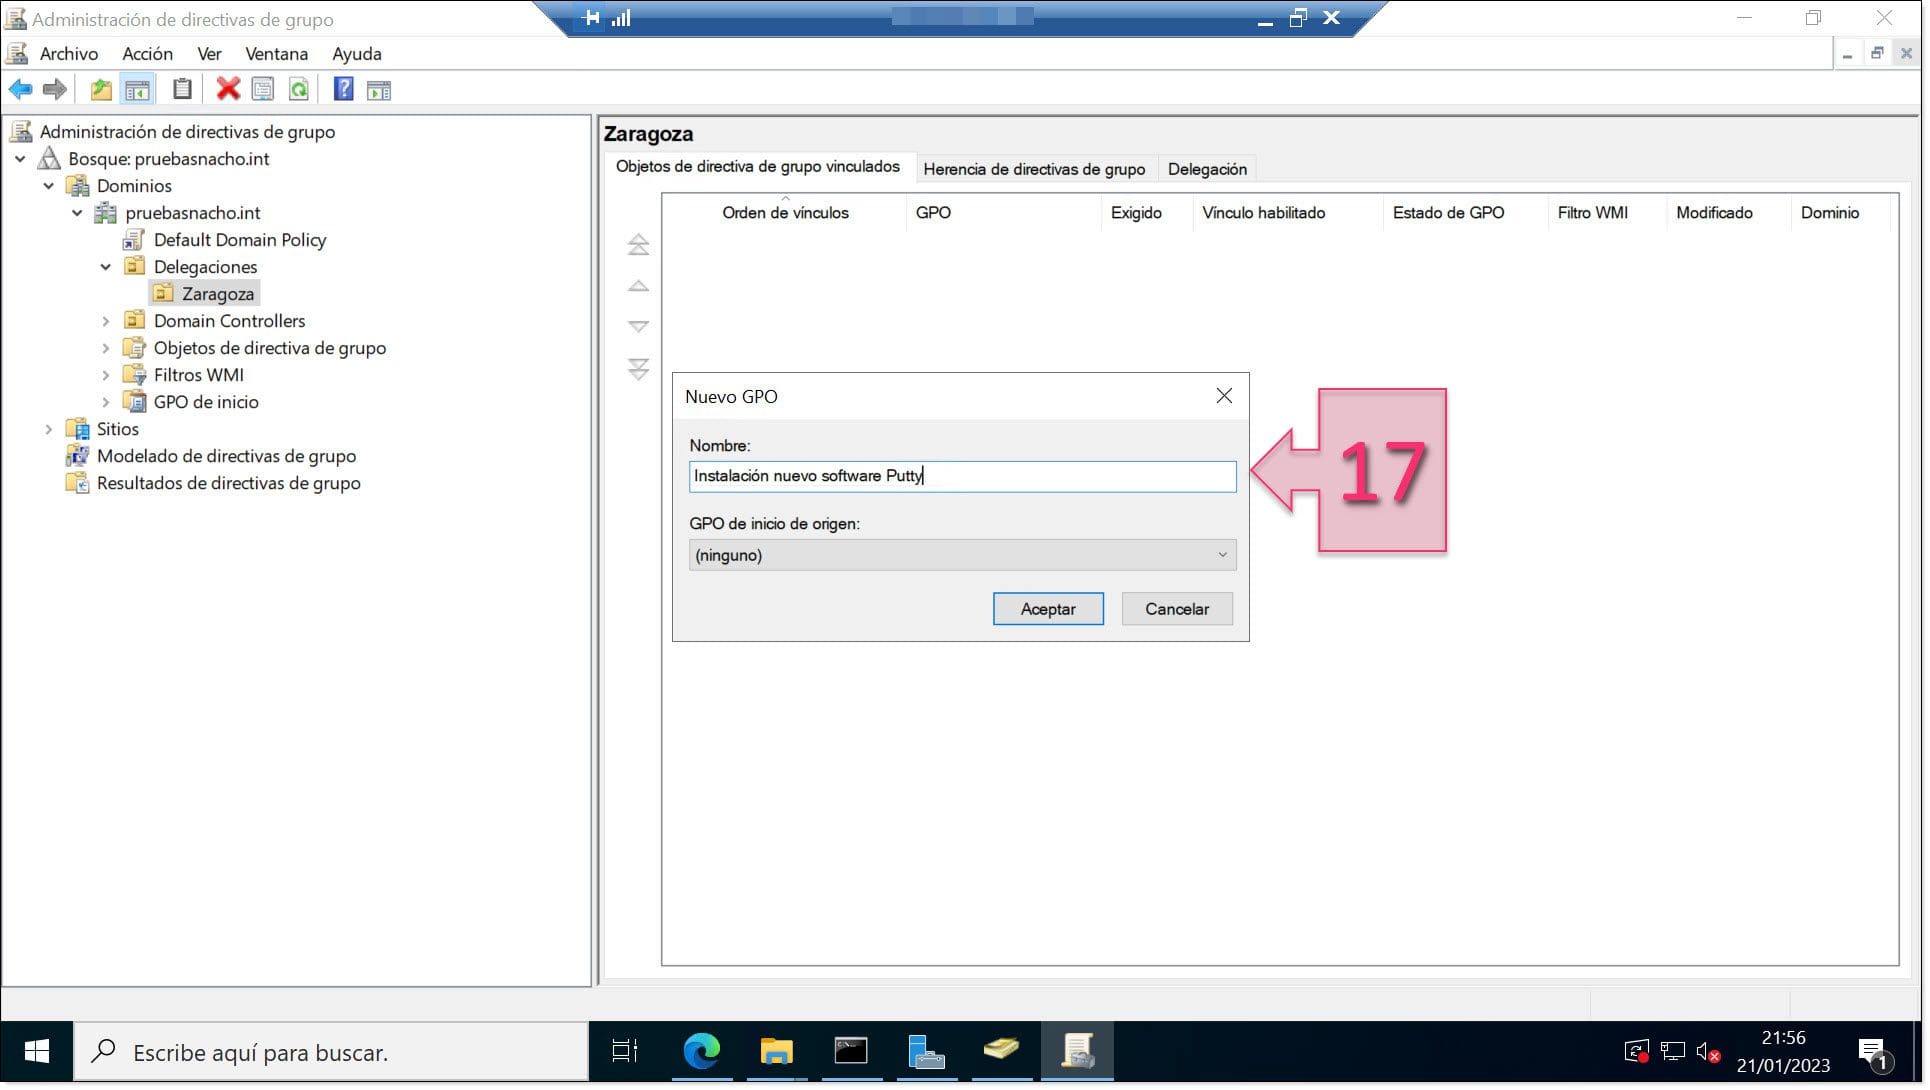
You will now see the New GPO window in which you just need to enter a name for your new GPO (17) and click on OK. For this tutorial, we’re going to name it “New PuTTY Installation”.
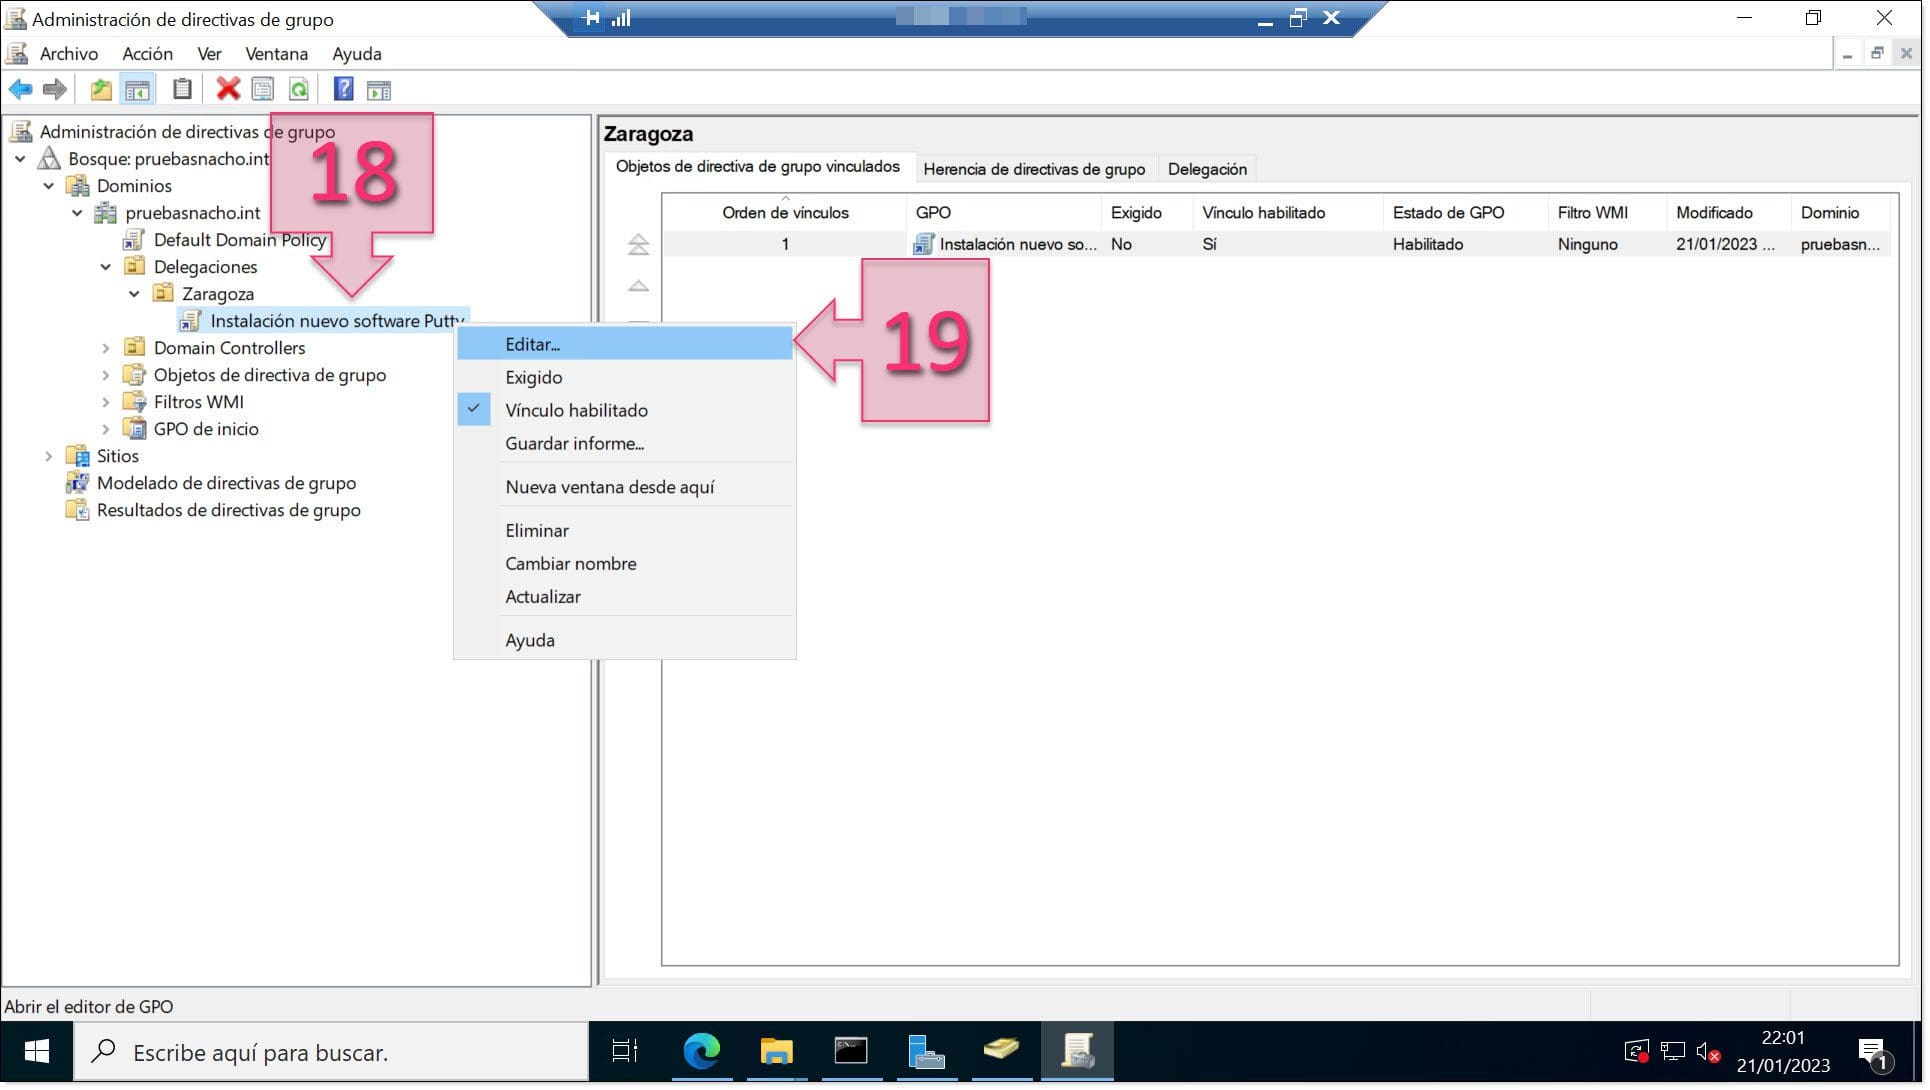
Your new GPO should now appear in the Group Policy Management window. Simply right-click on it (18) and click on Edit… (19).
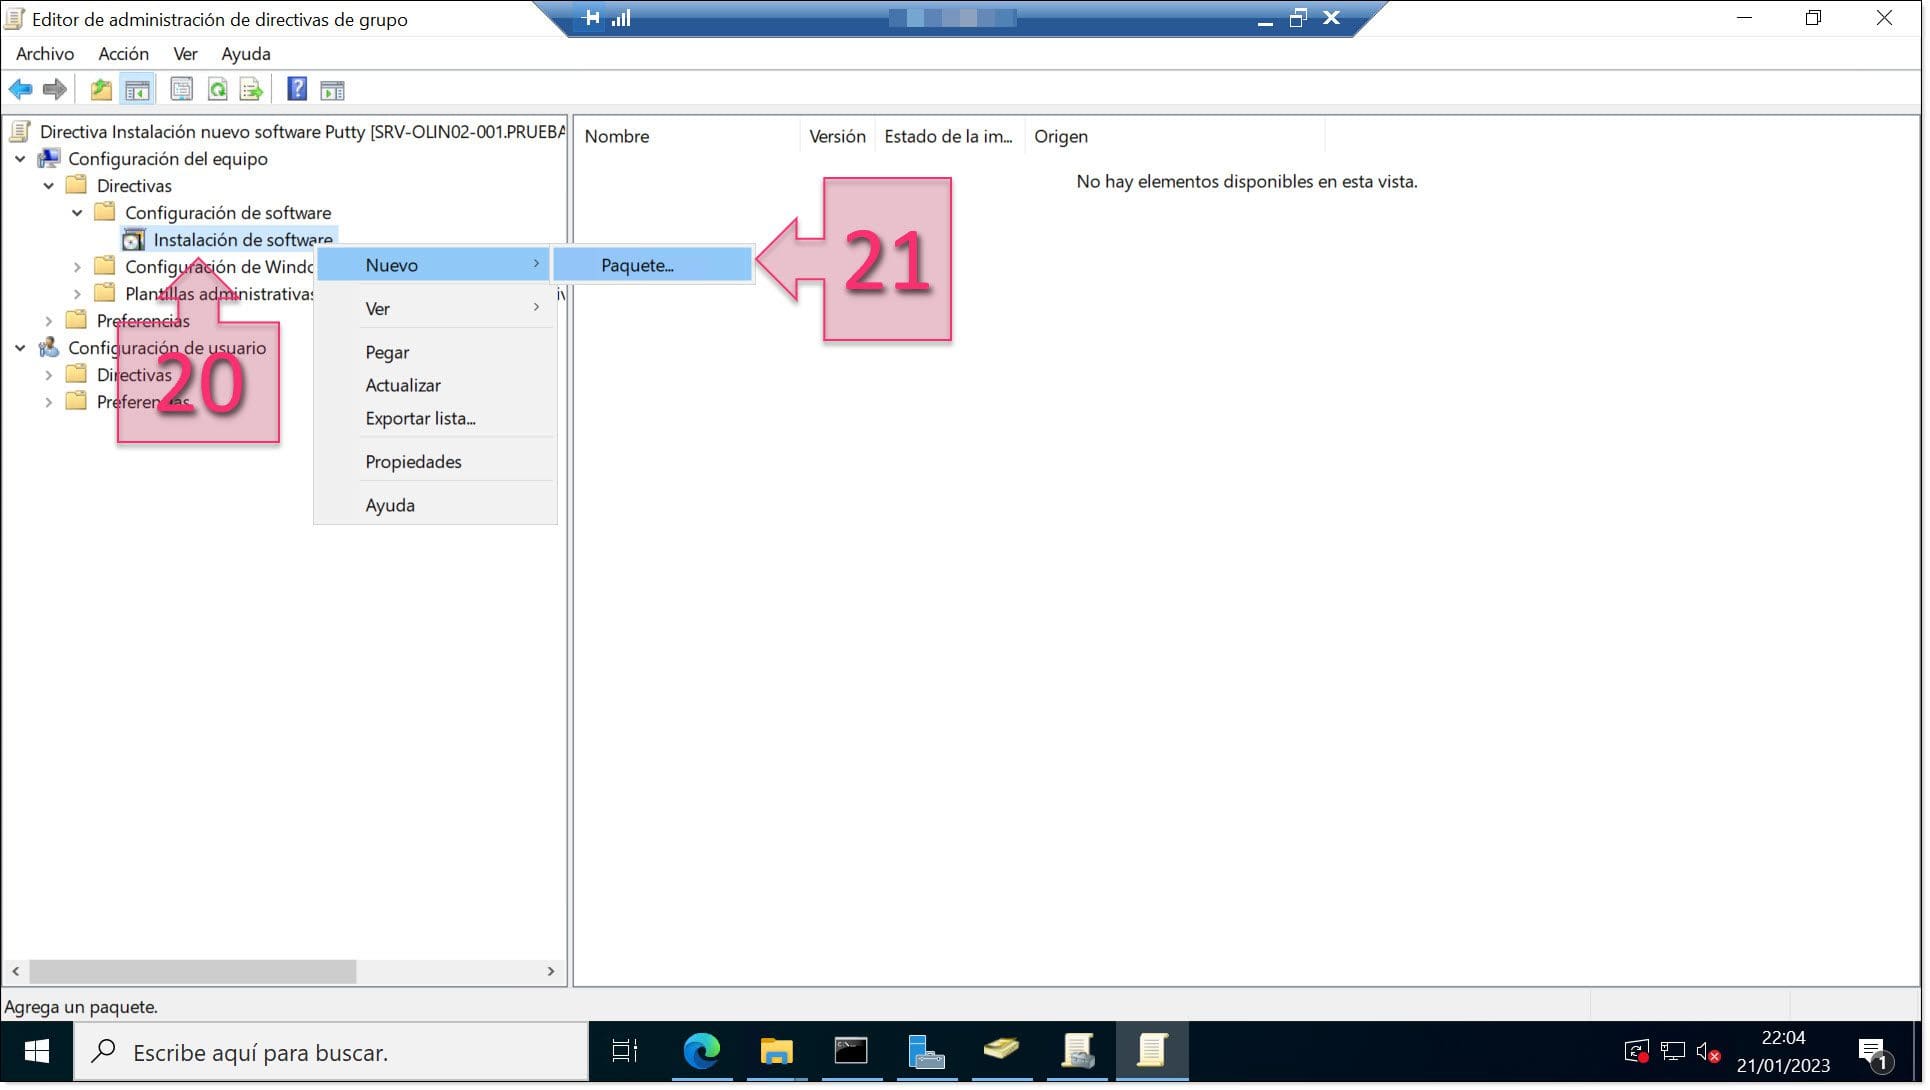
In the Group Policy Management Editor, expand the following branch: Computer Configuration > Policies > Software Settings > Software Installation (20). Right-click on Software Installation and select New > Package… (21).
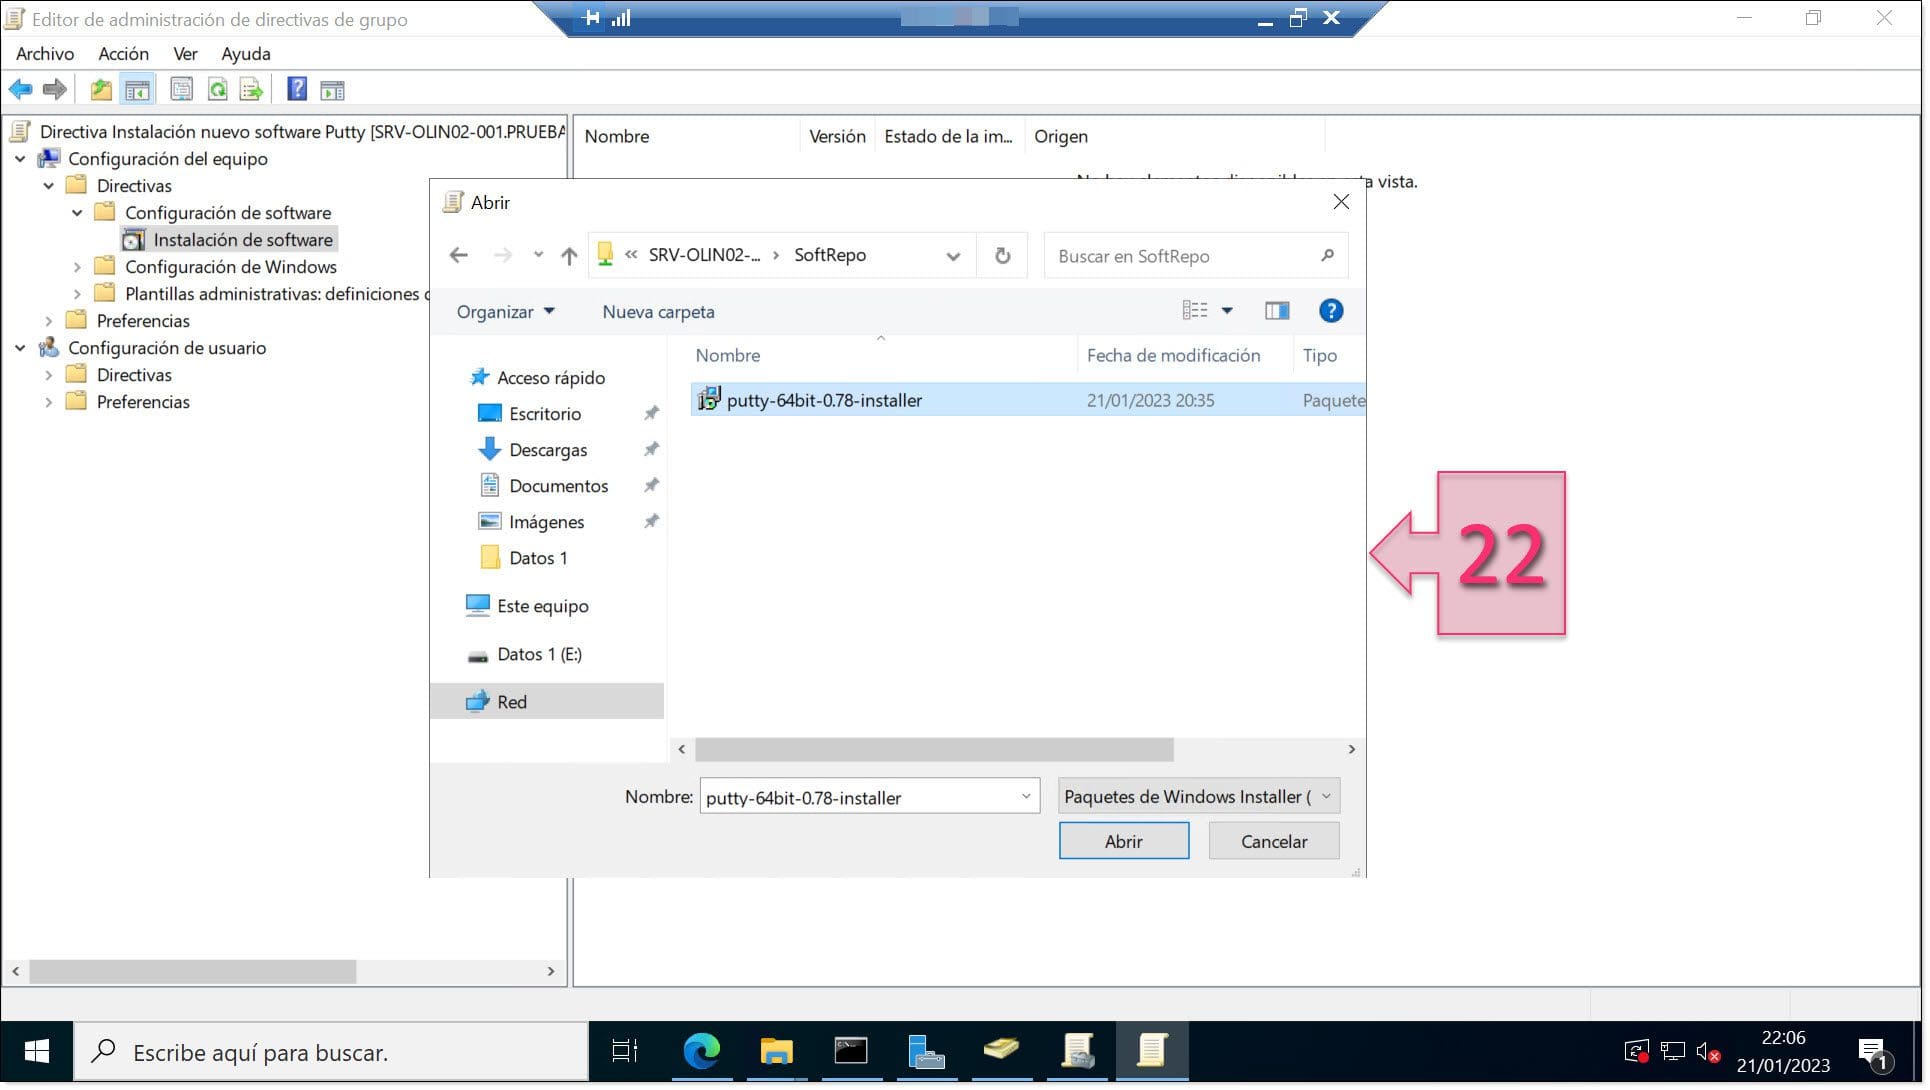
A new window will now appear in which you need to search for the installation package for your software (22). Once you’ve found it, select it and click on Open.
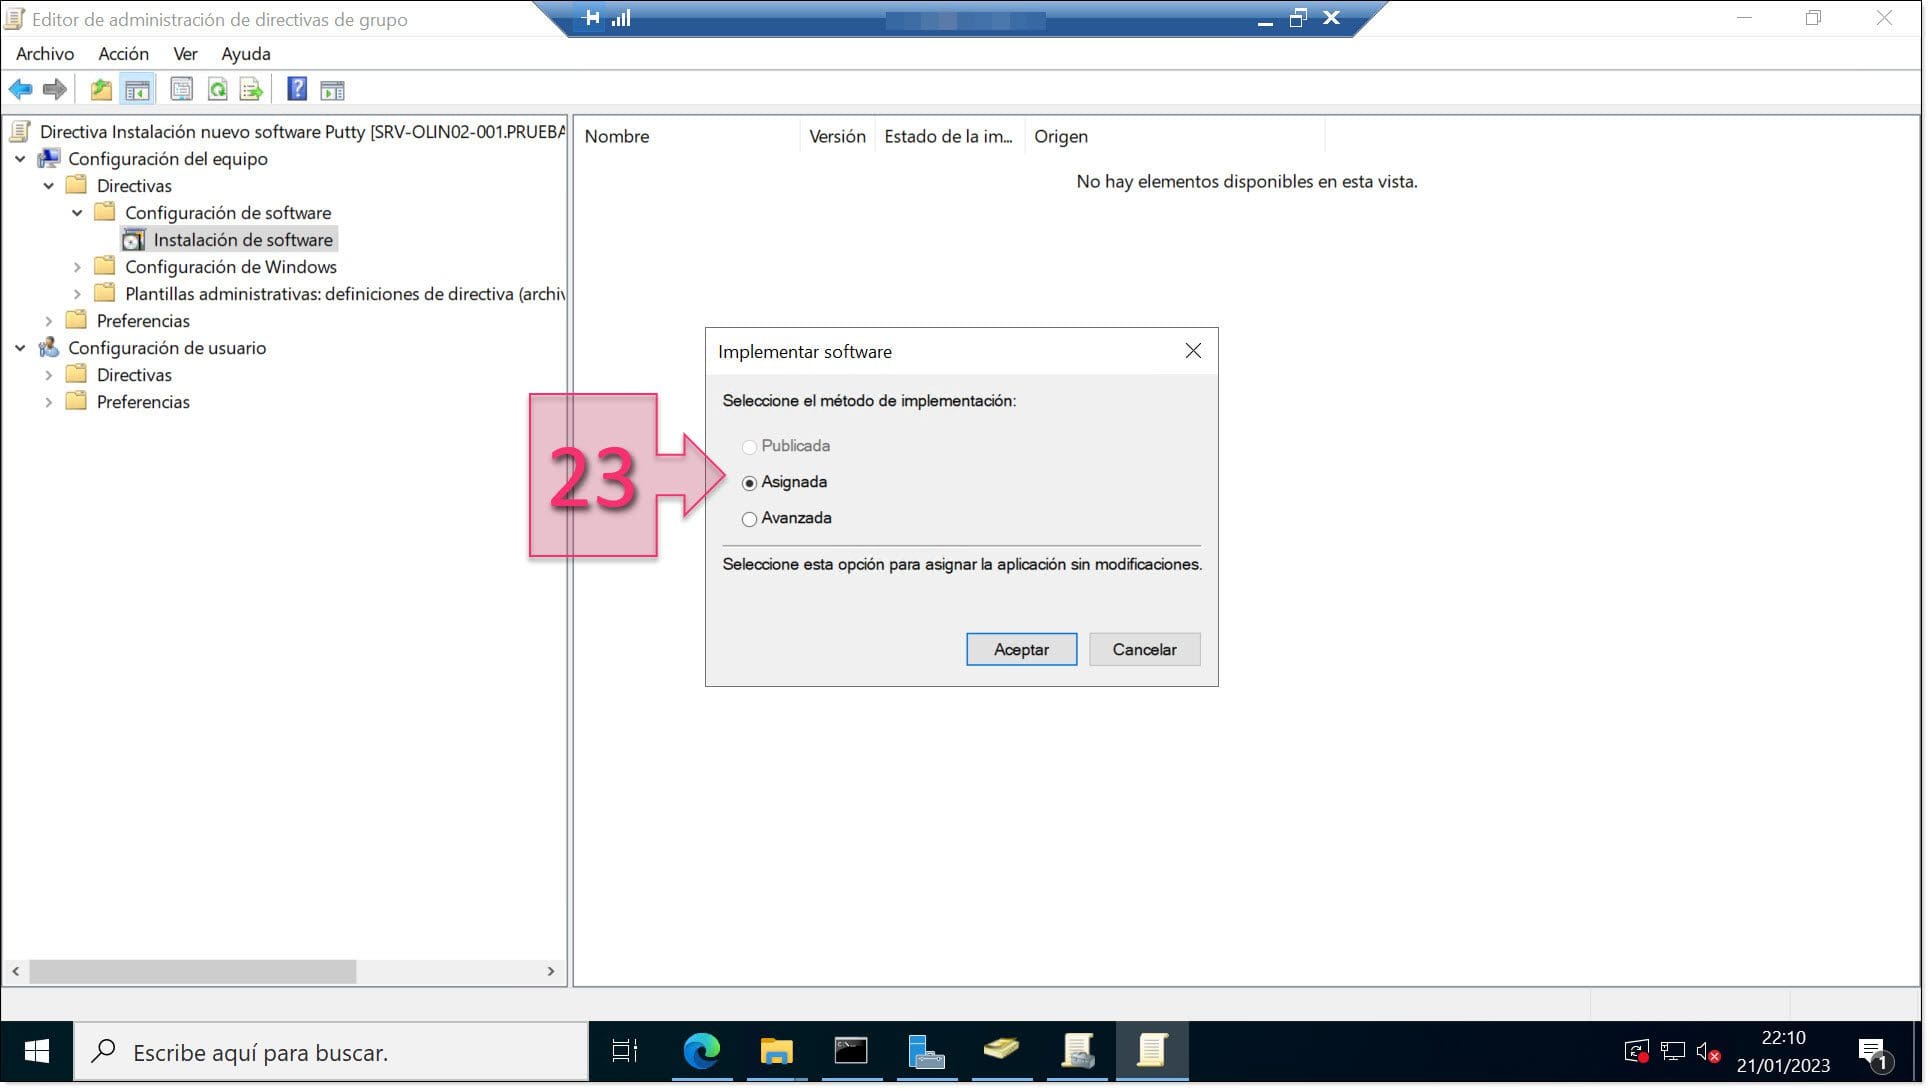
Another window will now appear and you should select Assigned (23) as the software implementation method.
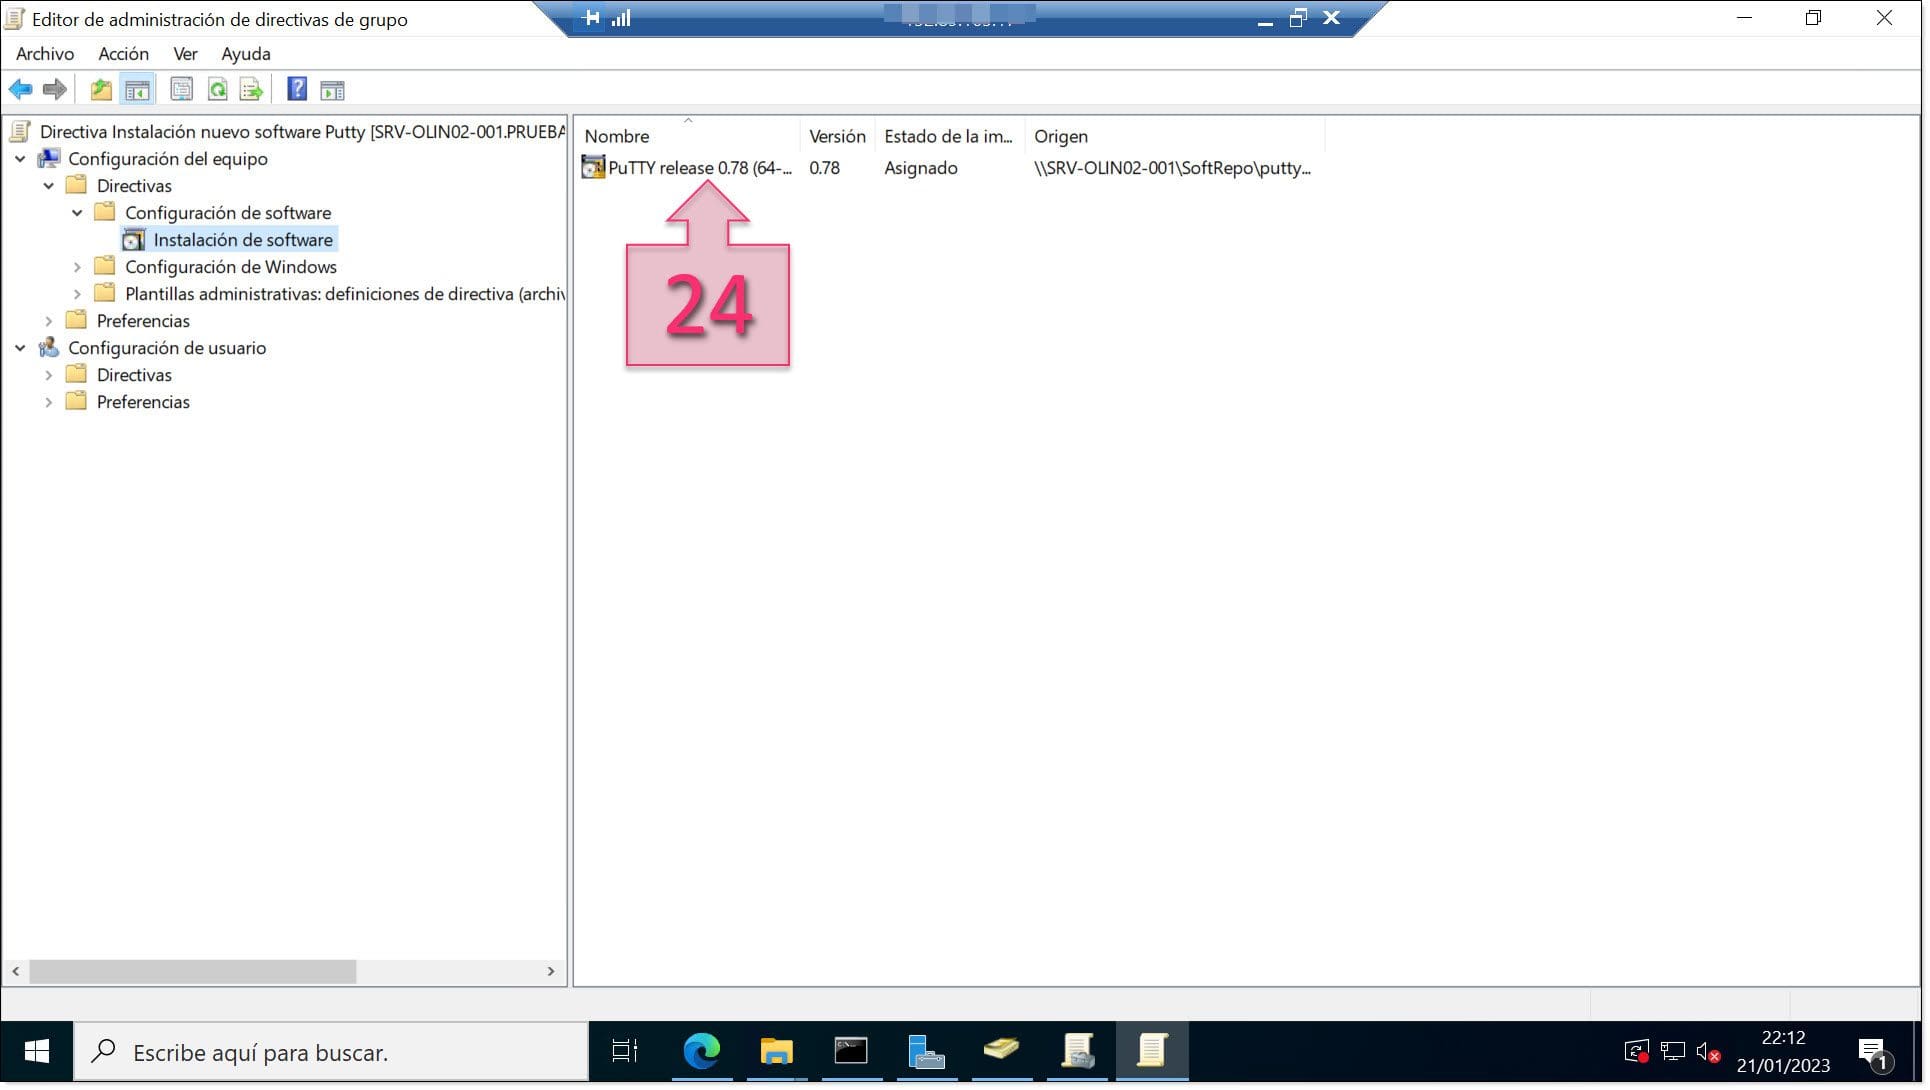
Next, you should check that you have definitely implemented the software (24).
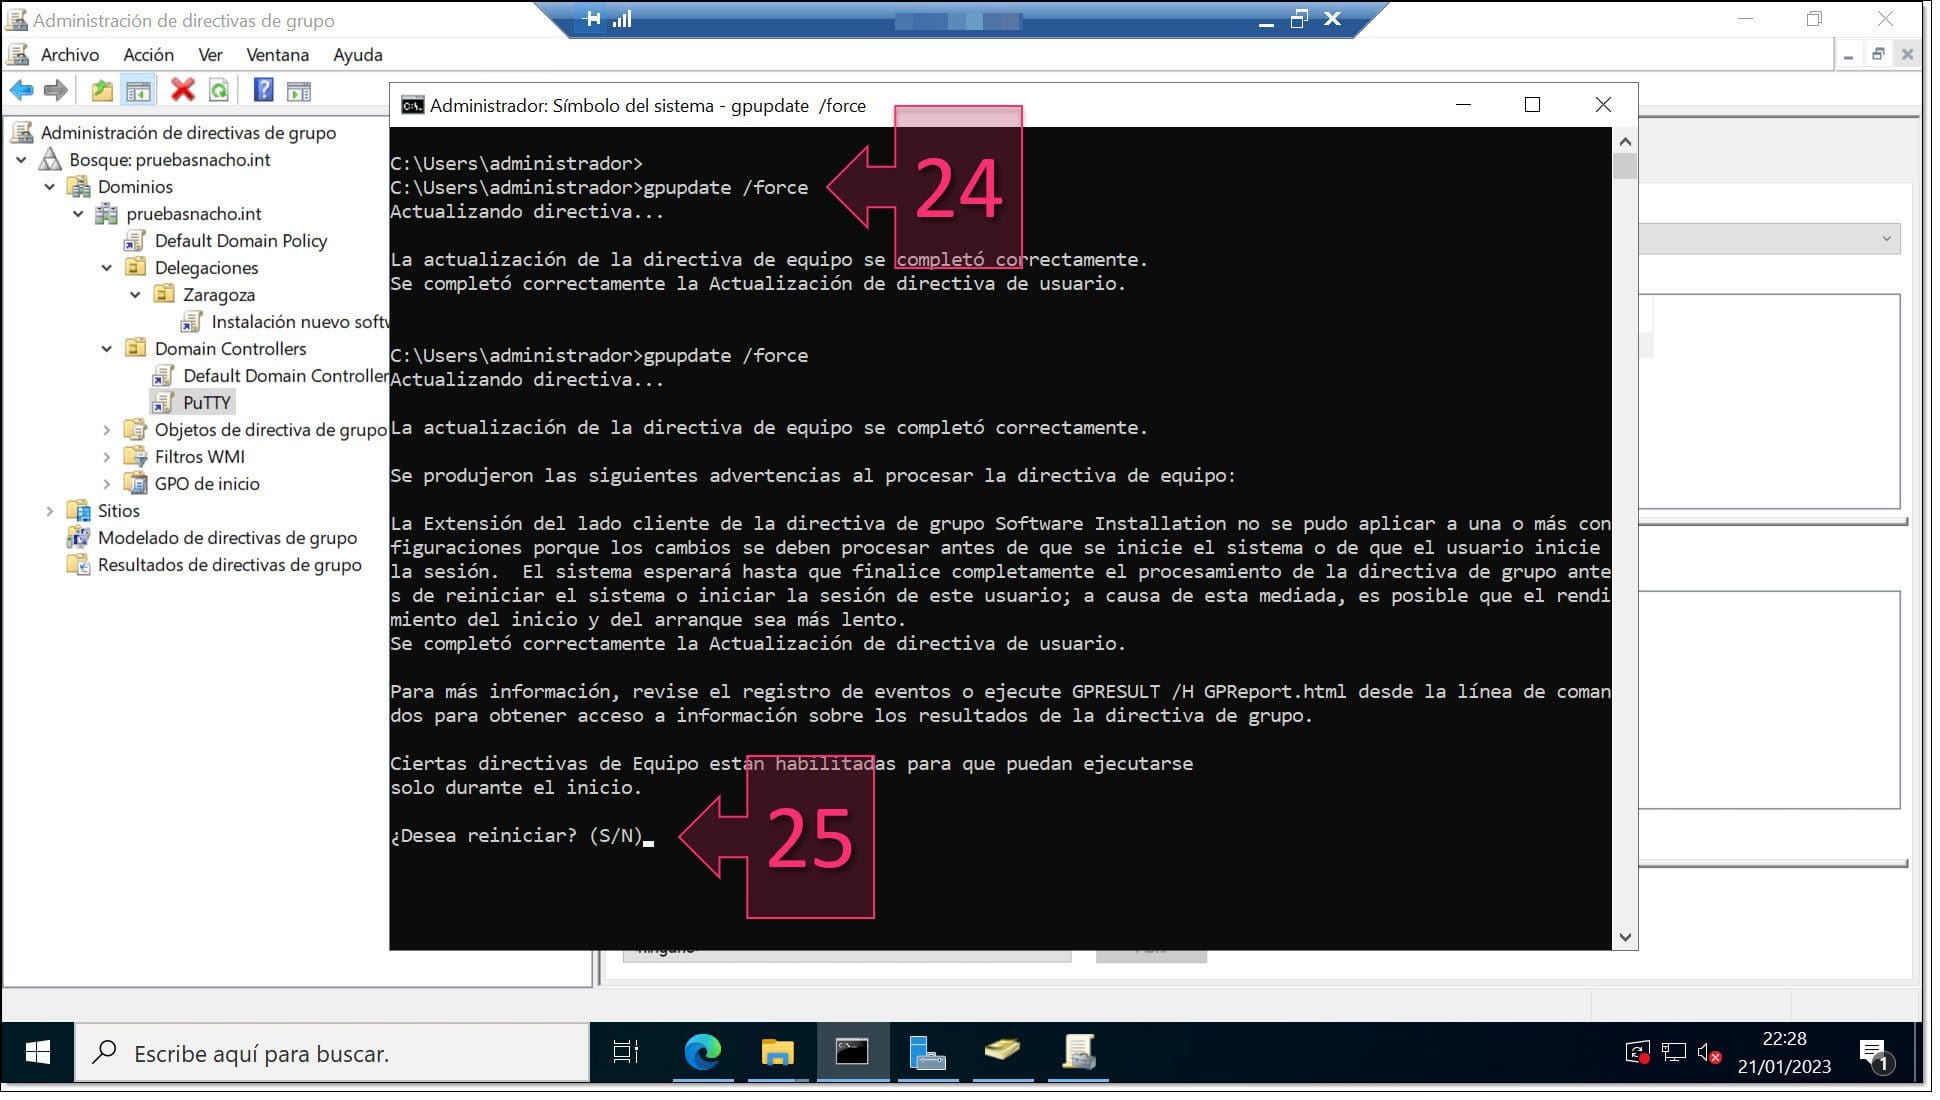
To check that your new GPO has been created correctly, run the command “gpupdate /force” with administrator privileges (24).
You may see a warning that it is going to run a startup policy and the system needs to restart. If this happens type “Y” (25) to continue.
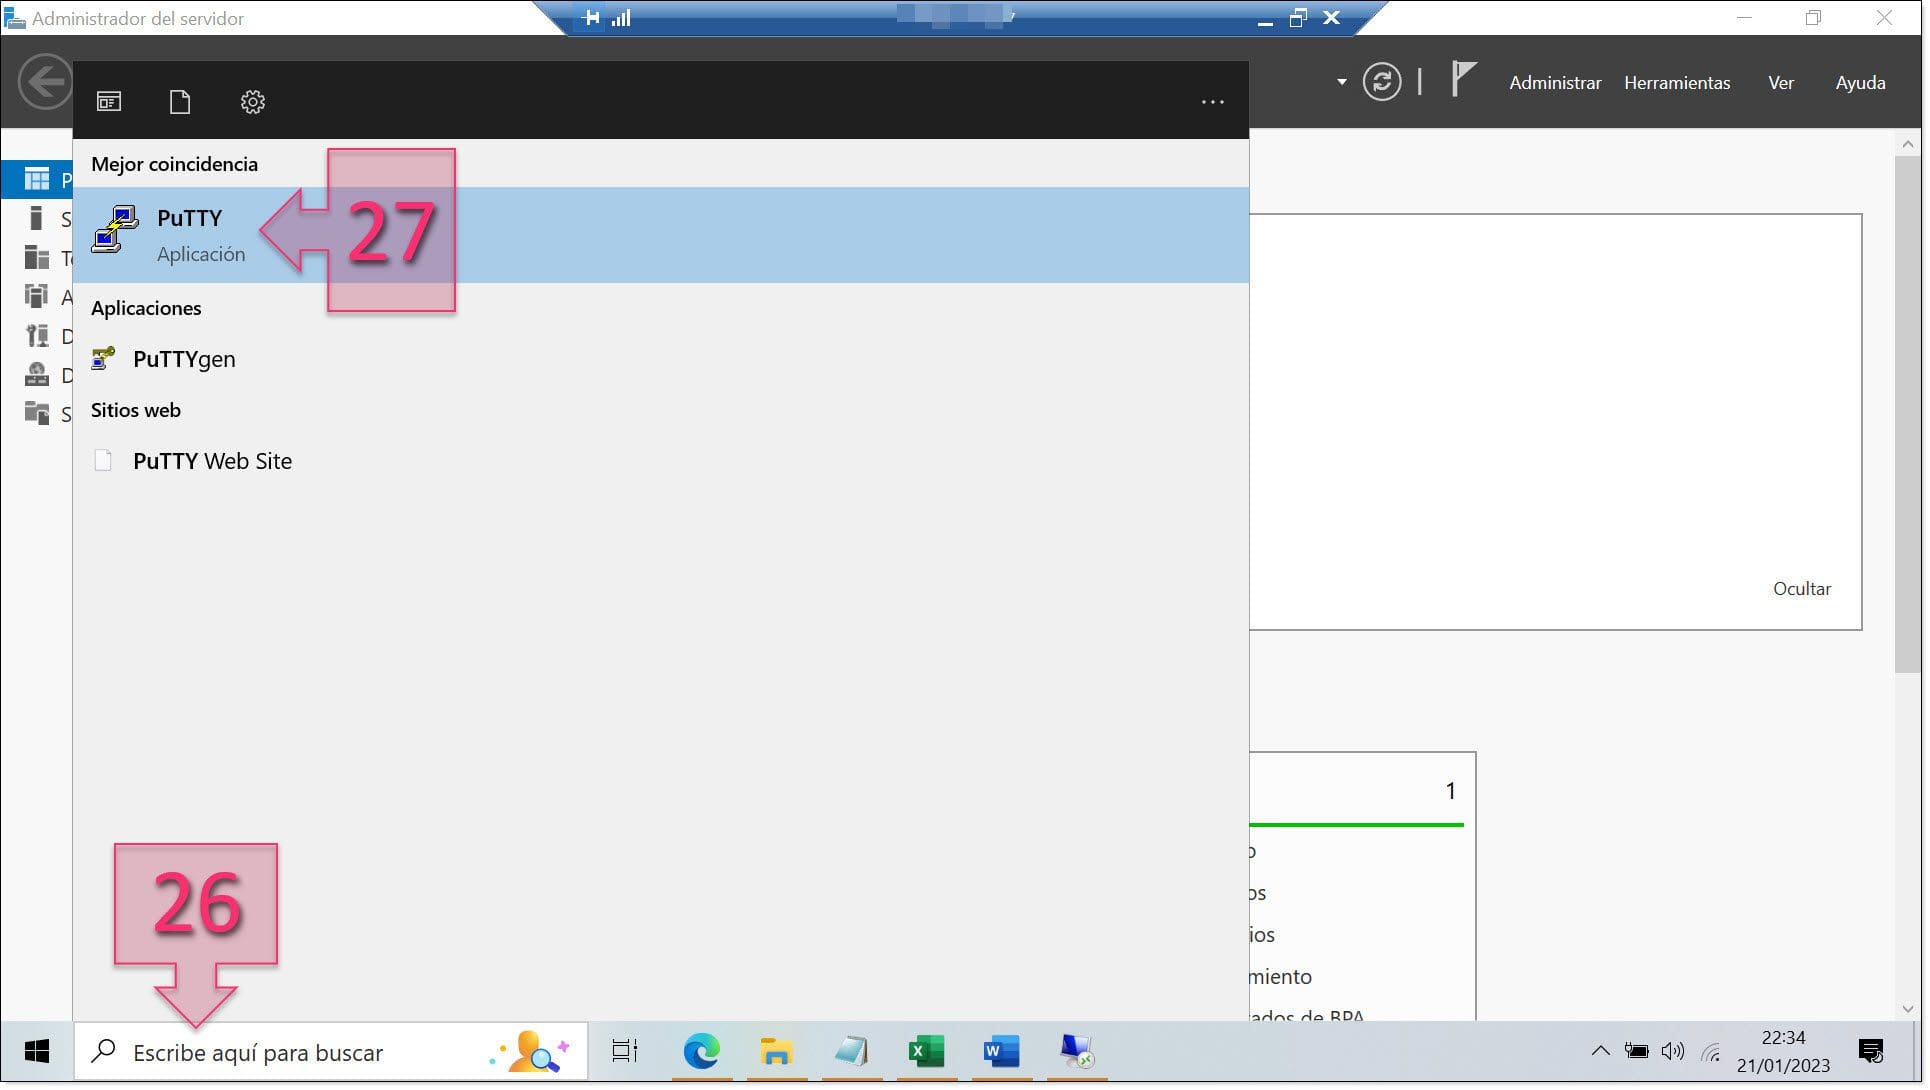
Now check that it has been installed correctly. To do this, go to the search bar and type the name of the program (26). If the program appears in the search results (27), click on it to see whether it runs correctly.
Now you know that the program works correctly. It will be available on all the devices that you wish to deploy it on.
Summary
In this tutorial, we’ve seen how to create a GPO to deploy software on your client devices. This will save you valuable time as a sysadmin so that you can dedicate your efforts to more important things like planning, corrections and improvements. As you can see, it’s a very straightforward process. However, if you do encounter any problems, don’t hesitate to contact us and we’ll try to help you as best we can.
Thanks for reading!