In this tutorial, you will learn how to change your SQL collation settings.
Most sysadmins don’t know what collation is until they start having problems with it. In fact, pretty much anyone who has ever set up an SQL server or an application like Microsoft System Center will have had to configure these settings, but most of the time, people simply follow the default installation settings without really knowing what it is or how to change it.
Unfortunately, if you don’t understand how this feature, there’s a chance that it could cause you a real headache. If you haven’t configured SQL collation properly for your database, it can trigger a raft of problems for both the database and the applications that connect to it.
But why do these problems happen? Why is this feature so important? What does it do?
SQL Collation is basically a set of rules about how characters, such as accents, uppercase, lowercase and other supported characters, are encoded and ordered in the database.
More specifically, SQL collation specifies the bit patterns that represent each character in a regional character set and the rules for comparing and organising data.
To understand how important this is, think about characters used in other languages, such as the ‘ñ’ in Spanish, or characters used in Arabic or Japanese, for example.
In these cases, having the right collation settings is really important. Otherwise, you could find that an application generates characters that the database is not able to handle and throws out errors as a result.
So as you can see, your SQL collation settings will depend on the region or language that the database is being used for. In this tutorial, we will see how you can check your current collation settings and then change them if necessary.
How to configure SQL server collation
Before you get started
To successfully complete this tutorial and configure SQL server collation, you will need:
- A Windows Server.
- SQL Server installed on your server.
Part 1 – How to check your current SQL collation settings
First, we are going to look at how to check your current SQL collation for your database. Then, we will look at how to change it using both the graphic interface and the command prompt.
There are two ways to query the SQL collation value:
- Using SSMS (SQL Server Management Studio).
- Running SQL.
Let’s start with the simplest way, using SSMS.
On SSMS, go to Object Explorer on the left-hand side and right-click on the name of the server (1). Then, click on «Properties» (2).

Show the database properties
A window will then appear showing the SQL server properties, including the current «Server Collation» value (3).
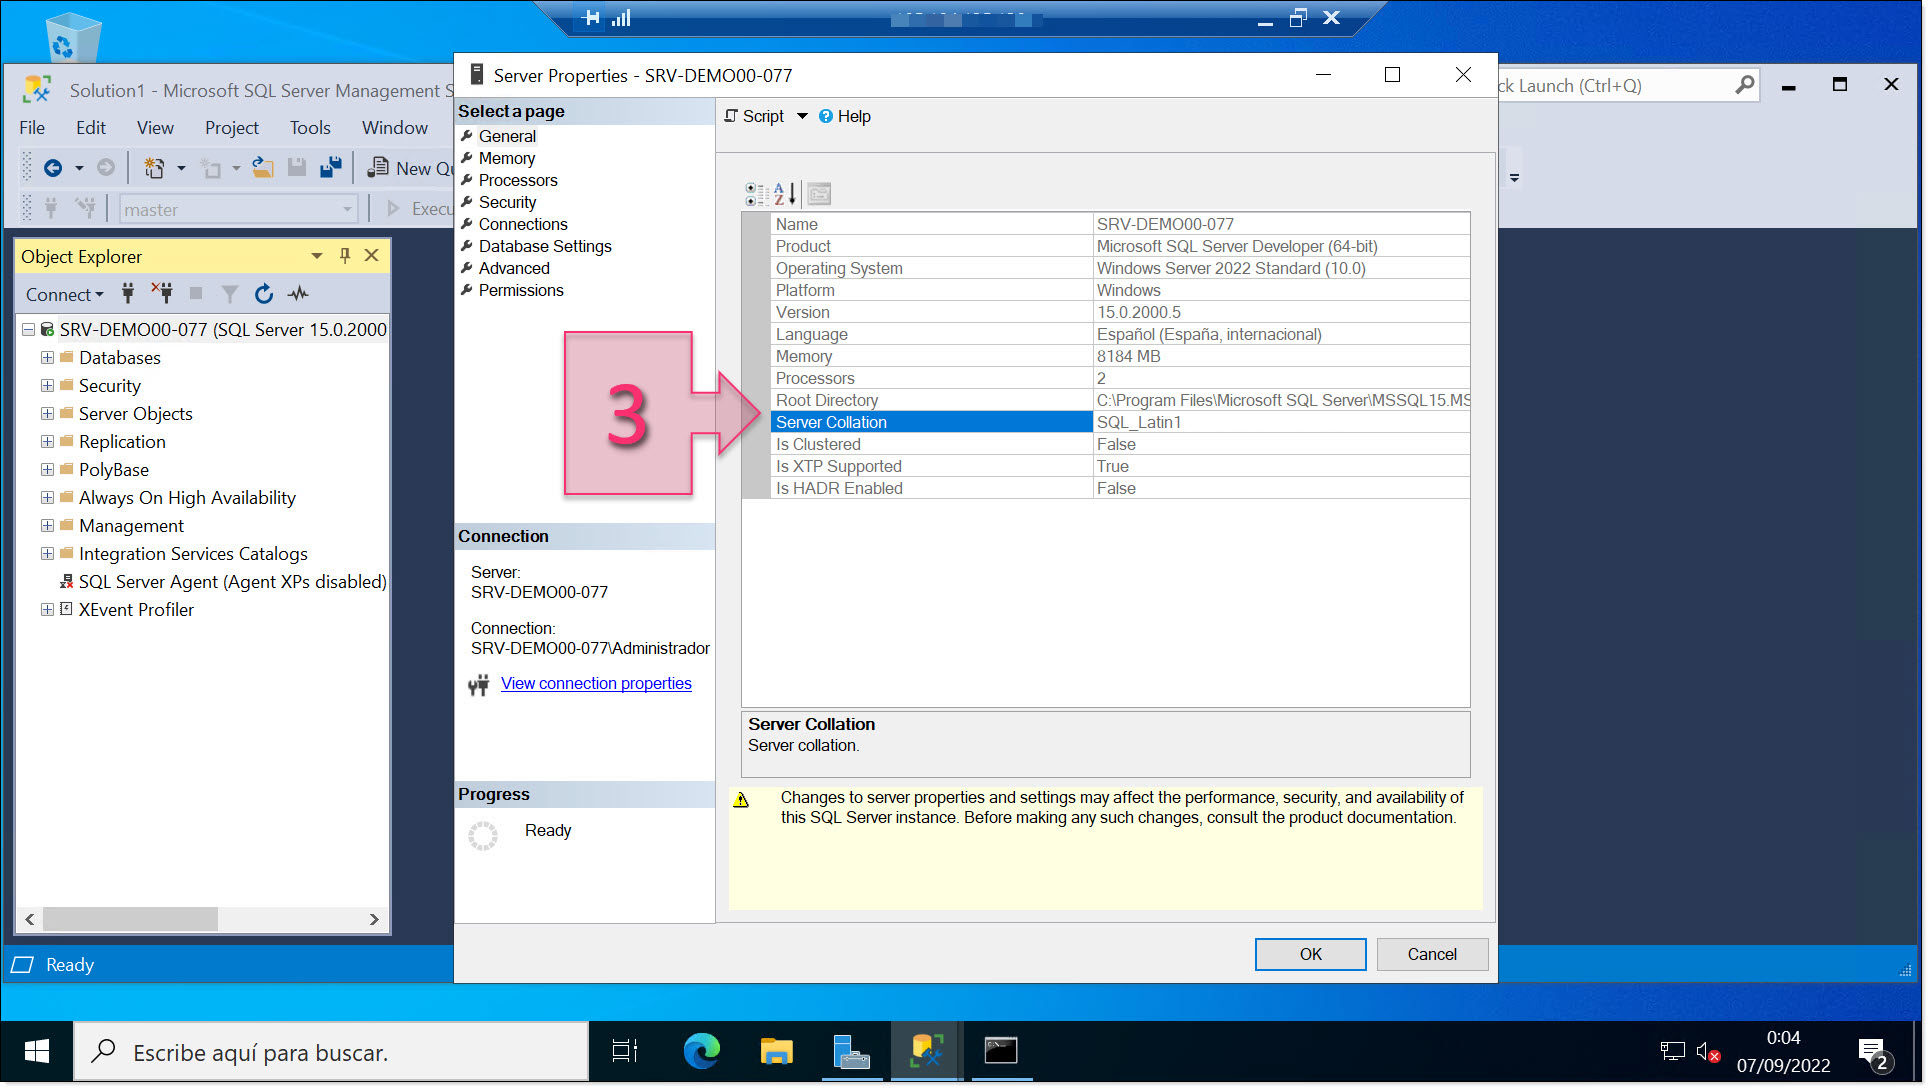
Check the server collation value
Another way to check the current collation value is with an SQL query. To do this, click on «New query» (4).
Next, in the query tab, enter the following text (5):
SELECT SERVERPROPERTY(‘collation’) AS ServerCollation;
Click on «Execute» (6).
If you have entered the query correctly, you will see the message «Query executed successfully” (7) at the bottom of the screen and the results of your query in the «Results» pane (8).

Check the SQL collation value using an SQL query
It is also possible to query the SQL collation value for all databases.
As before, click on «New query” (9).
In the query field, enter the following text (10):
SELECT name, collation_name DbCollation
FROM sys.database
Then, click on “Execute” (11).
Just as before, you should see the message “Query executed successfully” (12) and the results of the query shown in the bottom pane (13).

Check the SQL collation values for all databases
Now that you have checked your current SQL collation value, we will look at how to change it.
Part 2 – Changing your SQL collation value using the command prompt
There are a number of different ways to change the SQL collation value, but we are going to stick to the simplest way to keep things straightforward for you. After all, we’re always looking to make things more efficient!
NOTE: We always highly recommend backing up all databases on your server to avoid any potential data loss if an incident should occur.
First, we need to stop the SQL server service so that you can make changes without users connected to the database.
To do this, type «Services» in the search bar (14) and run the Services app (15).

Launch the Services manager from the search bar
Then, search for «SQL Server (MSSQLSERVER)” in the list of services. This is the service that runs the Microsoft SQL Server database.
Once you have found “SQL Server (MSSQLSERVER)”, right-click on the service (16) and click on «Stop» (17). The service should only take a couple of seconds to stop, though this will depend on the server load at the time.

Stop the SQL Server service to change the collation value
Once the service has been stopped, run the command prompt as an administrator. In reality, you will probably already be logged in as an administrator anyway.
In the command prompt window, run the following command (18):
sqlservr -m -T4022 -T3659 -s»MSSQLSERVER» -q»SQL_Latin1_General_CP1_CI_AS»
Where you have the following parameters:
- -m: Runs the executable in single-user mode.
- -T: Activates trace flags during execution and startup.
- -s: Sends the name of the server instance. If you don’t know this, you can use the default instance «MSSQLSERVER».
- -q: Sends the new collation value to be applied, which for this example is «SQL_Latin1_General_CP1_CI_AS».
We will also use two trace flags for this execution:
- T4022: Bypass database startup process.
- T3569: Logs all errors to “errorlog” during startup.
To give you another example, here is what the command would look like to change the collation to French:
sqlservr -m -T4022 -T3659 -s»MSSQLSERVER» -q»French_CI_AS»

Use command prompt to change the SQL collation value
Whilst the execution is running, a large number of messages will be generated as a result of the changes (19) which you will be able to see on the screen.
Once the execution has finished, the command prompt will wait in standby mode. Simply type Ctrl + C to terminate the execution (20).

Press Ctrl + C to terminate the execution
Now, we need to return to the Services manager. Search for “SQL Server (MSSQLSERVER)”, right-click on the service (21) and click on «Start» (22). The service should start within a few seconds, although once again, this will depend on the server load at the time.

Start the SQL Server process again
Now, all that remains is to check that your changes have been applied.
Return to SSMS and, in the Object Explorer, right-click on the name of the server (23) and click on “Properties” (24).

Server properties
Once done, you will see the SQL Server properties where you can check the «Server Collation» value (25), which should now show the correct collation.
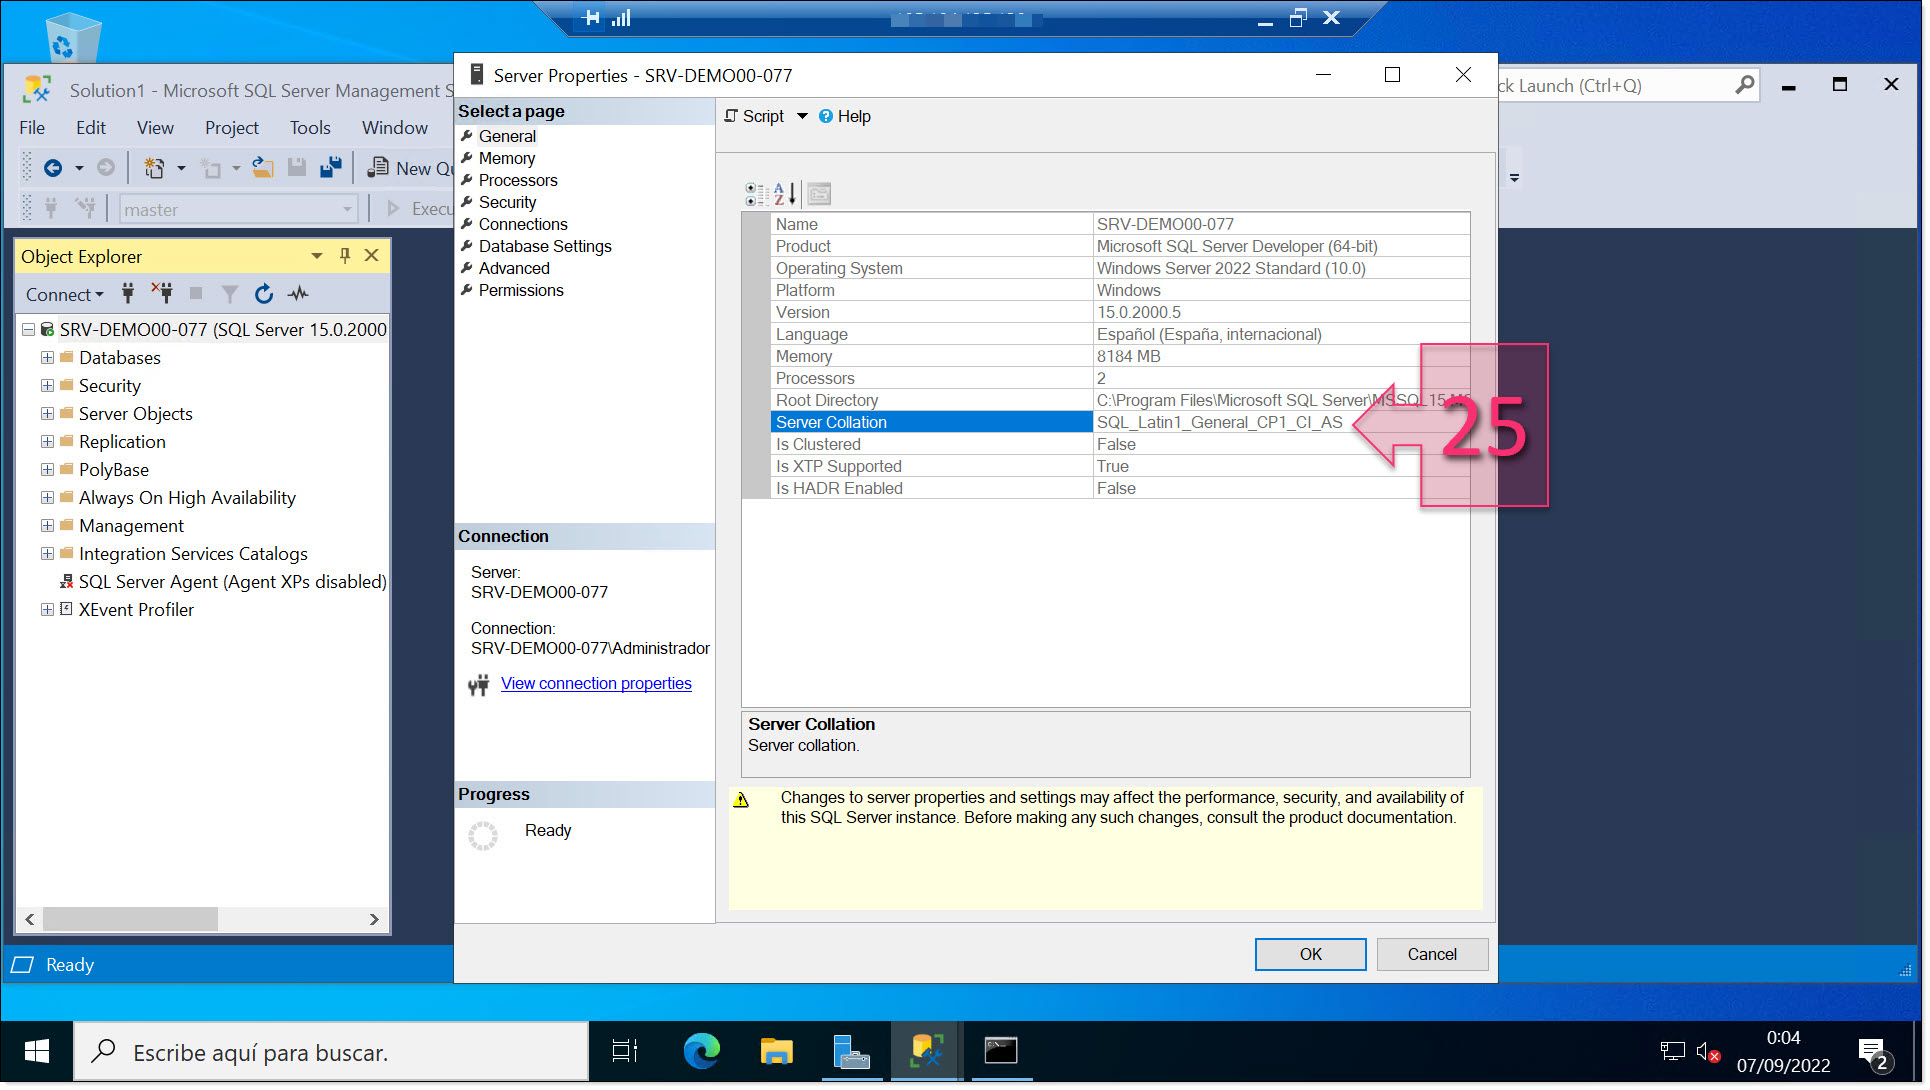
Check that the SQL Collation value has been changed successfully
You have now successfully changed the SQL Server collation on your server.
Conclusions
SQL Collation specifies the bit patterns that represent each character and character set, as well as the way that they can be compared and ordered. This is a critical value for the database and associated applications to function correctly.
If it is not configured correctly, it could cause strange behaviour or errors. In this tutorial, you have learnt how you can easily change the SQL collation yourself to ensure that you are using the right one for the language you are working in.
Thanks for choosing Jotelulu!