Sysadmin
Keep reading to learn how to create task scheduling with PowerShell scripts and manage the automated execution of your scripts at specific intervals.
Many of us eventually need to schedule tasks to run automatically every certain period of time (for example, every few hours, daily, weekly, and so on).
This approach helps reduce our workload as administrators—or simply ensures that we don’t forget to perform certain repetitive tasks. Whether the task is tedious or business-critical, automating its execution saves time and prevents human error.
Usually, we use the Windows Task Scheduler manually through the graphical interface (GUI). However, as you may already know, using PowerShell is a powerful way to save time and simplify recurring processes.
Let’s imagine that we want to check our server’s disk health once per week to ensure there are no errors or potential failures. We want this script to run every Monday at 3:45 PM, for instance.
Scheduling a PowerShell script using the PowerShell console
NOTE: This guide assumes that you’re using a relatively recent system version and PowerShell with the cmdlet New-ScheduledTaskTrigger. For older systems running PowerShell 2.0, you’ll need to use the TaskScheduler module instead, which works differently.
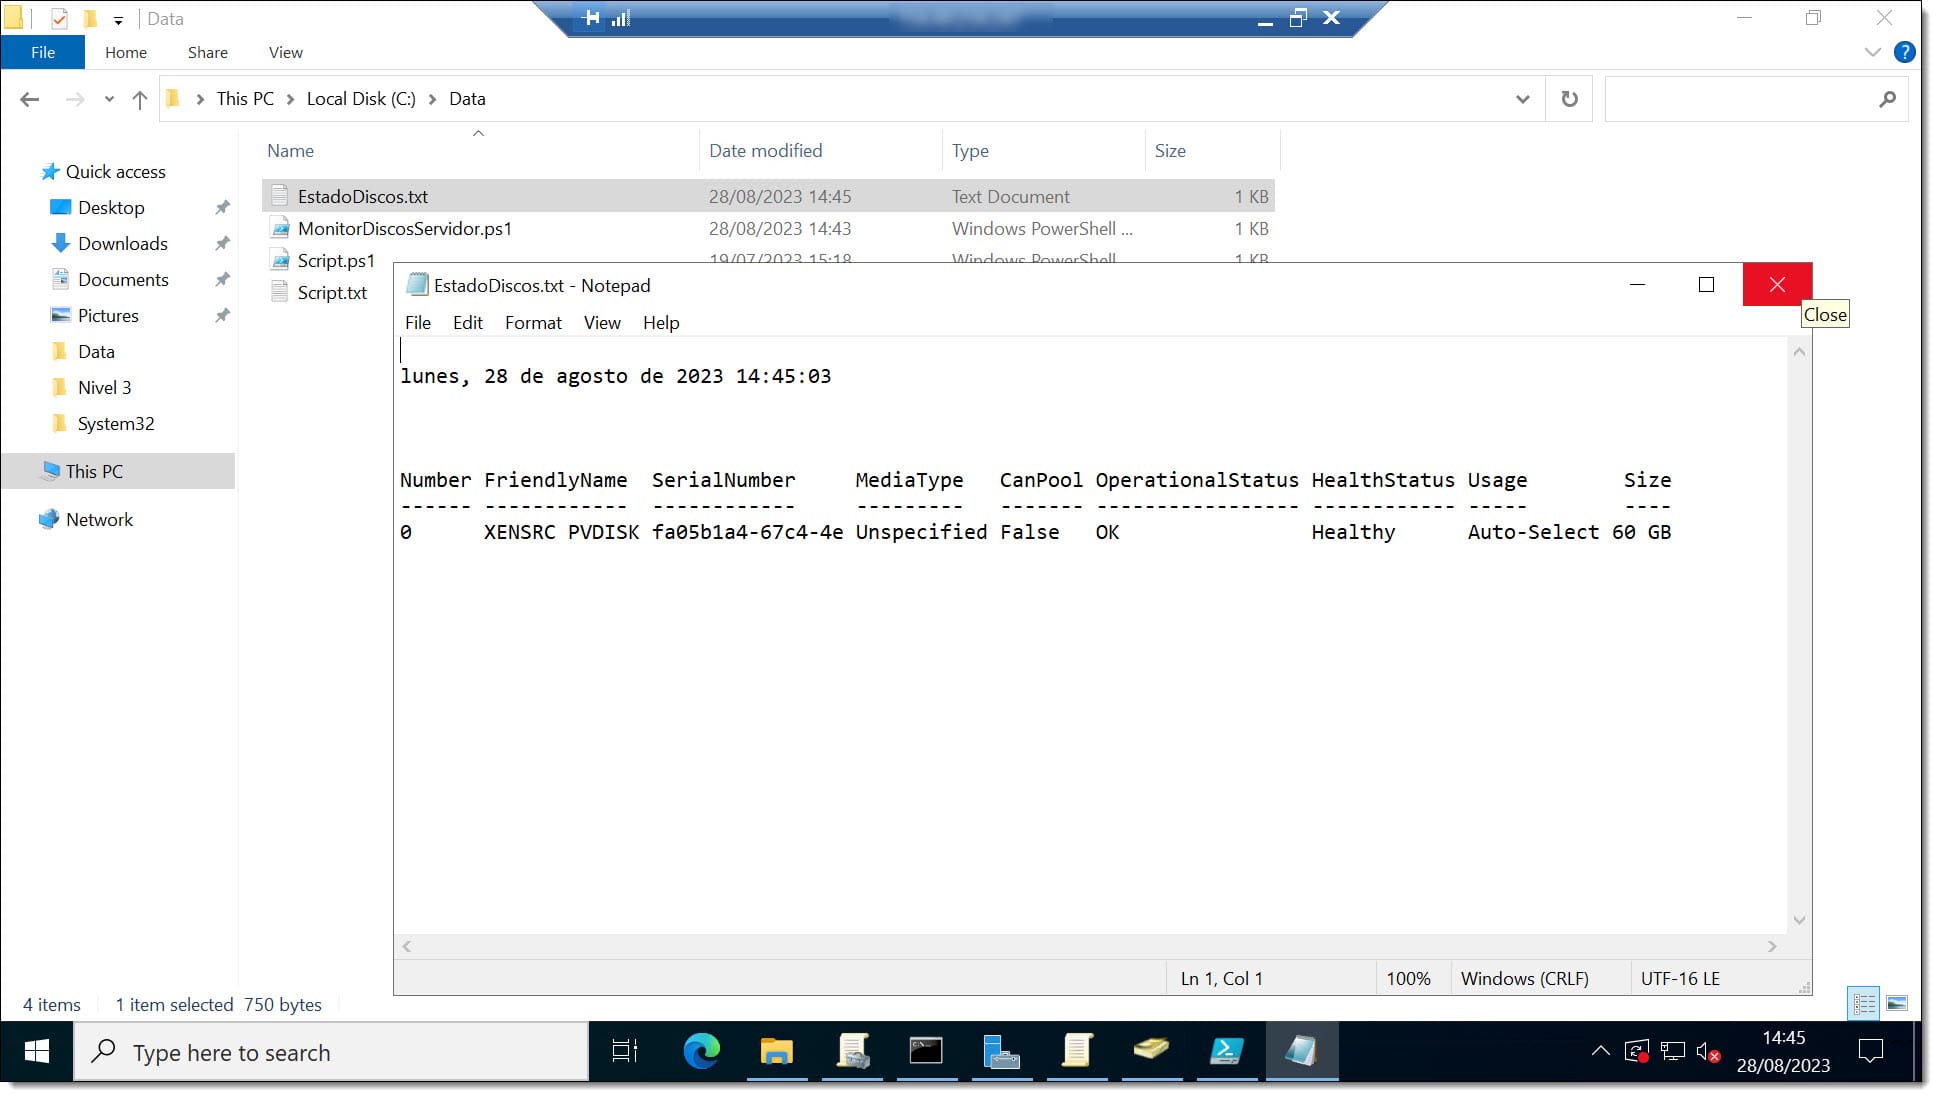
The first step is to create a “.ps1” file in a path accessible to the user who will create and execute the task. In this example, the path is C:\Data\ and the script file is named MonitorDiscosServidor.ps1.
Inside that script, insert your PowerShell code—the one you want to run automatically. It’s always a good idea to test the script manually before scheduling it. Code copied from other sources can sometimes include hidden characters or formatting errors that may cause execution issues.
Once verified, we can move on to scheduling the task. The first time may feel lengthy, but as you become familiar with the process, you’ll see how much time—and how many future mistakes—it helps you avoid.
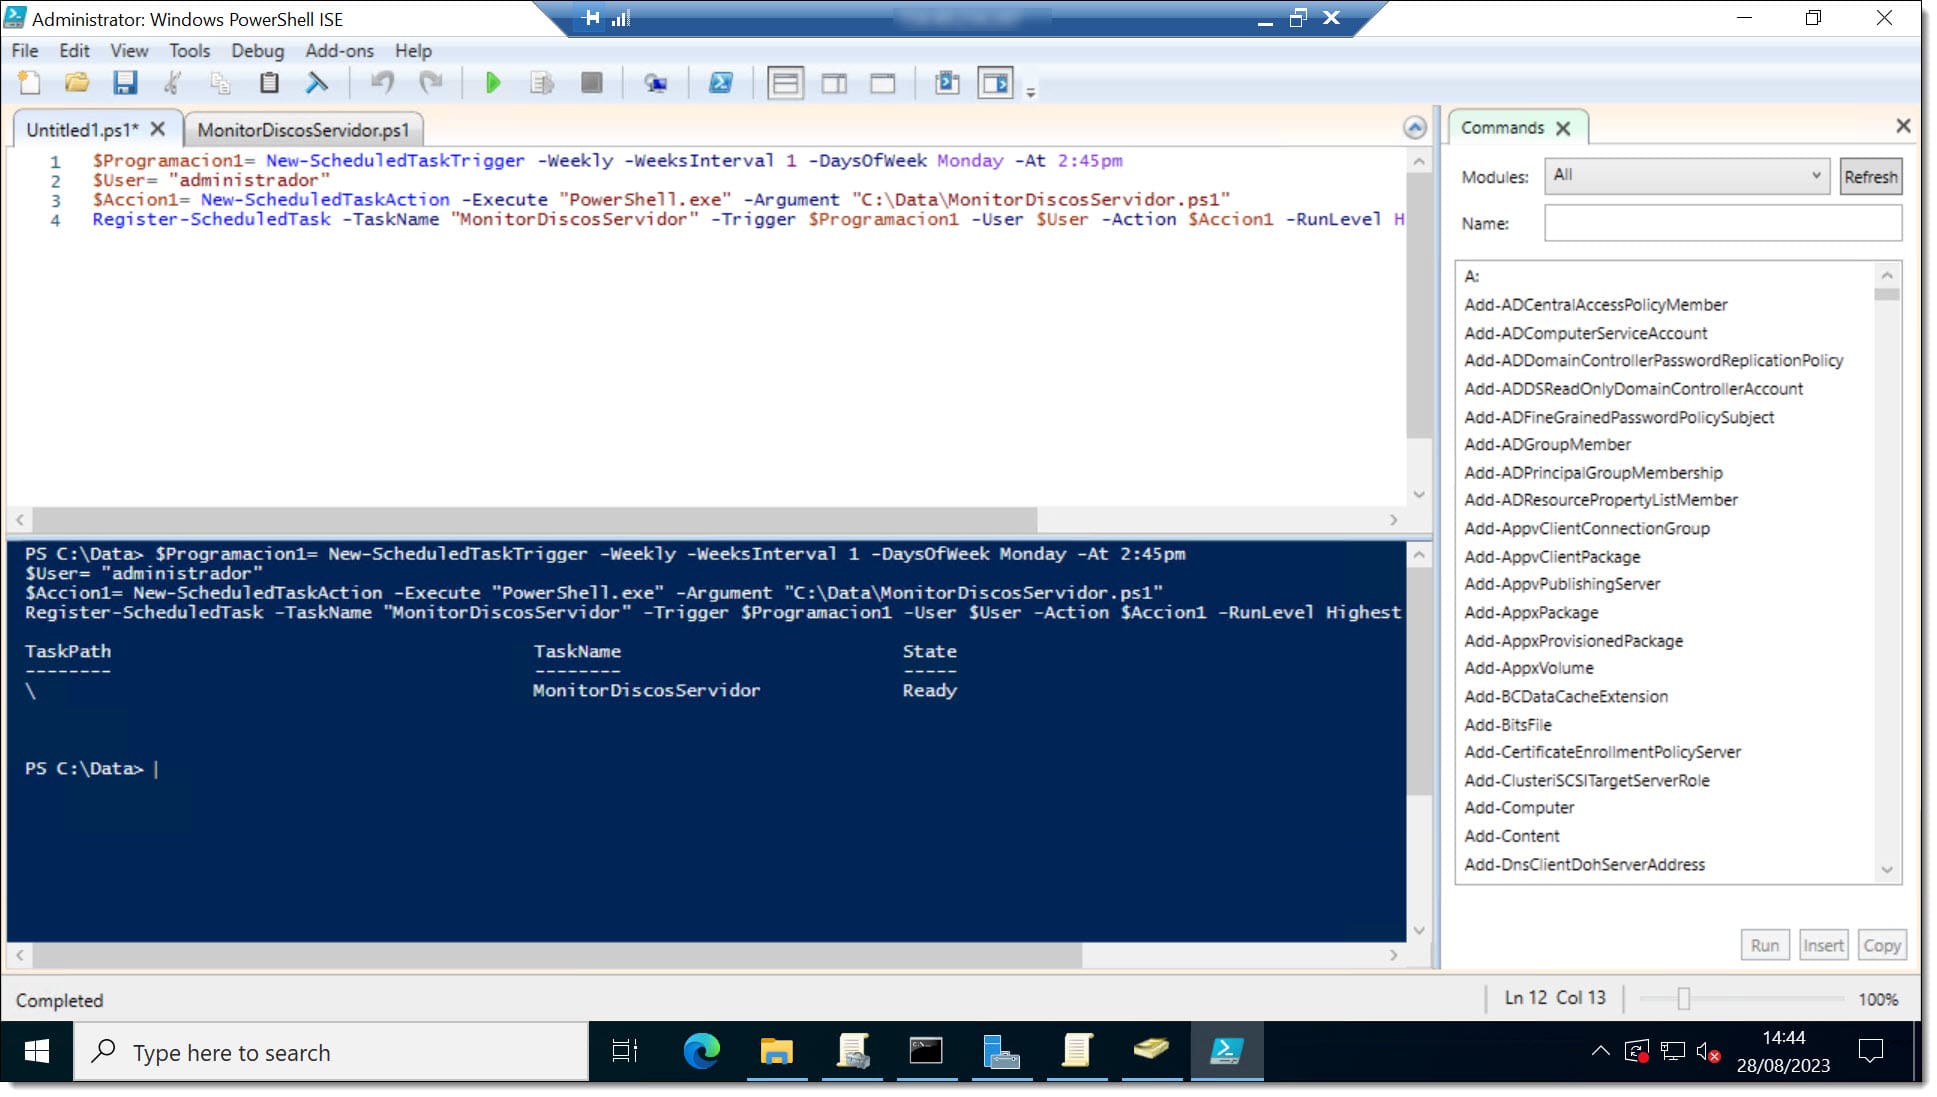
The complete script looks like this (we’ll explain each part below):
$Programacion1 = New-ScheduledTaskTrigger -Weekly -WeeksInterval 1 -DaysOfWeek Monday -At 2:40pm
$User = "administrator"
$Accion1 = New-ScheduledTaskAction -Execute "PowerShell.exe" -Argument "C:\Data\MonitorDiscosServidor.ps1"
Register-ScheduledTask -TaskName "MonitorDiscosServidor" -Trigger $Programacion1 -User $User -Action $Accion1 -RunLevel Highest -Force
Explanation:
- $Programacion1: defines how often the script runs, creating the task trigger.
This line:
New-ScheduledTaskTrigger -Weekly -WeeksInterval 1 -DaysOfWeek Monday -At 2:40pm
means the task will:
- Run weekly (
-Weekly -WeeksInterval 1). - Execute on Mondays (
-DaysOfWeek Monday). - Start at 2:40 PM (
-At 2:40pm).
Note: Be careful with the AM/PM format, as it can easily cause confusion.
Next, we define the user account responsible for running the task:
$User = "administrator"
Then, we specify the action to execute:
$Accion1 = New-ScheduledTaskAction -Execute "PowerShell.exe" -Argument "C:\Data\MonitorDiscosServidor.ps1"
- $Accion1: contains the command to execute.
- -Execute “PowerShell.exe”: specifies PowerShell as the executable.
- -Argument “C:\Data\MonitorDiscosServidor.ps1”: provides the absolute path to the script.
Finally, we register the scheduled task:
Register-ScheduledTask -TaskName "MonitorDiscosServidor" -Trigger $Programacion1 -User $User -Action $Accion1 -RunLevel Highest -Force
- -TaskName: assigns a name to the task.
- -Trigger: defines the trigger variable.
- -User: specifies the user account executing the task.
- -Action: declares the action defined earlier.
- -RunLevel Highest: ensures the task runs with elevated privileges.
- -Force: forces execution without confirmation prompts.
As always, PowerShell ISE is recommended. It allows you to test, debug, and refine your commands interactively before applying them in production.
Once everything is ready, run the commands. If successful, you should see confirmation messages similar to the ones below:
Schedule a quick test run (e.g., five minutes from now) to make sure everything works as expected. After execution, verify the outcome and fine-tune if necessary.
NOTE: For more information about the cmdlets, you can check PowerShell’s built-in help or visit the Microsoft Docs page for New-ScheduledTaskTrigger.
Conclusions and Next Steps
This article has shown how to create task scheduling with PowerShell scripts—and more specifically, how to automate the execution of PowerShell scripts via the Task Scheduler using PowerShell commands.
The entire process requires only a few steps and can be set up in minutes once you’re comfortable with the syntax. You can find more PowerShell tips and tutorials on our blog.
If you run into any issues or need help, don’t hesitate to contact us. We’ll be happy to help you troubleshoot your PowerShell configuration.
Thank you for trusting Jotelulu!
August 28, 2023