In this tutorial, you will learn how to quickly and easily programme a disk backup for your Server or Remote Desktop subscription.
A backup is an image of a disk, taken at a certain point in time by the hypervisor. This tutorial will explain how to programme a disk backup, also known as an On-Secondary Backup. The platform currently offers two forms of backup, one of which is programmable:
- On-Primary (cannot be changed): On-Primary Backup is the default backup setting for servers and remote desktops. It is fixed and cannot be edited. These security copies are snapshots stored on the same CPD as the disk.
- On-Secondary (optional): On-Secondary Backup is an optional backup that allows you to store security copies on an external bucket. A bucket is a storage object that uses the S3 protocol. The customer has the option to schedule these backups themselves and can create up to 30 restore points.
How to schedule a disk backup for servers or remote desktops?
Before you begin:
To successfully complete this tutorial, you will need::
- To be registered on the Jotelulu platform and have signed in using your username and password.
- To have registered for a Servers or Remote Desktop subscription. If you need more information about how to do this, have a look at the tutorial entitled: How to Deploy a Server on Jotelulu or How to Register a Remote Desktop on Jotelulu.
Step 1. Open the On-secondary backup scheduling section
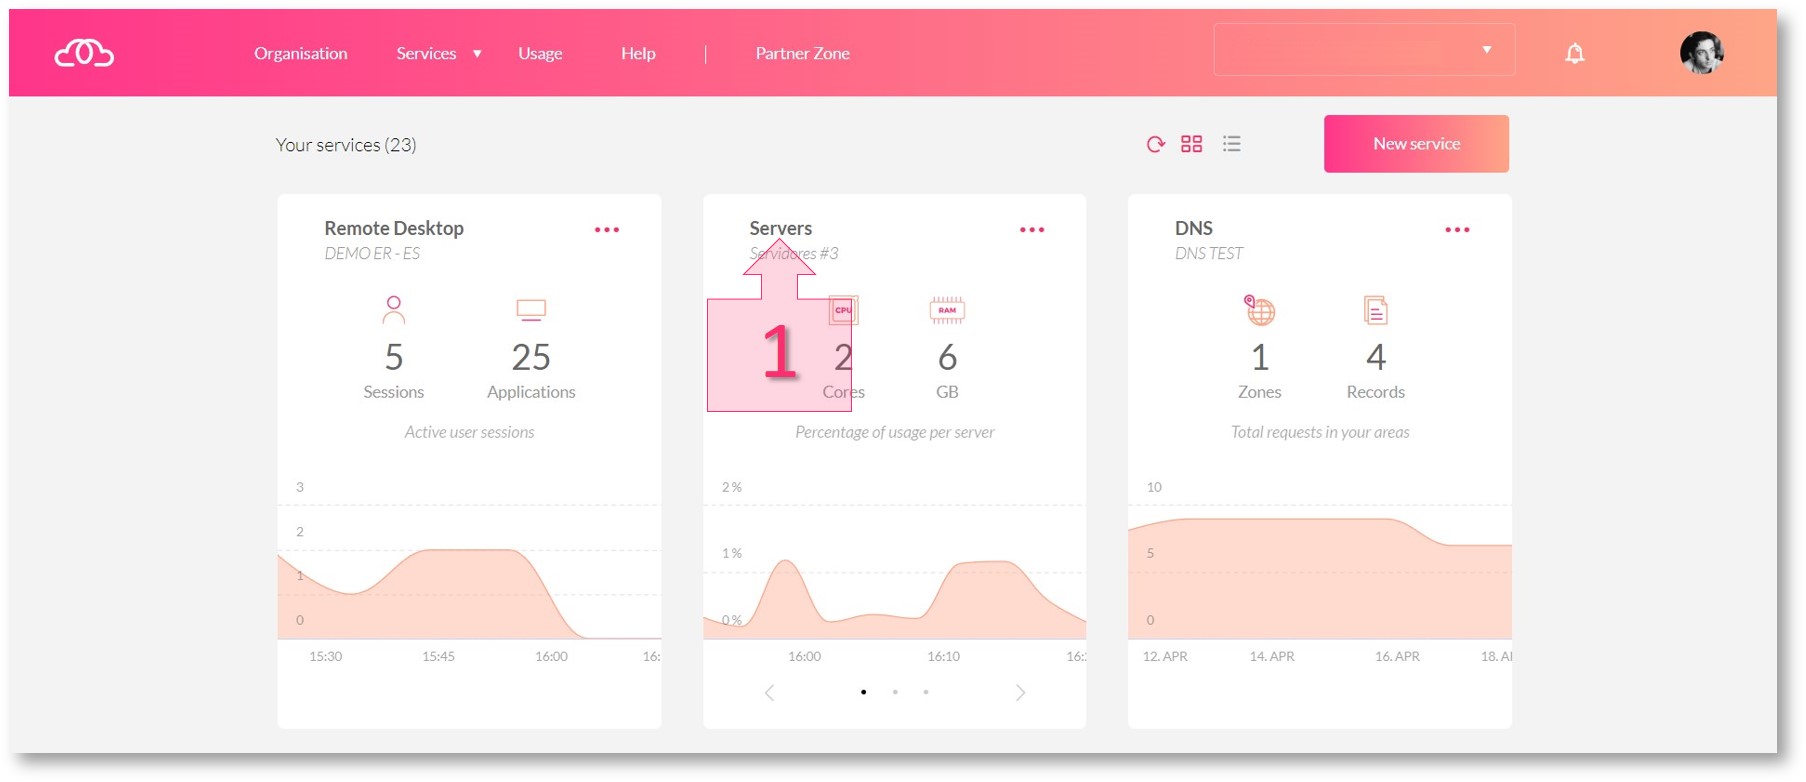
On the main dashboard, click on the top of the Servers card (1).
Note: Although this tutorial will show you how to schedule security copies through the Servers subscription, the process is the same for the Remote Desktop subscription.
Step 1. Open the Servers or Remote Desktop page to begin scheduling backups
Next, click on the Backup section (2) in the left-hand menu.
Step 1. Open the Backup section to continue
Step 2. Schedule an on-secondary backup
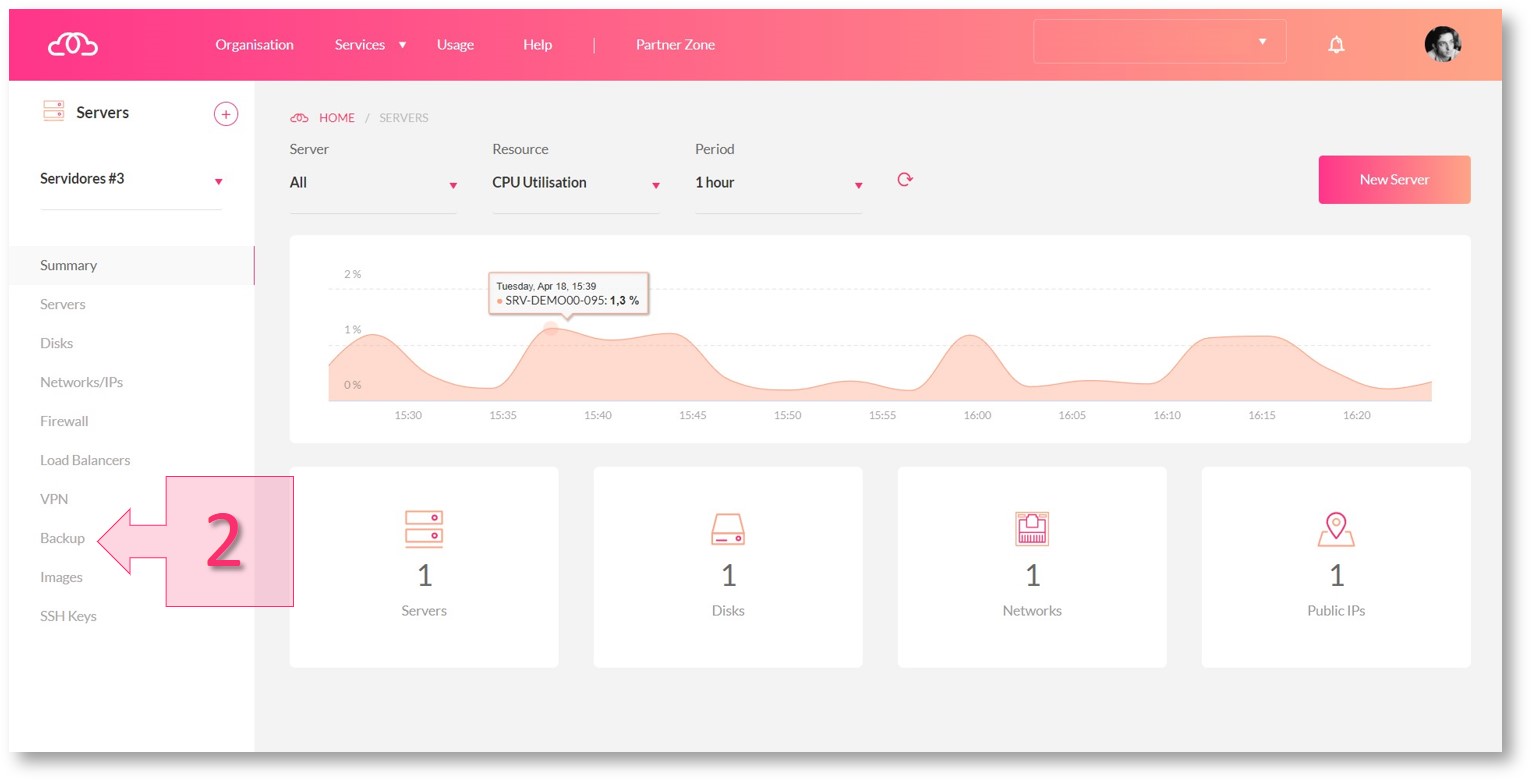
The next page displayed will be the Scheduling page, where you will be able to see all scheduled backups, including their frequency, timestamp and how long they are retained. To schedule a new backup, click on the On-Secondary Backup Scheduling tab and click on Schedule New Backup (3)
Step 2. Select the on-secondary backup scheduling tab
Step 1. Select new schedule
The next page will allow you to schedule a new backup. At this point, the platform will ask you to choose the server and disk that you wish to copy (4).
Next, you will need to set the frequency (5), a time zone, a start time and the number of backups to retain (maximum of 30). Once you have filled in these details, click on OK (6).
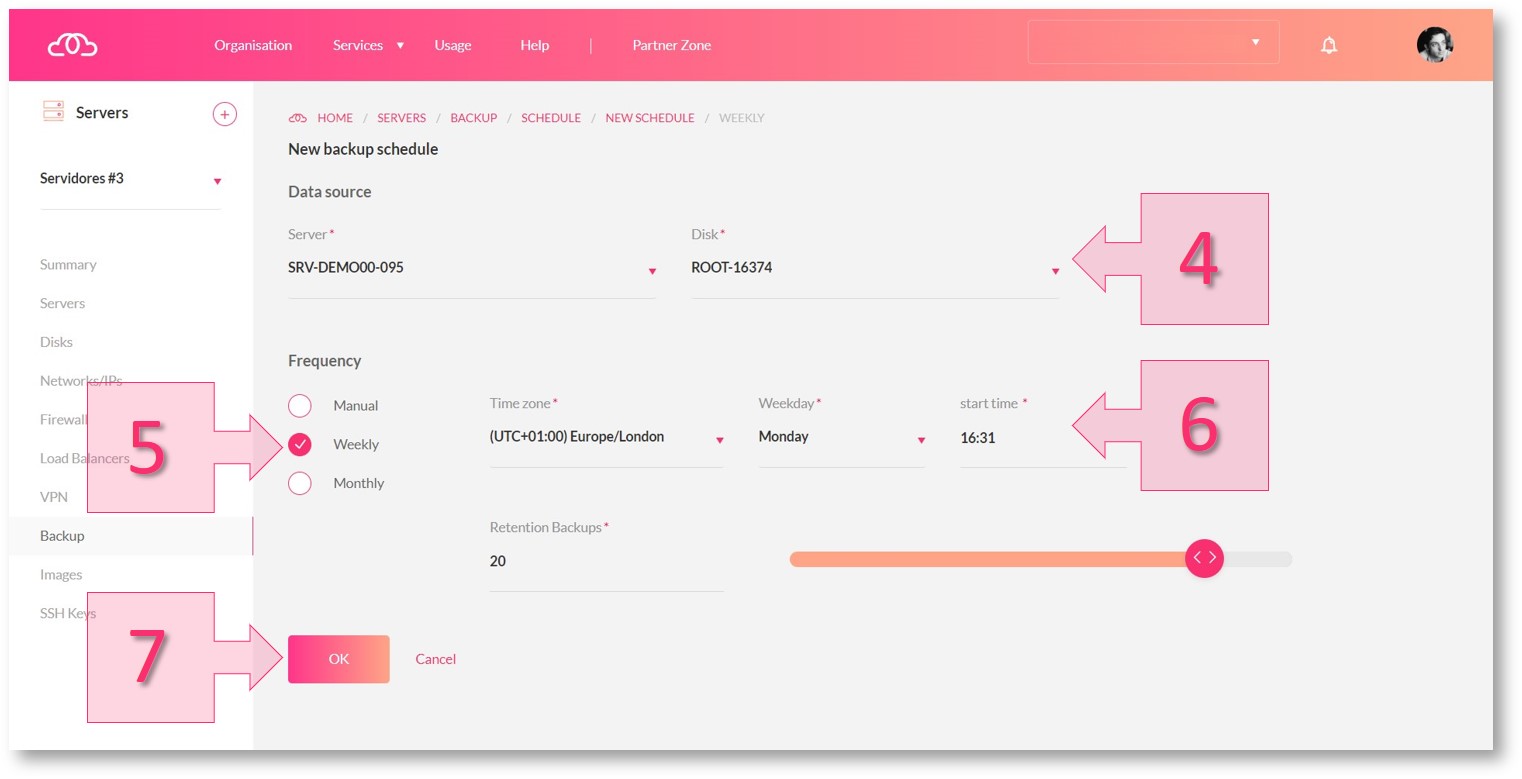
Step 2. Set the parameters to schedule a new security copy
Your new scheduled backup will now appear in the list on the Scheduling page (8) and a notification will appear at the bottom of the screen (9).
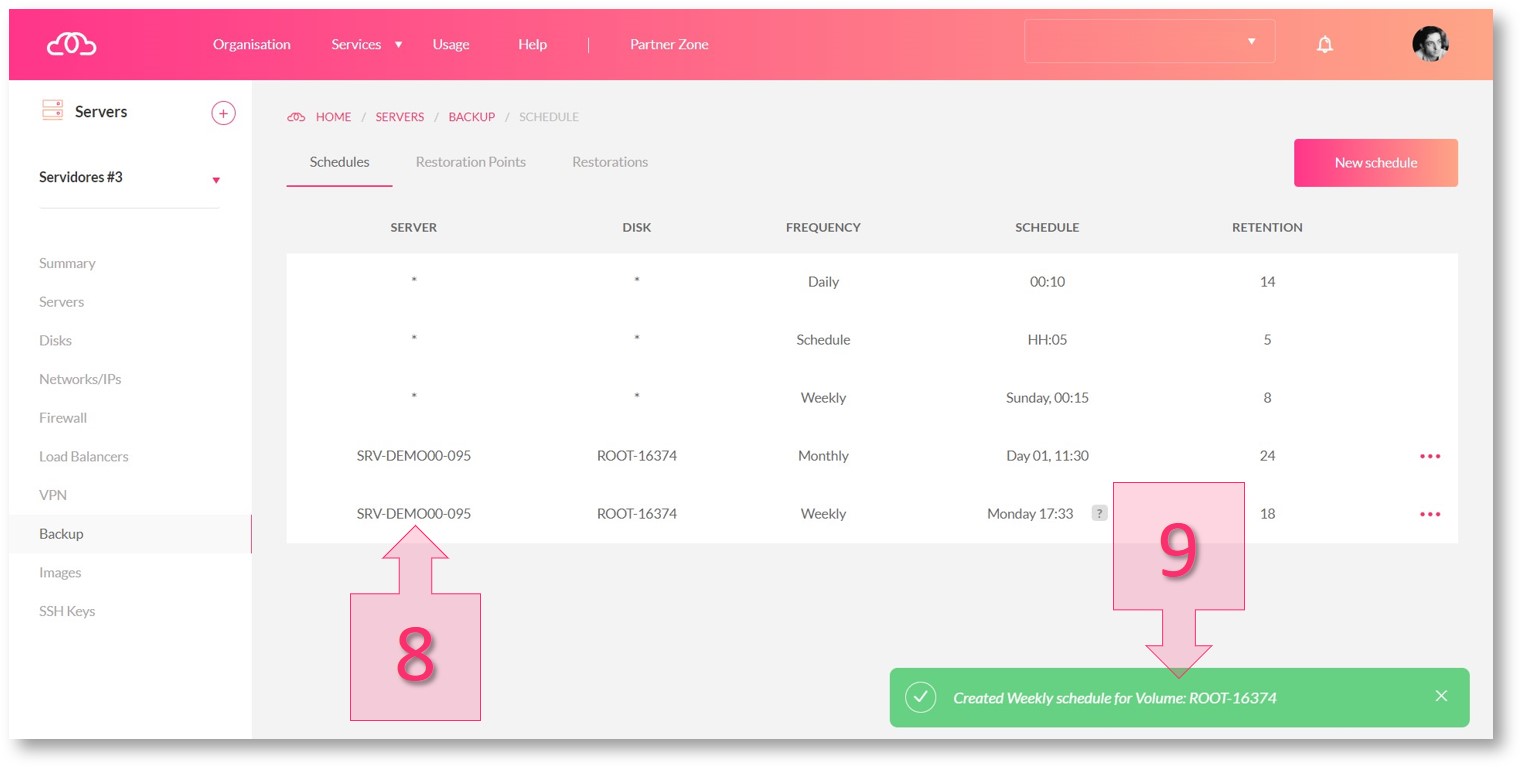
Step 2. Confirmation of the new scheduled backup
Your new scheduled backup has now been created successfully.
Summary and next steps:
Scheduling a disk backup is a quick and simple process. Now that you have completed this tutorial, you may want to learn how to restore a disk using a backup. If so, have a look at the tutorial entitled: How to Restore a Server Disk Using a Backup.