How to link your file storage to your remote desktop?
Before you begin:
To successfully complete this tutorial and link the two services, you will need:
- To have subscribed to the file storage service. If you need more information about how to do this, see the tutorial entitled: How to Add File Storage.
- To have subscribed to the remote desktop service. If you need more information about how to do this, see the tutorial entitled: How to Register a Remote Desktop on Jotelulu.
- To have user access to the remote desktop for each user that requires access to your file storage. If you need more information about how to access the remote desktop as a user, see the tutorial entitled: Remote Desktop Quick Start Guide for Users.
- To have published the Windows Explorer application on the remote desktop so that it can be seen by the users who need to use it (prior mapping between the application and users).
Step 1. Connect to the file storage using SMB
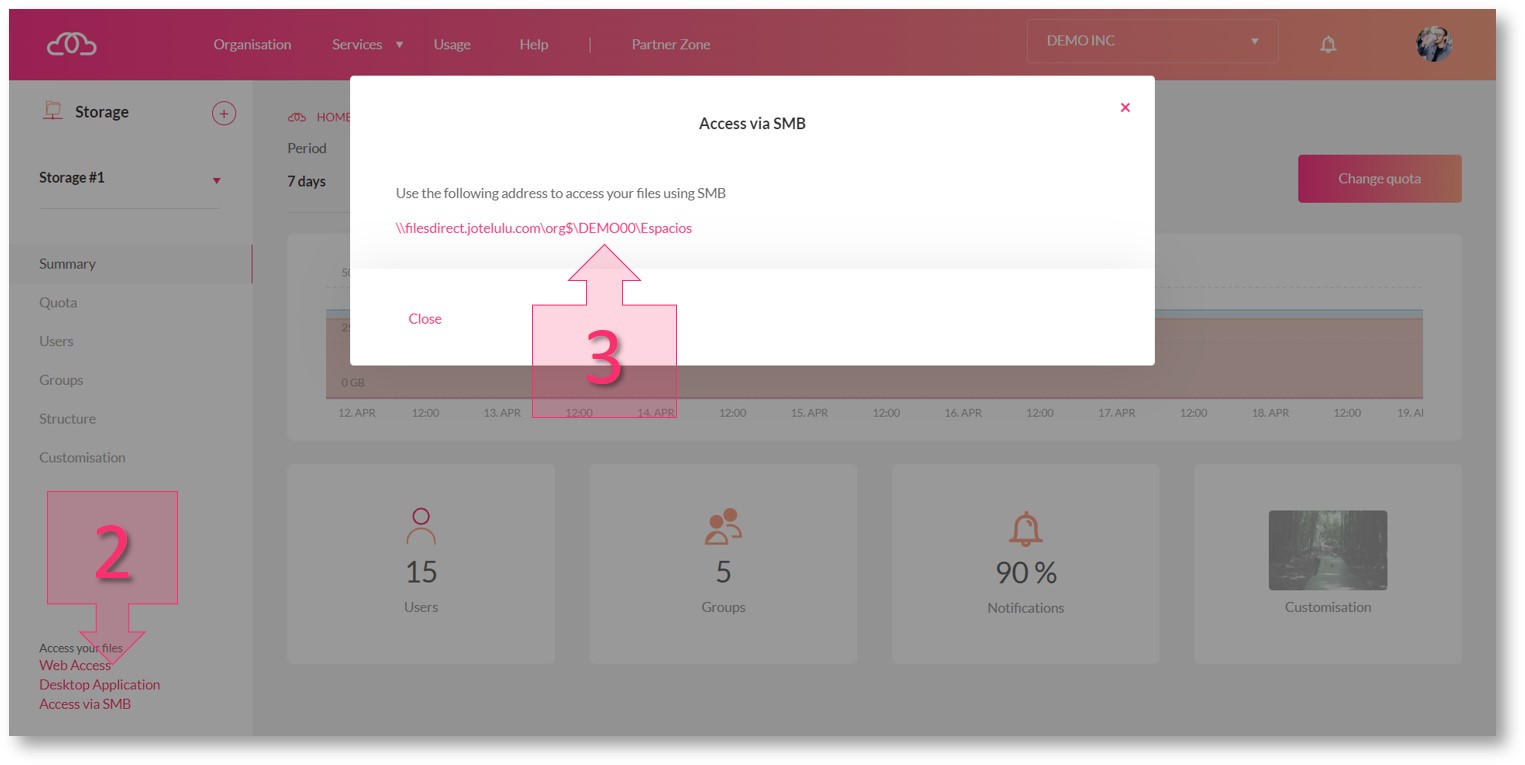
From the main dashboard, click on the top of the file storage card (1).
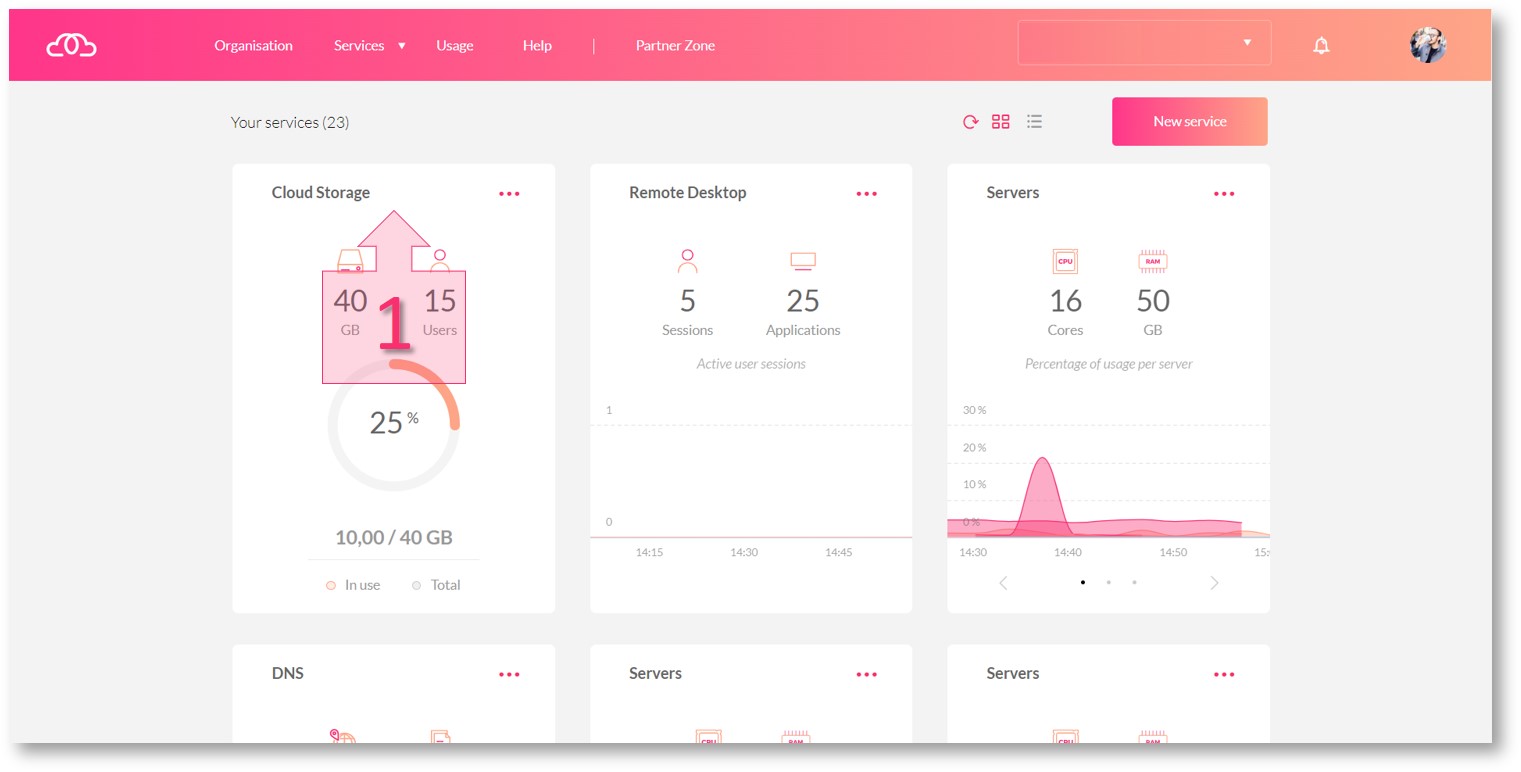
Next, click on the link entitled “Connect using SMB” in the bottom left corner (2). A message window will appear displaying a URL (3). Copy the URL so that you can use it later.
Step 2. Modify the settings on the user’s remote desktop.
To link your file storage to the user’s remote desktop, you will need to first sign into the user portal and access the remote desktop as a user. For more information about how to do this, see the tutorial entitled: Remote Desktop Quick Start Guide for Users.
From the Applications Launchpad, double click on the Windows Explorer icon (4).

Step 2. Open Windows Explorer from the Applications Launchpad on the remote desktop
Next, a window will open with three items in the top menu: File, Device and View. Click on “Device” (5).

Step 2. Access the Device menu from the Applications Launchpad on the remote desktop
In the submenu, click on “Connect to network drive” (6).

Step 2. Click on “Connect to network drive”
A window will appear with two fields to modify. Choose the drive that you wish to use and paste the previously copied SMB access URL in the folder path field (7). Next, tick the options “Connect again on sign-in” and “Connect using other credentials” (8) and click “Finish” (9).

Step 2. Choose the network drive and paste the copied SMB access URL.

Step 2. Enter the user’s sign-in details
Once this process is complete, the user should be able to see the new network drive (12) in Windows Explorer when they next sign in.

Step 2. Check that the network drive has been successfully created on the remote desktop
NOTE: This process will need to be repeated for each remote desktop user.
Summary and next steps:
Linking your file storage and remote desktop services can make life much easier for your users when managing and storage files. In this tutorial, you have learnt how to link these services together in just a few simple steps.
Now that you have linked your file storage to your remote desktop, you might wish to customise the user’s access to Windows Explorer to make things even simpler for them. If so, have a look at the tutorial entitled:
We hope that this tutorial has been useful for you. If you have any questions, please write to us at platform@jotelulu.com and we will be happy to help.